

Applicable Products
These instructions apply to the following products:
- Barracuda Intronis Backup - MSP
Files and Folders Restore
Overview
You can restore Files and Folders by:
- Folder Hierarchy
- Daily Snapshots
- Backup Sets
Folder Hierarchy
Restoring by Folder Hierarchy lets you restore files and folders from the hierarchy that you originally backed up. Each file may have been backed up multiple times and therefore have multiple revisions. By default, the most recent revision is selected, but you can choose any revision that is displayed.
Daily Snapshots
Restoring by Daily Snapshots lets you restore a version of files and folders from a specific date. Seven of the most recent daily snapshots are available for restore. You can only restore from one daily snapshot at a time.
Backup Sets
Restoring by Backup Sets lets you restore files and folders organized by the backup sets you have created.
Restoring Files and Folders by Folder Hierarchy
- From the ECHOplatform ribbon bar, select the Manage tab.
- In the Manage screen, navigate to the client account and expand it.
- Click on the computer ID hyper-link.
- Select the Restore tab.
The Restore Selections page is displayed.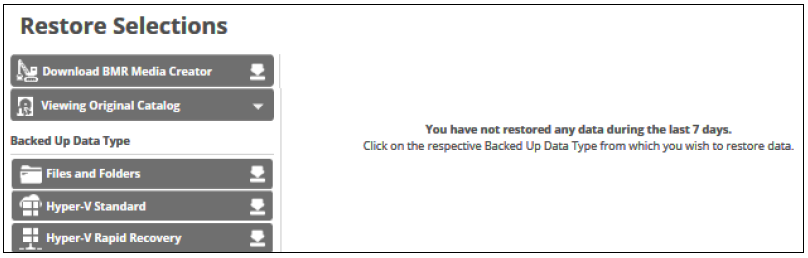
- Click Files and Folders.
The Select page is displayed with Folder Hierarchy selected as the default.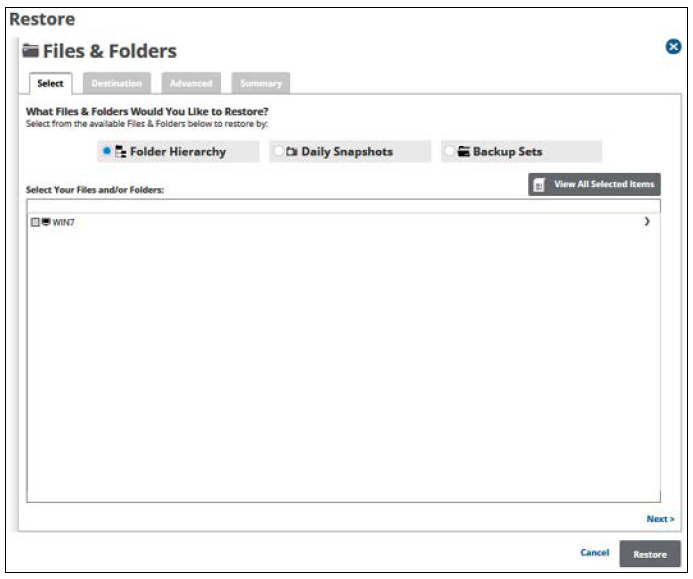
- In the Select Your Files and /or Folders pane, select the row of the files and folders you would like to restore.

The folders available for restore are displayed.
- Click the check box of the folder you would like to restore.
Clicking the arrow at the right of the items displays more files and folders.
- To review and edit your selections, click the View All Selected Items button.
The All Selected Items pop-up is displayed.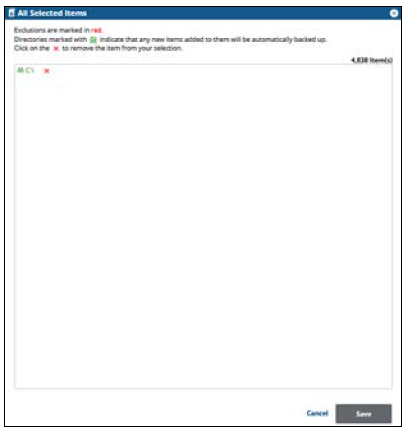
- Click the remove
 icon to remove items from your selection.
Notes:
-You may only remove items from the list.
- Exclusions are marked in red. - To apply changes made in the pop-up, click the Save button.
Note: Clicking Save commits the changes, closes the pop-up, and returns you to the Selection page.
Click the Cancel button ignores changes made in the pop-up list and returns you to the Selection page. - After making your selection, click Next.
The Destination page is displayed.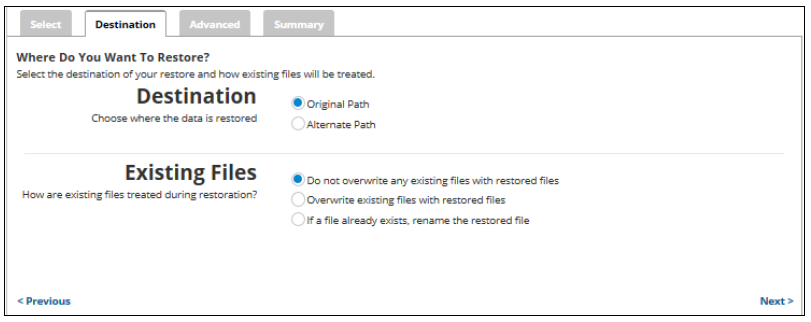
- At the Destination section, to select the original destination path, click the Original Path radio button.
- To select an alternative path, click the Alternate Path radio button, and then browse to the destination.
- At the Existing Files section, select one of the following radio buttons regarding the restoration of existing files:
- Do not overwrite any existing files with restored files.
- Overwrite existing files with restored files.
- If a file already exists, rename the restored file. - After making your selection, click Next.
The Advanced page is displayed.
- Optionally, select from the following to specify the advanced features of the restore:
-Restore NTFS File Permissions
-Restore File Attributes
-Restore Last Modified Date - Click Next.
The Summary page is displayed.
- Verify your selections, and then click the Restore button.
The confirmation pop-up is displayed.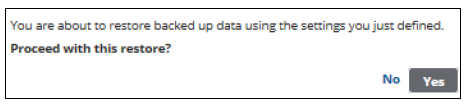
- Click Yes.
The Restore Selections page is displayed with the latest status.
Restoring Files and Folders by Daily Snapshot
- From the ECHOplatform ribbon bar, select the Manage tab.
- In the Manage screen, navigate to the client account and expand it.
- Click on the computer ID hyper-link.
- Select the Restore tab.
The Restore Selections page is displayed. - Click Files and Folders.
The Select page is displayed. - Click the Daily Snapshot radio button.
The available snapshot are displayed in the Select pane.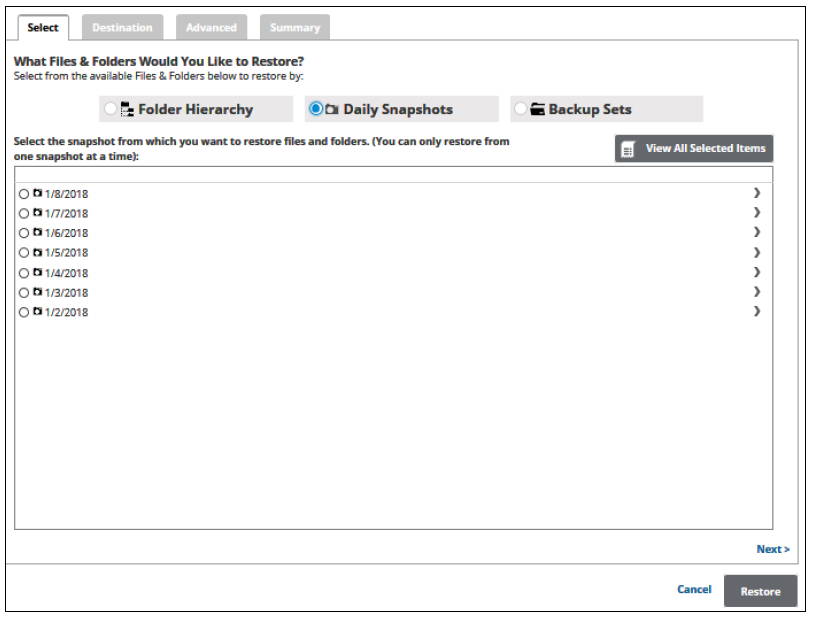
Note: Seven of the most recent daily snapshots are available for restore. You can only restore from one daily snapshot at a time. Selecting a different snapshot clears your current selection. - To display more snapshots, select the row of the files and folders you would like to restore.

The folders available for restore are displayed. - Click the checkbox of the folder in which the snapshot resides that you would like to restore.
Clicking the arrowat the right of the items displays more files and folders. - Click the radio button of the snapshot you would like to restore.
- To review and edit your selections, click the View All Selected Items.button.
The All Selected Items pop-up is displayed.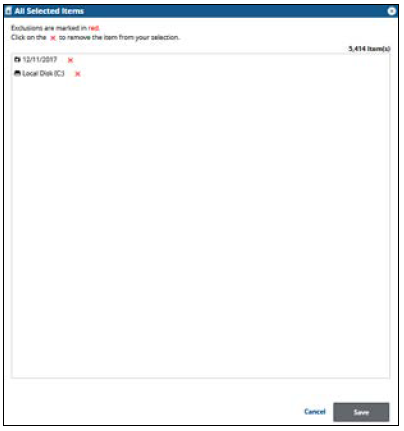
- Click the remove icon to remove items from your selection.
Note: You may only remove items from the list. - To apply changes made in the pop-up, click the Save button.
Note: Clicking Save commits the changes, closes the pop-up, and returns you to the Selection page.
Clicking the Cancel button ignores changes made in the pop-up list and returns you to the Selection page. - After making your selection, click Next.
The Destination page is displayed.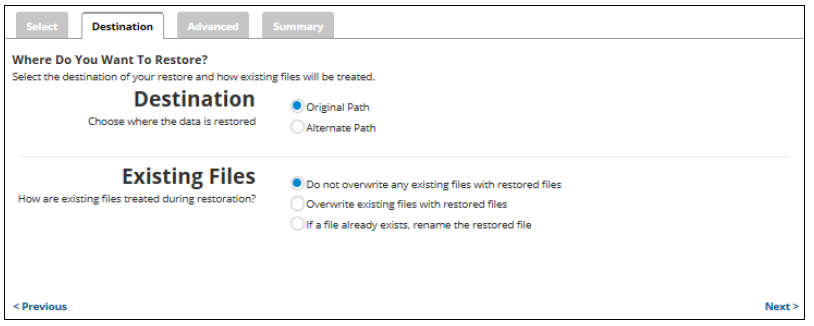
- At the Destination section, to select the original destination path, click the Original Path radio button.
- To select an alternate path, click the Alternate Path radio button, and then browse to the sestination.
- At the Existing Files section, select one of the following radio buttons regarding the restoration of existing files:
-Do not overwrite any existing files with restored files
-Overwrite existing files with restored files
-If a file already exists, rename the restored file - After making your selection, click Next.
The Advanced page is displayed.
- Optionally, select from the following options to specify the advanced features of the restore:
-Restore NTFS File Permissions
-Restore File Attributes
-Restore Last Modified Date - Click Next.
The Summary page is displayed.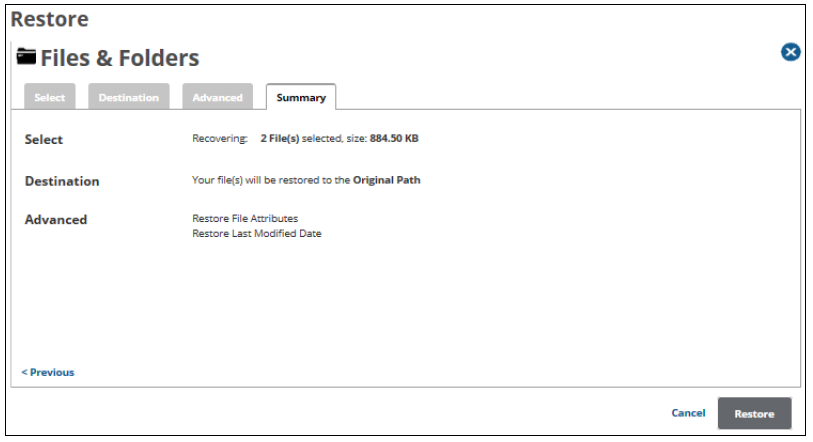
- Verify your selections, and then click the Restore button.
The confirmation pop-up is displayed.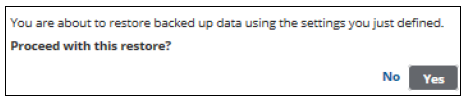
- Click Yes.
The Restore Selections page is displayed with the latest restore.
Restoring Files and Folders by Backup Sets
- From the ECHOplatform ribbon bar, select the Manage tab.
- In the Manage screen, navigate to the client account and expand it.
- Click on the computer ID hyper-link.
- Select the Restore tab.
The Restore Selections page is displayed. - Click Files and Folders.
The Select page is displayed. - Click the Backup Sets radio button.
The available Backup Sets are displayed.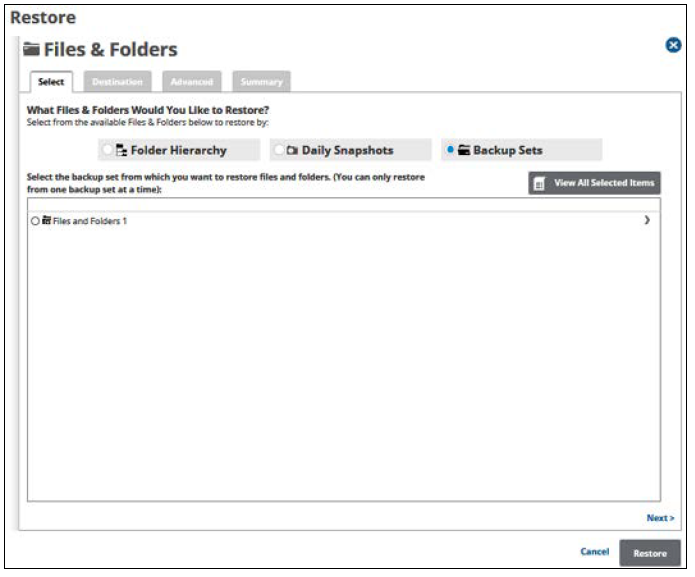
- To display more backup sets, select the row of the files and folders you would like to restore.

The folders available for restore are displayed.
- Click the check box of the folder in which the files reside that you would like to restore.
Note: You can only restore from one backup set at a time.
Clicking the arrowat the right of the items displays more files and folders. - To review and edit your selections, click the View All Selected Items button.
The All Selected Items pop-up is displayed.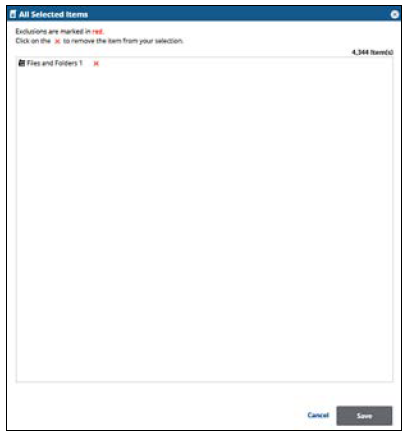
- Click the remove icon to remove items from your selection.
Note: You may only remove items from the list. - To apply changes made in the pop-up, click the Save button.
Note: Clicking Save commits the changes, closes the pop-up, and returns you to the Selection page.
Clicking the Cancel button ignores changes made in the pop-up list and returns you to the Selection page. - After making your selection, click Next.
The Destination page is displayed.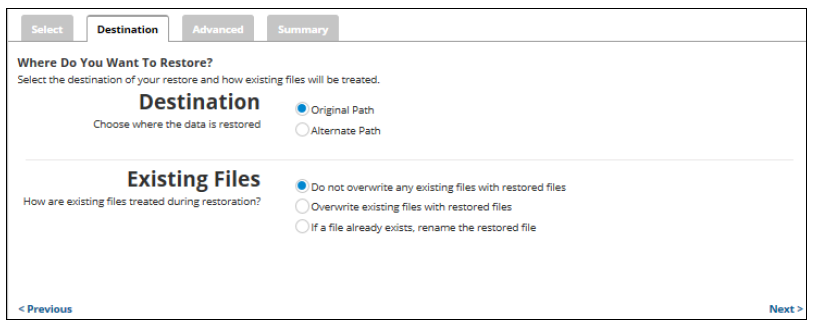
- At the Destination section, to select the original destination path, click the Original Path radio button.
- To select an alternate path, click the Alternate Path radio button, and then browse to the destination.
- At the Existing Files section, select one of the following radio buttons regarding the restoration of existing files:
-Do not overwrite any existing files with restored files
-Overwrite existing files with restored files
-If a file already exists, rename the restored file - After making your selection, click Next.
The Advanced page is displayed.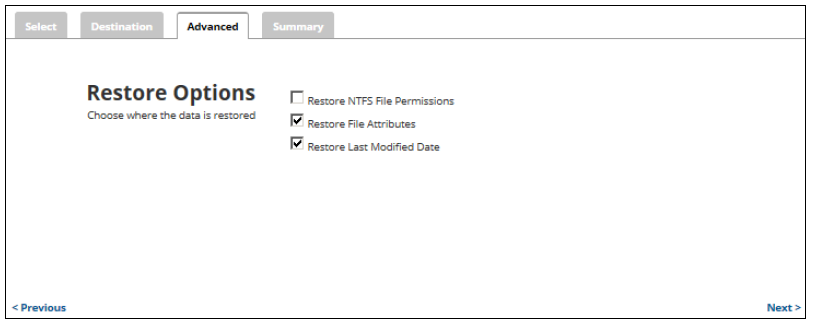
- Optionally, select from the following options to specify the advanced features of the restore:
-Restore NTFS File Permissions
-Restore File Attributes
-Restore Last Modified Date - Click Next.
The Summary page is displayed.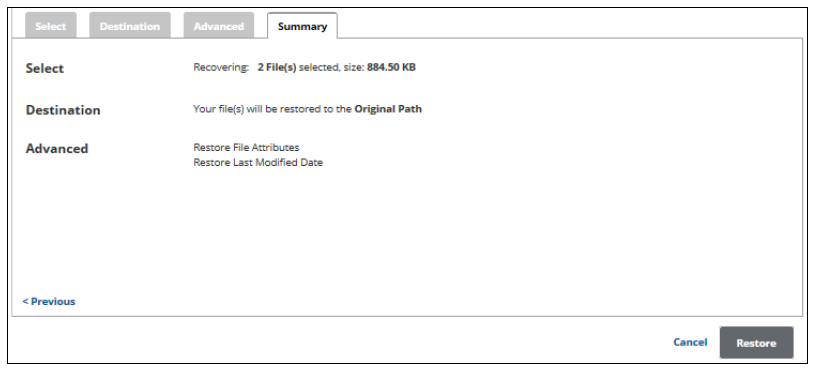
- Verify your selections, and then click the Restore button.
The confirmation pop-up is displayed.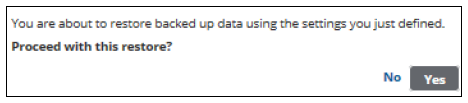
- Click Yes.
- The Restore Selections page is displayed with the latest restore.