

Barracuda Networks recommends the following settings for the initial deployment of your virtual appliance or when upgrading existing installations.
Cores, RAM, and Hard Disk Space for the Barracuda Load Balancer ADC Vx
| Model | Cores | RAM - Recommended Minimum | Hard Disk - Recommended Minimum |
|---|---|---|---|
| 340 Vx | 2 | 4 GB | 50 GB |
| 440 Vx | 4 | 8 GB | 50 GB |
| 540 Vx | 5 | 12 GB | 100 GB |
| 640 Vx | 6 (1) | 16 GB | 120 GB |
Note:
(1) To increase the performance of this model, you should plan on adding 2 GB of RAM and 20 GB of additional hard disk space for each additional core. To purchase licenses for additional cores, contact your Barracuda Networks sales representative.
Allocating Cores
In your hypervisor, specify the number of cores to be used by the Barracuda Load Balancer ADC Vx. Each Barracuda Load Balancer ADC Vx model can use only the number of cores specified in the table above, unless you buy licenses for additional cores from Barracuda Networks. For example, if you assign 4 cores to the Barracuda Load Balancer ADC 340 Vx (which supports only 2 cores by default), the hypervisor disables the 2 extra cores that cannot be used.
To add cores to your appliance:
- Shut down the Barracuda Load Balancer ADC Vx in your hypervisor.
In the virtual machine CPU settings, add cores.
Allocating Hard Drive Space
Barracuda Networks recommends a minimum of 50 GB of hard disk space to run your Barracuda Load Balancer ADC Vx. From your hypervisor, you can specify the size of the existing hard disk, or you can add a hard disk.
To specify the allocated hard disk space or add a hard disk to your appliance:
- Shut down the Barracuda Load Balancer ADC Vx in your hypervisor.
- Take a snapshot of your virtual machine.
- In your virtual machine settings, specify the new size for the hard disk or add a new hard disk.
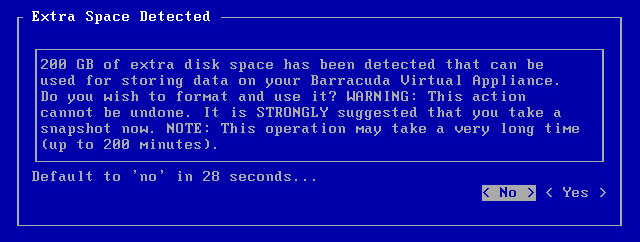
Restart the virtual machine. As the appliance is booting up, view the console for the Barracuda Load Balancer ADC Vx. When the blue Barracuda Networks console screen appears and asks if you want to use the additional hard disk space, enter Yes .
Next Step
For instructions on how to set up the Barracuda Load Balancer ADC Vx, see the Barracuda Load Balancer ADC Vx Quick Start Guide.