

This article applies to the Barracuda Email Security Gateway running version 7 and above. Versions of the Barracuda Microsoft Outlook Add-In before 8.0.17 are compatible with MS Outlook 2010 - 2016, while version 8.0.17 also supports MS Outlook 2019. The add-in is NOT compatible with Microsoft 365. See Microsoft 365 Encryption below for a workaround.
If you want end users to use Bayesian classification via this add-in, you must enable Per-User Quarantine on the Barracuda Email Security Gateway from BASIC > Quarantine page in the Inbound Quarantine Type section. See also Bayesian Analysis Inbound.
Note that the language for add-in options is determined by your Microsoft Office installation locale. Supported languages for the add-in include:
- English
- Spanish (continental)
- French
- Japanese
- Dutch
- Italian
- Chinese
- Polish
- German
Step 1: Install the Outlook Add-In Deployment Kit
- Log into your Barracuda Email Security Gateway as an administrator.
- Navigate to USERS > User Features and download the Outlook Add-In Deployment Kit (a .zip file) to the local system running Windows Vista or above.
- Extract the contents somewhere easily accessible. The deployment kit should contain the following:
- Barracuda Email Security GatewayOutlook Add-in installer for Outlook 2010 64-bit or for Outlook 2013 64-bit (BsfOutlookAddIn-8.0.3.0_x64.msi)
- Barracuda Email Security Gateway Outlook Add-in installer for all other versions of Outlook (BsfOutlookAddIn-8.0.3.0_x86.msi).
- Barracuda Email Security Gateway Outlook Add-in Administrator module (Barracuda Email Security Gateway Outlook Add-In version.admx
Step 2. Optional: Configure the Outlook Add-In
If you want to use GPO:
Create a directory on your PC/Server from which you are going to install the add-in. Put the MSI, ADMX and ADML files from the Barracuda Outlook Add-in ZIP file in that directory. Note that the ADML files are in the language folders in the ZIP file.
Copy the ADMX and ADML locale directories to the PolicyDefinitions folder on your system, for example:
%systemroot%\sysvol\domain\policies\PolicyDefinitionsStart the Group Policy (GPO) Editor for the domain where you will be installing the Add-In. You can edit the default policy or create a new policy object and link it to the desired container, for example, the particular OU containing the computers of users that will be using the Add-In.
In the GPO, expand User Configuration > Administrative Templates > Barracuda > Spam Firewall > Outlook Add-In :
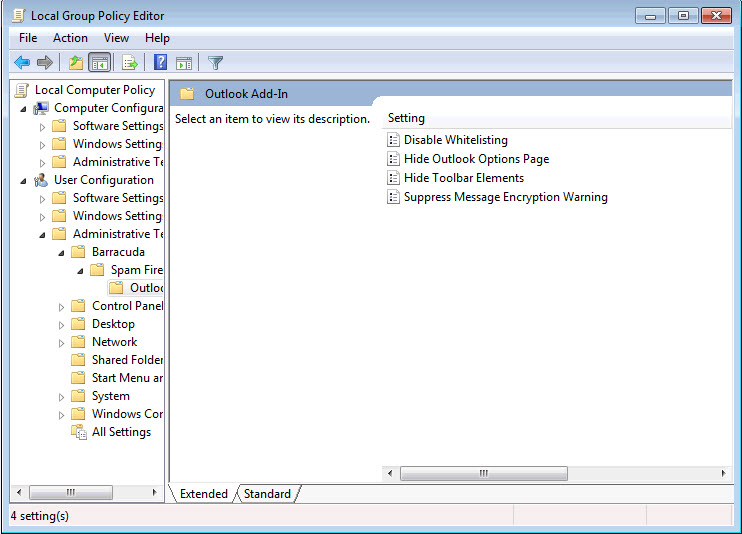
Configure any policies as needed. You will need to recreate any policies you previously configured, and then remove the old ADM template.
Step 3. Deploy the MSI File
- Open the GPO Editor for the organization that is to use the Barracuda Email Security Gateway Outlook Add-in, e.g., the default domain policy.
- Either edit the default policy, or create a new policy object, then link it to the desired container. For example, the particular OU containing the computers on which the add-in is to be installed.
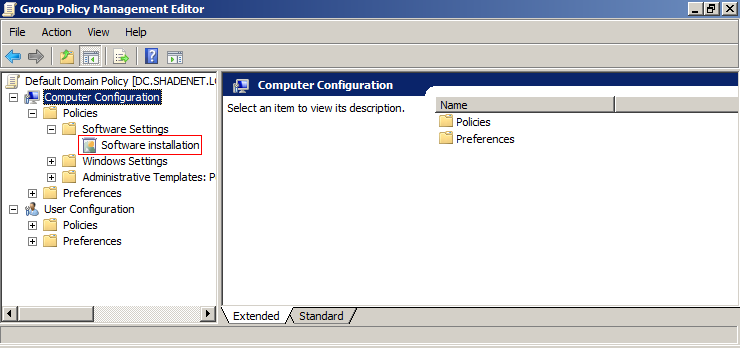
- In the GPO, navigate to Computer Configuration > Policies > Software Settings > Software Installation :
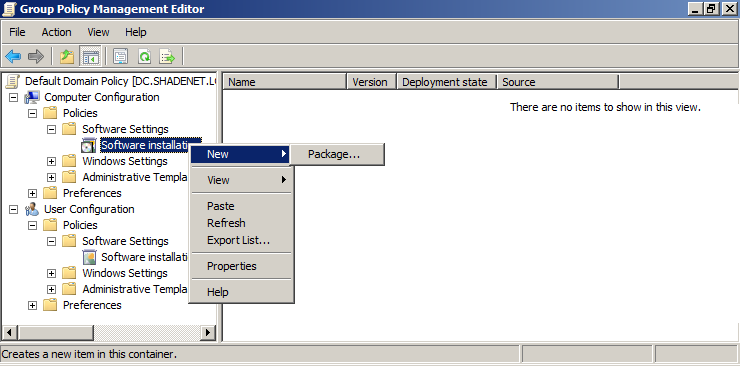
- Right-click Software Installation, point to New, and click Package:
- Enter the UNC path to the .msi file located in the shared folder. For example, enter: \\fileserver\deploy
- Click Open. In the Deploy Software dialog box, click Assigned:
- Click OK . The policy displays in the GPO Editor window.
Deploying the Add-In to Machines with 64-bit Windows and 32-bit Outlook
If any of the machines in your environment have a 64-bit version of Windows installed but are using a 32-bit version of Outlook, you will need to deploy the 32-bit MSI to these machines. If you are also deploying the 64-bit MSI for machines with both 64-bit Windows and 64-bit Outlook, then both software deployment policies will apply to the machines with 32-bit Outlook, which will result in both MSIs being installed on these machines. Since Outlook will only load the Add-In that matches its bitness, this should not cause any problems.
- In the GPO editor, navigate to Computer Configuration > Policies > Software Settings, and click Software Installation .
- Right-click the 32-bit Barracuda Email Security Gateway Outlook Add-In, and click Properties .
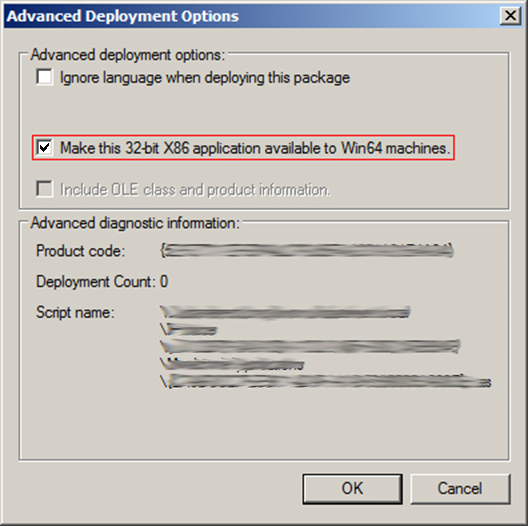
- Click the Deployment tab, and click Advanced. In the Advanced deployment options section, select Make this 32-bit X86 application available to Win64 machines.
- Click OK. In the Properties dialog box, click Apply, and click OK to to save your settings and close the dialog box.
Finishing the Configuration
After the Barracuda Email Security Gateway Outlook Add?In is installed (either manually or through GPO), there is no initial configured identification with your Barracuda Email Security Gateway. This identification happens automatically as the add-in scans the user's inbox for recent messages and inspects each message’s headers for a Barracuda Email Security Gateway URI. If none is found, the add-in will monitor the user's inbox for new messages and scan each new message header for a Barracuda Email Security Gateway URI. When a Barracuda Email Security Gateway URI is found, an authentication probe will be initiated with that Barracuda Email Security Gateway. The Barracuda Email Security Gateway then sends an authentication probe via email to the user’s email address, and the add-in will intercept the probe, extract the required authentication information contained in the probe, and then delete it. This process is transparent to the user. Once the probe is received, the user is authenticated, and all of the add-in features are available for use. Typically, this process should take no more than a few minutes.
Testing
Complete the following steps to test the Barracuda Email Security Gateway Outlook Add-in deployment.
- Restart a computer that is joined to the domain.
- Verify that the Outlook Add-In is installed when you log in, and that the configured policies are applied.
Notify Users
Once the MSI file is successfully deployed, send the Outlook Add-In access details to your users. For additional resources, see the Barracuda Email Security Gateway User 's Guide 6.x.
Troubleshooting
- A common cause of failure is the user and/or the user's computer does not have adequate access to the share location. Verify that that all access and network privileges have been configured appropriately.
- Additional error messages may be found in the Event Log on the domain computer.
- If the Event Log has no useful information, consider enabling verbose logging and restarting the computer.
Configure the Add-In from the MS Outlook Client
For Microsoft Outlook 2003 and 2007:
- Click Tools > Options.
- Click the Barracuda Networks tab.
- Click Configure to set Allow List options and configure actions for clicking the Spam and Not Spam buttons in the client.
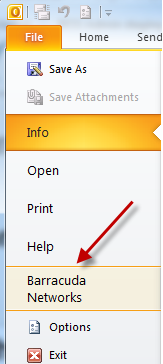
For Microsoft Outlook 2010 and 2013:
- In the MS Outlook client, click File > Barracuda Networks (Note that the UI graphics may look different between the versions, but the actions you take are the same).
- Click the Configure button and configure Allow List and spam settings as described above.

Workaround for Encryption With Microsoft 365
The Barracuda Outlook Add-In does not support Microsoft 365, but if you want to use encryption, you can add a content filter that will trigger encryption:
- Go to BLOCK/ACCEPT > Content Filtering.
- In the Content Filters section, add the pattern \[ENC\] and select Encrypt in the Outbound drop down. Check the Subject check box.
- Instruct users to prefix the subject of emails to encrypt with that pattern. For example:
Subject: [ENC] For your eyes only.