

Server Rail Kit for SCB-1911 - Version 1.0
This quick installation guide is designed and built for 1U and 2U chassis. Not recommended for 3U or above applications. The bracket is for chassis rail with pitch and square holes, and can only be mounted behind the rail. You will need to purchase a transfer bracket in order to mount the bracket on the rail with round holes.
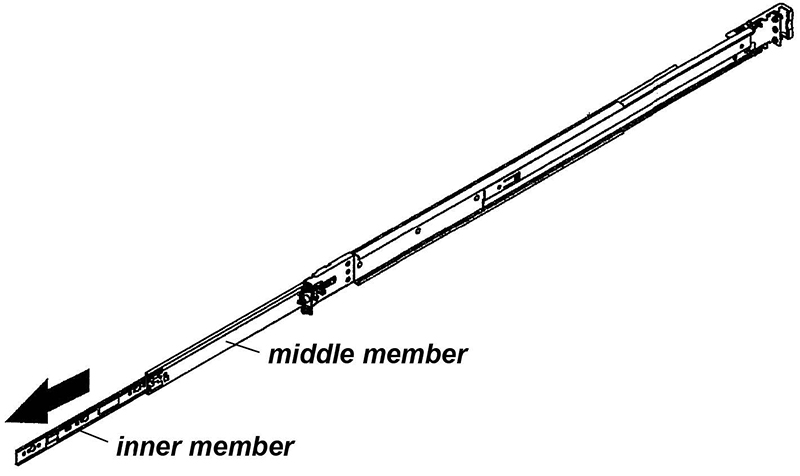
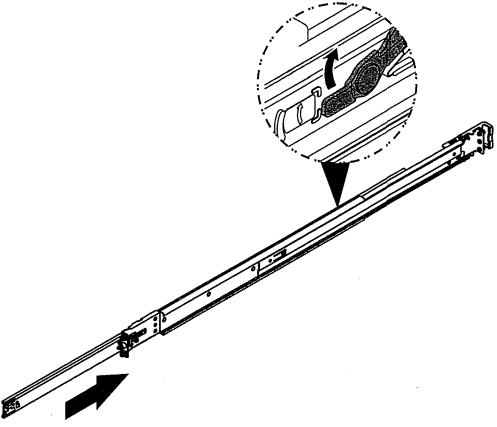
- Remove the chassis (inner) member:
- Hold the front end of the inner member and pull the inner and the middle member out until they click.
- Push the white plastic latch in the direction the arrow shows and pull the inner member out of the middle member.
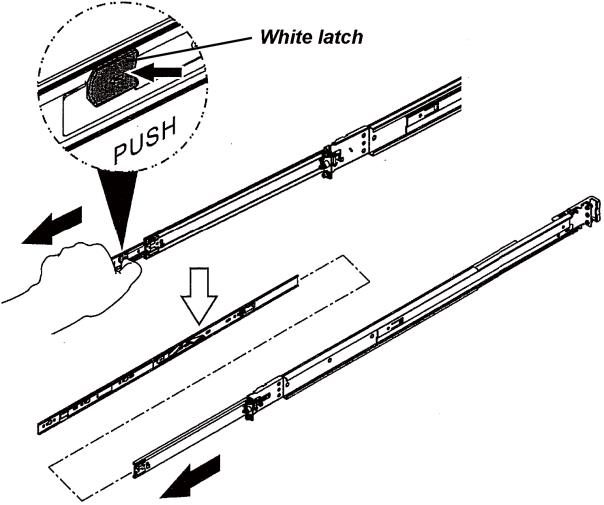
- Hold the front end of the inner member and pull the inner and the middle member out until they click.
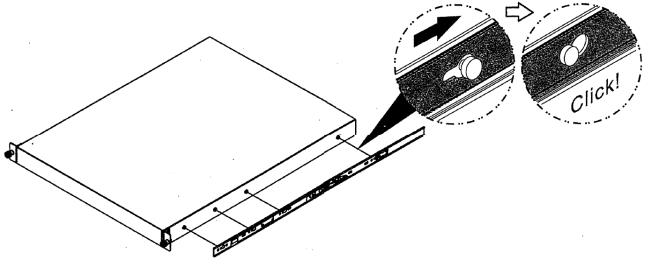
- Aim the four mounting holes of the inner member to the four mounting hooks on the SCB-1911, and then push the inner member to the rear of the SCB-1911 until it clicks.
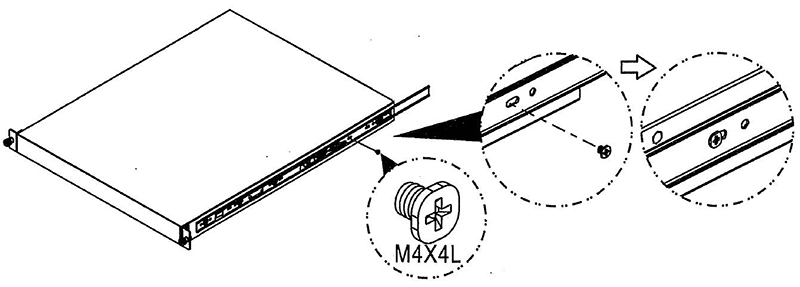
- Tighten the M4 X 4L screws as shown.
- Repeat Step 1 - 4 on the other side of SCB-1911.
- Press the inner steel latch in the direction the label shows and then push the middle member back until it clicks.
- Repeat this step for the other middle member.
- Attach two outer members to your rack as shown.
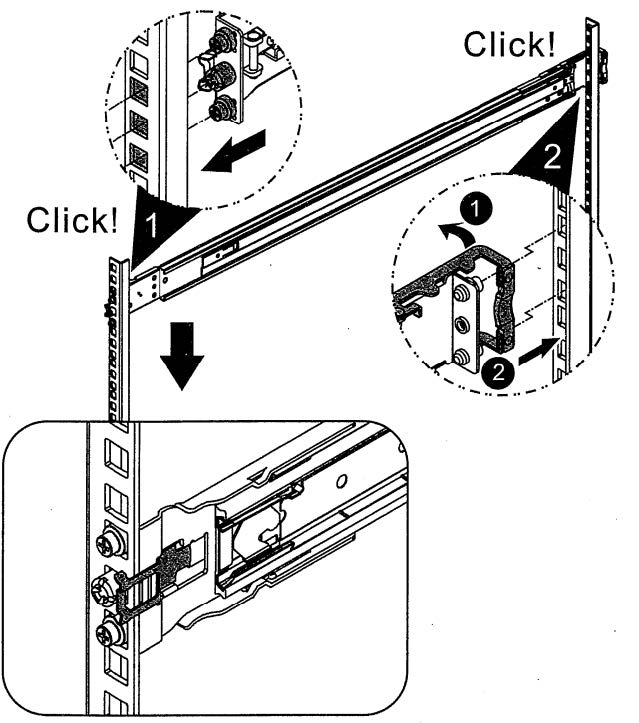
Aim the two inner members that are fixed on the SCB-1911 to the middle member attached to the outer members on the rack.
- Horizontally install the SCB-1911 into the middle member attached to the outer members on the rack.
- Press the blue plastic latches towards you and push the SCB-1911 as far as you can.
Resource
![]()
Package Contents
| Item | Quantity | Image |
|---|---|---|
L-shaped brackets (A) | 4 | 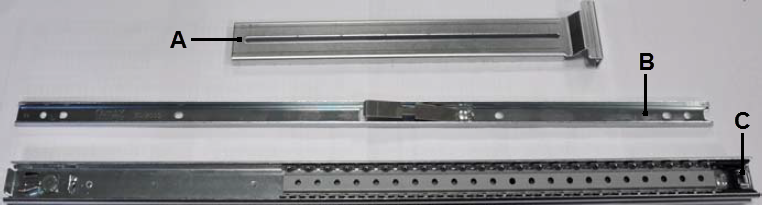 |
Sliding rails (which can be separated into inner and outer rails)
| 2 | |
Short flat-head screws (A) | 8 | 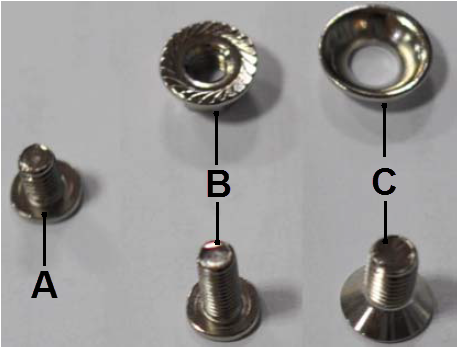 |
Longer flat head screws and nuts (B) | 8 + 8 | |
Flat countersink screws and conical washers (C) | 12 + 12 | |
Front ear bracket installation package (comes with the device package) | 2 |  |
Rail Mount Installation
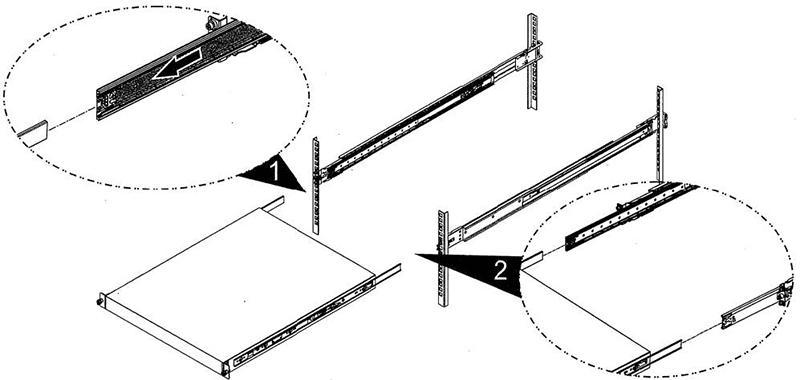
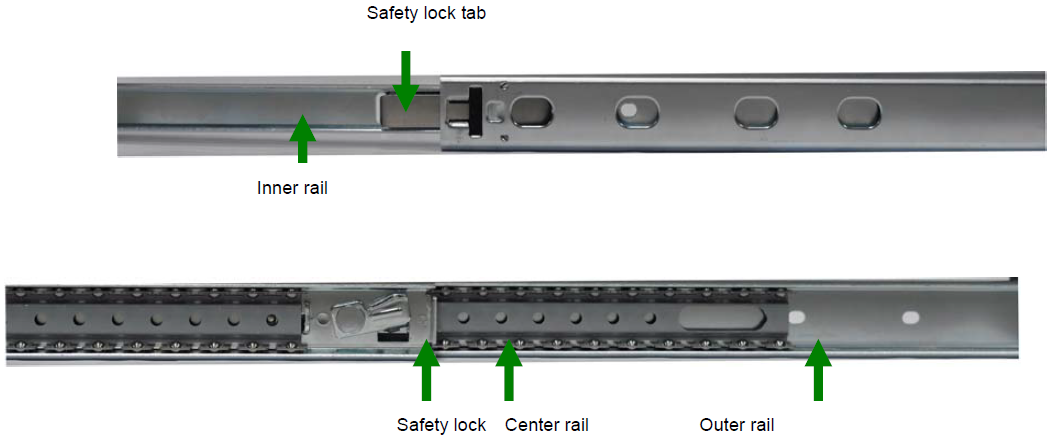
Separating the Inner Rail from the Outer Rail
To install the inner rail, separate it from the middle rail first. Use the following procedures:
- Place the rail as shown below.
- Press the safety lock tab and pull the inner rail from the middle rail until they completely separate.
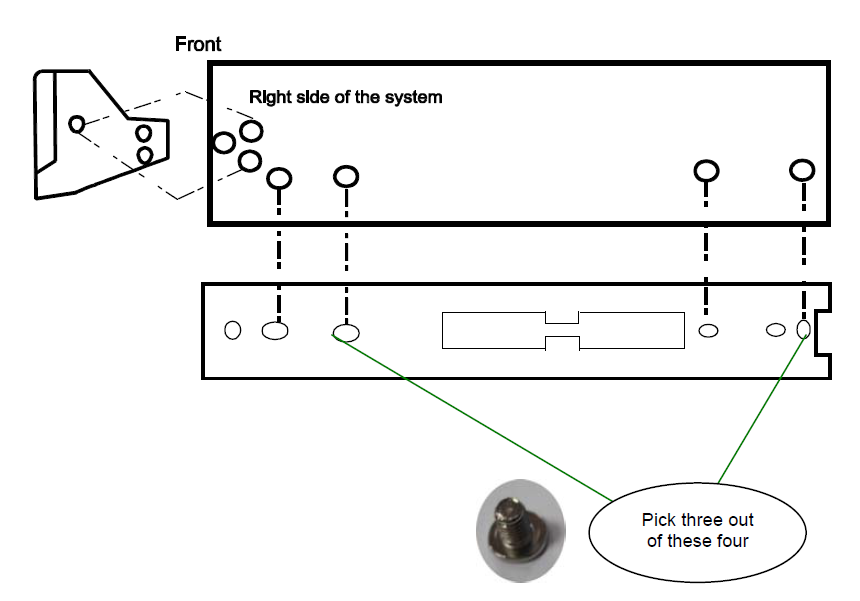
Attaching the Inner Rails to the System
Use the following procedures to attach the inner rails to the chassis.
- Position the inner rail adjacent to one side of the system’s chassis. Make sure that the safety lock tab faces out, and that the notched end of the rail is located at the rear of the unit as shown in the following diagram.
- Align the screw holes in the rail and the mounting holes on the chassis and then attach the inner rail to the system with three of the short flat-head screws (A).
- Attach the front ear bracket to the system.
- Repeat these steps to attach the other inner rail and front ear bracket to the other side.
Attaching the L-shaped Bracket to the Outer Rails
Use the following procedure to attach the L-shaped bracket to the outer rails.
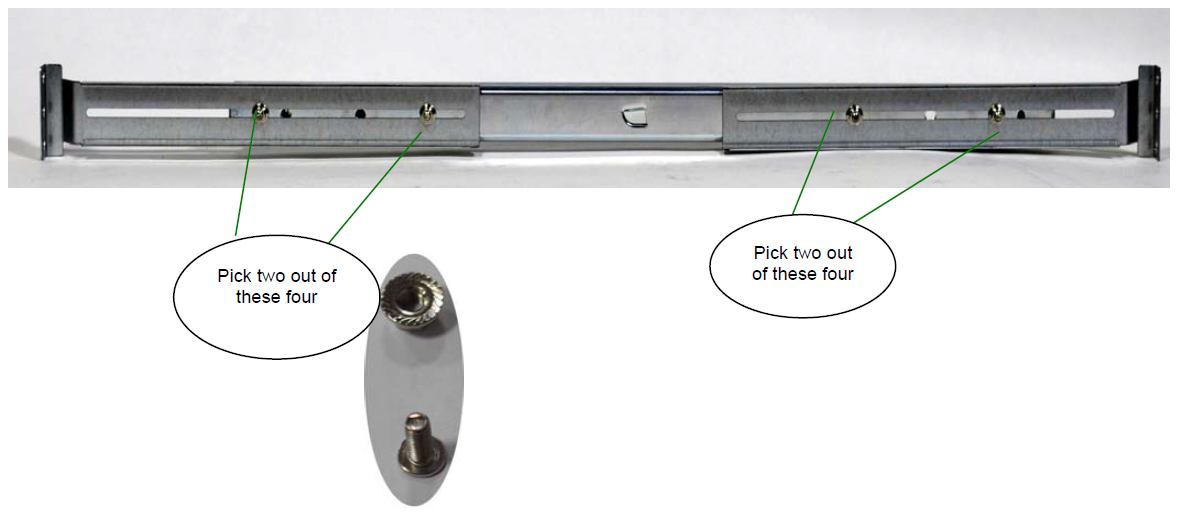
- The L-shaped bracket is for securing the outer rails to the rack. You should attach the L-shaped brackets to the outer rails first.
- Use two longer flat head screws and two nuts (B) to connect an L-shaped bracket to the outer rail through any two of the four holes at the end of the outer rail. Position each nut on the outside of the bracket, and attach a screw from the inside of the outer rail through the bracket. Do not tighten the nut yet because you will need to adjust the location of the rear bracket for the depth of your rack. Depending on the depth of your rack, you can position the bracket to meet the depth of the rack.
The outer rail includes a center rail that slides back and forth. Slide the center rail to expose the screw holes at the other end of the rail. Use the same steps to attach second L-shaped bracket to the other end of the outer rail.
Repeat these steps to attach the other two L-shaped brackets to the other outer rail.
Mounting the Outer Rails to the Rack
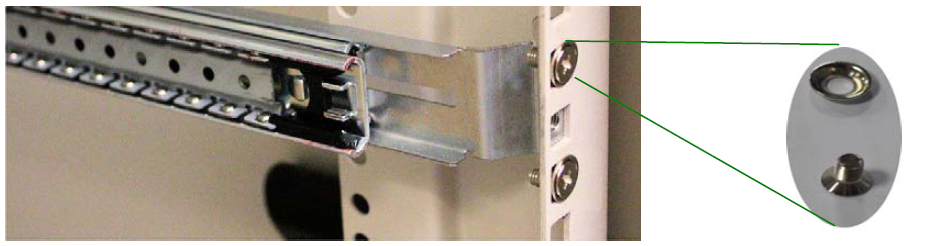
Use the following procedures to mount the outer rails to the rack.
- Install the outer rail with the attached bracket to the front rack post by using two countersink screws and conical washers (C).
Extend and adjust the rear bracket to meet the depth of the rack and secure it to the rack post with two countersink screws and conical washers (C).
- Repeat step 1 and 2 above to install the other rail to the other side of the rack.
You may use a wrench to tighten the nuts and the screws that attach the L-shaped brackets to each of the rails.
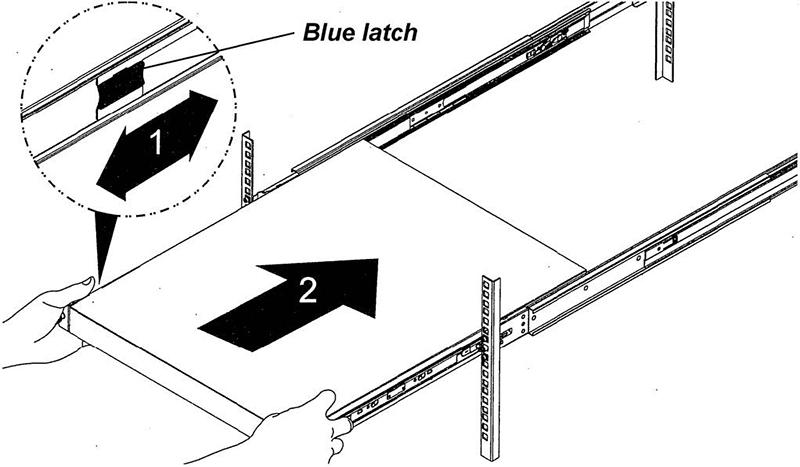
Installing the System to the Rail
- Pull out the center rail until the extension safety lock is locked.
Hold the system with its front facing you, lift the chassis and carefully insert the system by sliding the inner rail into the outer rail. Push the chassis all the way toward the back until the front ear brackets contact the rack.
You may also fix the front ear brackets to the rack if the system doesn’t require frequent pulling out of the rack.
