

If you do not have an external authentication server you can manage users in the built-in database on the Barracuda SSL VPN. Each user database can contain multiple groups. You can also create multiple local user databases if you are using Barracuda SSL VPN 480 or higher.
Before you begin
Create a list of all users you want to include in the local database. Consider individual access rights when designing the user groups. Create a local user database or add your users to the pre-configured built-in database on the User Databases page.
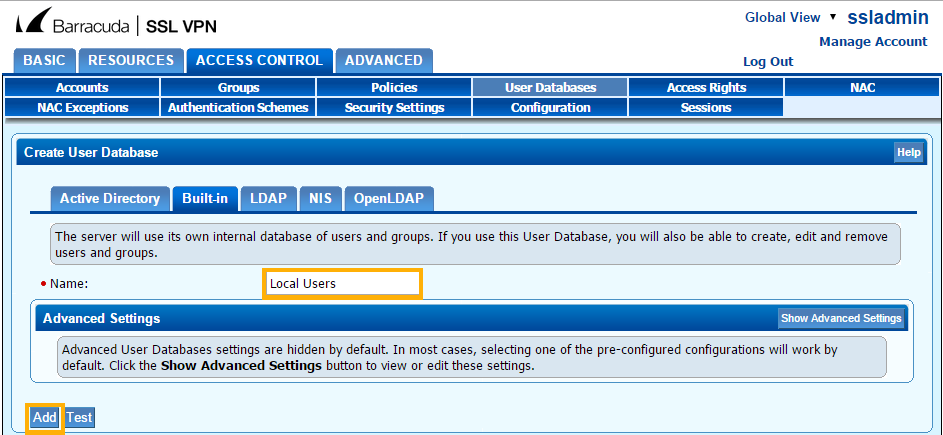
Step 1. Create a built-In database
- Go to the ACCESS CONTROL > User Databases page.
- In the Create User Database section, click the Built-In tab.
- Enter a descriptive Name for the user database.
- (Optional) Click Show Advanced Settings to change the case sensitivity option. Per default usernames are case sensitively.
- Click Add.
The user database is now displayed in the User Databases section on the bottom of the page.
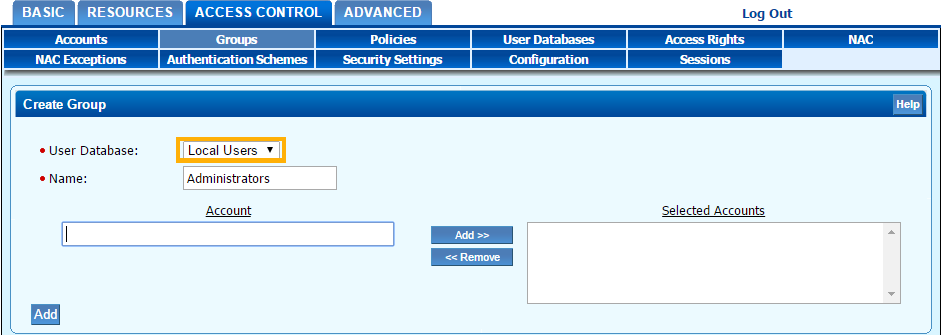
Step 2. Create a user group
Users in a built-in database can be part of one or several user groups. There is no limit on how many groups a user can be assigned to.
- Go to the ACCESS CONTROL > Groups page.
- In the Create Group section, select the built-in user database you created in step 1.
- Enter a descriptive Name for the group.
- Click Add.
Step 3. Add users to the built-in user database
Create user accounts in the built-in user database and place them in groups.
- Go to the ACCESS CONTROL > Accounts page.
- In the Create Account section, select the local database from the User Database list.
- Enter the following information:
- Username – The login name of the user.
- Password – The user password.
- You must also confirm it in the Confirm Password field.
- Select the checkbox if you want to force the user to change their password at the next login.
- Full Name – The full name of the user.
- Service Account Password – The password for the user.
- (Optional) Enter the email of the user in the Email field.
- Add your user account to the user group you created in step 2.:
- Type the first letters of the group name in the Available Groups field. Select the group from the dynamic list.
- Click Add to add the account to the Selected Accounts table.
- Click Add.
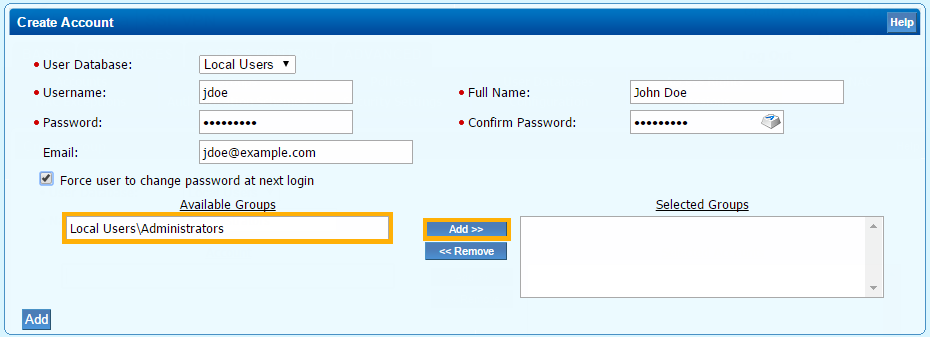
The user account is now part of the group in the built-in database you created. All entries can be edited at any time, to add or change attributes.