

Before connecting for the first time, you need at least one working VPN profile. Upon initial connection or if no working VPN profile for automated connections has yet been defined, the Barracuda VPN Client for Windows appears with the Default profile’s Connect dialog. Instead of creating a new profile, you can also edit the default profile. To create and configure a new VPN profile, use the profile wizard, or create the profile manually. You can create multiple profiles for several users with individual certificates. The VPN Client for Windows also offers the option to import VPN profiles created in Barracuda Firewall Admin.
Before You Begin
- For successful certificate authentication, both client and root certificates must be available. The VPN Client for Windows supports the certificate types DER-encoded binary x.509, PKCS #12, and PEM-encoded binary x.509. You can also export certificates either to a text file or to the clipboard for further use elsewhere.
- Barracuda Authentication requires a valid certificate file (
*.lic). This certificate file must be saved locally on the client system using it.
Create a VPN Profile Using the Wizard
Configure a VPN profile for every VPN server you might want to access. In this way, you can use the client’s Direct Access functionality (see How to Configure the Barracuda VPN Client for Windows) that lets you keep your VPN connection automatically up in the background via different VPN gateways.
- Launch the VPN Client for Windows by left-clicking the Barracuda Network Access Client icon
 in the system tray.
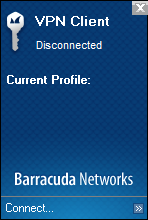
- Connect using your administrative credentials.
- In the Barracuda VPN Client window, select Preferences from the left menu.
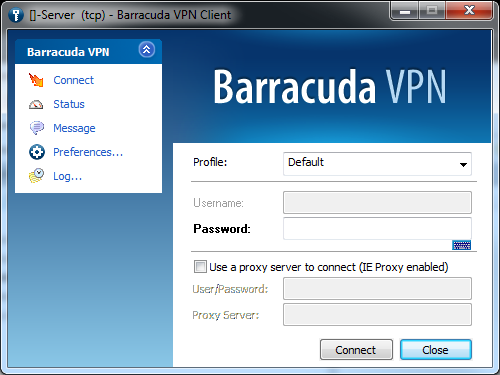
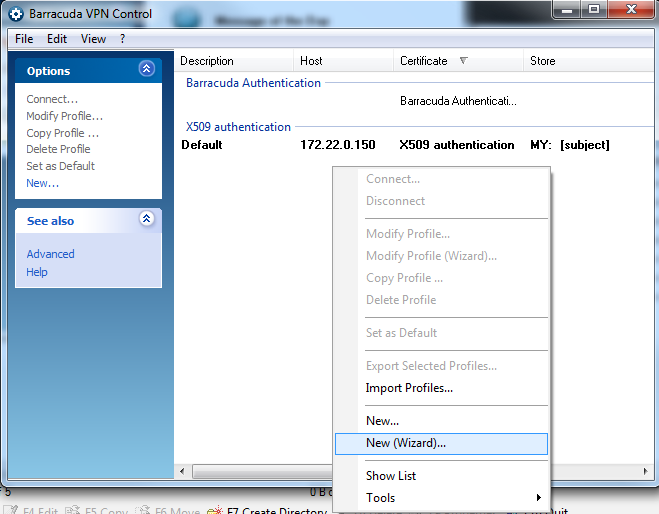
The client shows the Default profile’s Connect dialog. VPN profiles can be chosen using the Profile drop-down menu. Click Connect to initiate a connection using the chosen profile. - In the left menu of the Barracuda VPN Control window, select New, or right-click anywhere within the empty white space in the Barracuda VPN Control window. Then, select New (Wizard).
- In the Profile Wizard window, type the VPN server address into the upper field and, optionally, include a name in the lower field.
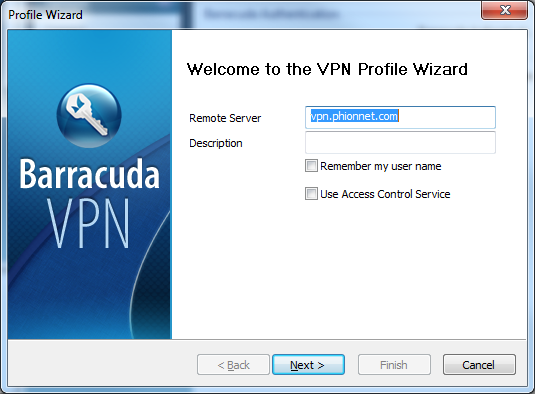
- If desired, select the following check boxes:
- Remember my user name – The VPN connection GUI remembers the last-entered username. For security reasons, this is disabled by default.
- Use Access Control Service – If enabled, the health state will be validated via the Access Control Service before a connection is established.
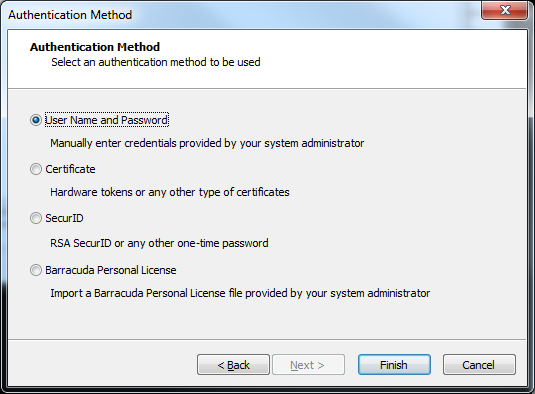
- Click Next. The Authentication Method window opens. You can later choose a different method for authentication in case you have chosen the wrong one.
- Select the authentication method to be used.
- Choosing Username and Password or SecurID will enable the Finish button, allowing you to complete the configuration process at this point.
- Choosing Username and Password or SecurID will enable the Finish button, allowing you to complete the configuration process at this point.
- If you select Certificate or Barracuda Personal License, click Next.
- If you have chosen Barracuda personal License, browse for the license file, and click Finish.
- If you have chosen Certificate, enter your certificate data and click Finish to complete the wizard.
- If you have chosen Barracuda personal License, browse for the license file, and click Finish.
You can later call the wizard again at any time by right-clicking Modify Profile (Wizard) ... at the respective VPN profile entry.
Create a VPN Profile Manually
- Launch the VPN Client, and connect as described in the above section.
- In the left menu, select Preferences to open the Barracuda VPN Control dialog.
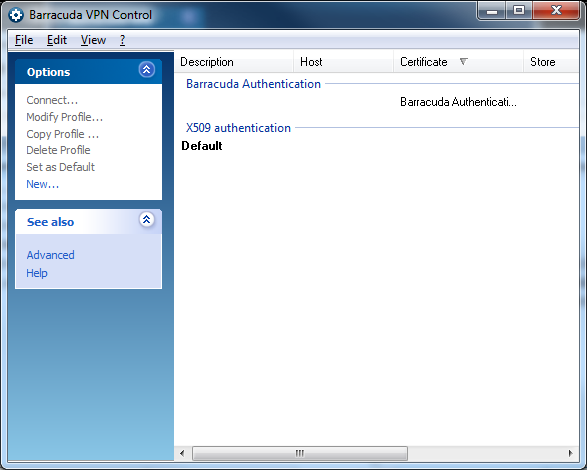
- Right-click anywhere within the empty white space in the Barracuda VPN Control window, and select New.
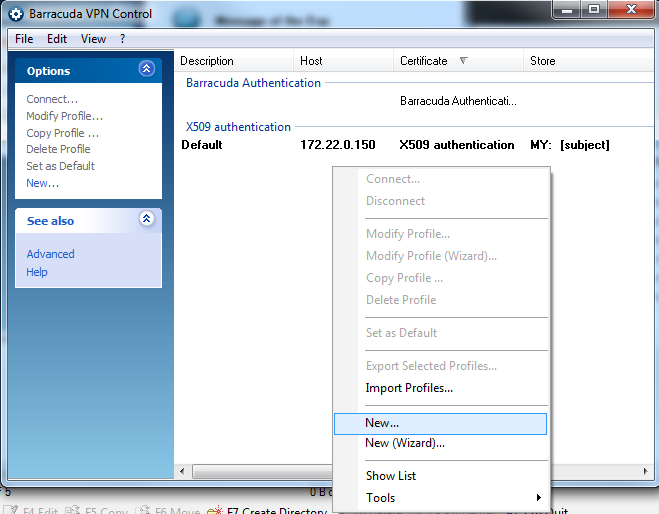
- In the Connection Entries tab, enter a description of the connection entry. This name will be displayed as profile name in the Connection dialog window.
- In the Certificate section, choose the authentication method required by the VPN server. For more information, see the Advanced profile Settings section in How to Configure the Barracuda VPN Client for Windows.
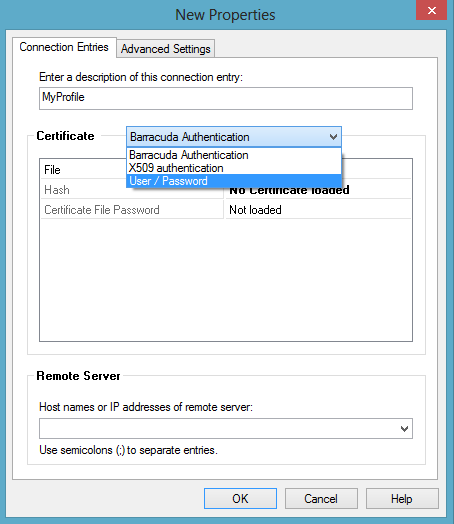
- In the Remote Server section, enter the host names or IP addresses of the VPN server. Separate multiple entries using a semicolon (';').
- If required, configure the sections in the Advanced Settings tab. For more information, see the Advanced Profile Settings section below.
- Click OK.
The newly created VPN profile can now be chosen as a preconfigured profile from the VPN Client dialog. You can later edit the settings at any time by right-clicking Modify Profile at the respective VPN profile entry.
Advanced Profile Settings
The profile configuration is done via the Connection Entries and Advanced Settings tabs. To edit and modify connection entries and advanced VPN profile settings, select the profile in the list, right-click it, and select Modify Profile.
Authentication Settings
The Certification Authorities configuration area helps you manage the server certificates for all your VPN connections. Click View > Certification Authorities (CA) in Barracuda VPN Control to display it. Use the Certification Authorities configuration window to import certificates into the certificate store.
The following parameter is available for User/Password authentication:
- Temporary Root Certificate – Set to Not Available whenever a connection to the VPN server has never been established or if the certificate file has been deleted. As soon as a certificate is available, it can be viewed by using the Show… menu item or deleted by using the Clear menu item.
The following parameters are available for Barracuda Authentication:
- File – Select the certificate (
*.lic) file needed for authentication at the VPN server. - Hash – (read-only) After a certificate has been loaded, its hash is displayed in this field.
- Certificate File Password – If a certificate file has been loaded, the password for certificate usage can be changed here. Enter the new password and confirm it.
The following parameters are available for X.509 authentication:
- Subject /Issuer – After selecting the X.509 certificate, its subject and issuer are displayed here.
- Use serial number – States whether the certificate’s serial number is used in the authentication process.
- Valid to – Displays date and time for the X.509 certificate's expiration.
- Key specific – Hash value of the certificate file.
- Key usage – Value of the KeyUsage keyCertSign bit. Possible values are Exchange (public key exchange) or Signing (digital signature).
- Private Encrypt – Switches encryption procedure (private key for encryption, public for decryption) depending on whether crypto API is supported or not.
- Probe Encrypt – Shows whether encryption probing is supported or not.
- Prompt for user and password – Enable to request both certificate validation and user / password validation.
- Temporary Root Certificate – After a temporary root certificate is provided by the server, it can be viewed using the Show… menu item or deleted using the Clear menu item.
- Show external X509 Certificate – If an external X.509 certificate has been loaded, its properties can be viewed here.
- External File – Path to the external X.509 certificate.
Proxy Settings
Individual settings, such as connection details, can be configured in the Advanced Settings tab of the respective profile.
Configure the following section when connecting to the VPN server via a proxy:
- via Proxy – Whether a proxy should be used and, if so, what type it is. Default: No Proxy.
- Proxy[:Port] – IP address and port for the proxy. If HTTP Proxy is selected, the system’s proxy server is automatically set as default. If not, the value is by default empty.
Proxy user / domain – The username and domain required for authentication at the proxy server, if required. Default is empty.
Simulate SSL – Set to Yes when using a proxy server requiring an SSL handshake. Default: No.
Data Integrity and Encryption (ESP)
Changes to this section should only be done by experts. Keep in mind that the VPN server must support the settings configured here.
- Authentication algorithm – The algorithm to be used for authenticating to the VPN server. Default: MD5.
- Encryption Algorithm – The algorithm to be used for encryption. Default: AES.
- Tunnel Mode – The protocol to be used for tunnel traffic. The available options depend on the chosen proxy type: Default is Response (UDP).
- Response (UDP) for Socks 5
- Reliability (TCP) for HTTP Proxy and Socks 4
No Proxy gives access to both protocol types and offers an additional one called Optimized (Hybrid) that indicates a combination of Response (UDP) and Reliability (TCP).
If the gateway is configured to expect the client connection on port 443, this needs to be set to Reliability (TCP). The other modes will not work in this case.
Tunnel Settings
- Virtual Adapter Configuration IPv4 – The method to be used for gathering IP addresses.
- Direct assignment - (default) Uses WMI (Windows Management Instrumentation) for assigning the IP address. This is recommended if DHCP is not available due to security reasons.
- Use internal DHCP assignment - Uses the integrated DHCP for assigning the IP address.
- Assign IP address manually - IP address is entered manually in NIC properties.
- Compression – Yes (default) Triggers the Barracuda VPN Client to request compressed traffic. The server may or may not accept the request depending on both its configuration and the license type assigned to the VPN client. Client compression is only available to clients that have assigned a secure connector license.
- Keep alive (sec) – The time value in seconds to keep an idle VPN tunnel alive. Default: 10.
- Silent Mode (No Keep Alive) – Break all non-relevant communication over the VPN tunnel (e.g., for dial-up connections). Default: No.
- Soft Heartbeat – Keep a VPN tunnel up by interpreting normal VPN traffic as keepalive traffic. Useful if the special keepalive packets are dropped somewhere between client and server. Default: No.
Tunnel Connect
Allow ENA Connection – Allows or blocks ENA (Exclusive Network Access) connections. Default: Yes. This is required in order to successfully establish a VPN connection between a server forcing ENA and a client. Otherwise, no connection is possible. If the VPN service to connect to is executed on a Barracuda CloudGen Firewall, an ENA connection can only be established with clients running the Barracuda Personal Firewall.
- Allow Sending Offline Ruleset – Enable the client to receive and use offline firewall rulesets from the VPN server. Offline rulesets are effective whenever no VPN connection is active. Default: Yes.
- Check Round Trip Time (RTT) – Activate automatic selecting of the fastest VPN server by measuring the roundtrip times of all available servers prior to connecting if more than one server IP address has been configured in the profile. Recommended and default value: Yes.
- Connect retry time (sec) – Timeout period in seconds that will be used for reconnection attempts to the given profile. The lower this value, the faster the connection is established to the fallback profile, if defined. Recommended and default value: 60.
- Enable VPN Tunnel Probing – Probe a VPN tunnel prior to establishing a VPN connection. If enabled (recommended), the reachability of configured IP addresses is tested prior to establishing a tunnel.
- One Time Password – The behavior for reconnecting. If enabled, the password is queried anew when reconnecting. If disabled (default), reconnecting is automatically performed without a password query.
Tunnel Reconnect
- WLAN Roaming – Different IP addresses from the same profile are tried if a connection breaks. Recommended and default value: Yes.
- Fast Reconnect – With this option enabled (recommended), reconnection is performed using a token instead of prompting the user for login credentials. Fast Reconnect is also to be considered in conjunction with one-time passwords.
- Reconnect immediately – Reconnect immidiately upon a connection break if set to Yes.
- After reconnect adapter reset – Reset the virtual adapter after reconnecting. This may help to resolve connectivity issues.
- Fallback Profile – Fallback profile definitions. The fallback profiles will be tried next if a connection to a certain profile cannot be established.
Tunnel Terminate
- Terminate Countdown (sec) – The client waits for this timespan after a connection has broken before it initiates the reconnection process. Default value: 2.
Network Access Control
- Use Access Control Service – If enabled, the health state will be validated via the Access Control Service before a connection is established. Default: No.
- NAC intercept VPN Connection – If enabled, the health state will be validated while a VPN connection is initiated. If disabled, the health check is delayed until a VPN connection is established. Default: No.
- Terminate VPN if unhealthy – If enabled, a VPN connection will be terminated as soon as the health check results in unhealthy state. Default: No.
- Access Control Timeout (sec) – Timespan to wait for the health check. Default: 30.
Active Directory
- Probe Active Directory – If enabled (default: disabled), VPN connections will be terminated as soon as a Microsoft Active Directory service is detected. This can be used to prevent the client from using a VPN connection while in the office network.
- Active Directory IP – One or more IP addresses of known Microsoft Active Directory servers. Separate several entries using semicolon characters (e.g.: 1.2.3.4;2.3.1.4;1.3.4.2). Storing known MSAD servers here accelerates the process of detecting MSAD services.
Always Connect
- Disable Active Directory Scan – Yes enables a VPN connection to be automatically established, also in local networks where an MSAD service is available. Default: No.
User Interface Settings
- Remember logon user name – The VPN connection GUI remembers the most recently entered username. For security reasons, this is set to No by default.
- Use MS Credential Manager – Session - Keeps credentials, once they are entered, valid for only one session. Local keeps credentials valid for all subsequent sessions on the same computer, so there is no need for another manual login.
- Show Popup – Specifies whether pop-up messages are displayed for incoming and outgoing connections. Default: Yes.
- Close after Connection – Causes the VPN client dialog to close as soon as a VPN connection is successfully established. Default: No.
- Save new Certificate Unattended – Save new certificates locally without any user interaction. Default: No.
- Custom Password Box Label – Allows to customize the Password Box Label on VPN Connect dialogs. If no value is set, the default text Password is used.
OS Settings
- IPv6 – In Legacy mode (default), only IPv4 will be used. The prefer IPv6 option uses IPv6 if available. If not, it falls back to IPv4.
- Start Script / Stop Script – Scripts to be started automatically upon connecting (e.g., to automatically modify Internet Explorer settings).
- Disconnect when user logs off – The behavior expected when logging off from Windows (Start > Log Off). When set to Yes, the VPN connection is terminated upon performing a system logout. If set to No, the VPN connection remains active.
Enable MS Logon – Causes the user credentials entered during the login procedure on the Windows system to be sent automatically to the client. When establishing a VPN connection, these credentials are automatically used for authentication. It is not possible to use other credentials.
- Certificate Store Flag – Enables or disables the certificate store flag.
- Certificate Store – Assigns the certificate location within the Microsoft Windows Certificate Management Store.
- Certificate Selection Dialog – If enabled, server certificates offered by VPN servers must be selected manually by the user. If disabled (default), the first valid certificate will automatically be used.
How to import a profile from Barracuda Firewall Admin
To import VPN profiles that were previously created in Barracuda Firewall Admin, perform the following steps:
- Create a VPN profile within Barracuda Firewall Admin and save it locally.
- Locate the saved *.vpn file in Windows Explorer and double-click it.
The profile will now be imported into the Barracuda VPN Client.
Adaptation of profile creation using an *.ini file (Barracuda authentication only)
Some parameters configurable in the Connection Entries and Advanced Settings tabs can be passed to the Barracuda VPN Client using an *.ini file. For more information, see Adaptation of Profile Creation Using an *.ini File.