

Configure the Barracuda VPN Client for Windows to silently switch to fallback VPN gateways when a VPN gateway is not reachable, such as when the client is used in different corporate networks or geographic locations. A working VPN connection is always available and the appropriate gateway is automatically selected.
Example Scenario
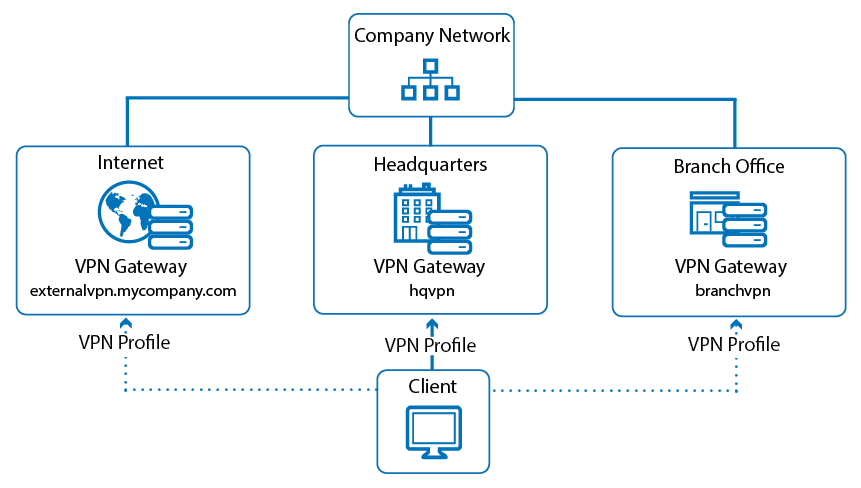
In this example, three VPN profiles are used to connect to a corresponding gateway into the company network:
- externalvpn.mycompany.com – The gateway to be used when the client is not connected to a corporate network.
- hqvpn – The gateway to be used within the company HQ network.
- branchvpn – The gateway to be used within a branch office network.
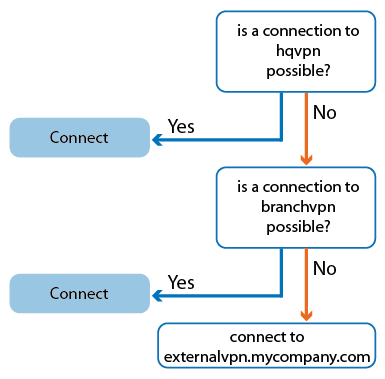
These VPN profiles are configured as part of a fallback chain that will be used by the VPN client to find the appropriate gateway. You can initiate a VPN connection using the hqvpn profile that is set as the default VPN profile. If necessary, the VPN client will try each configured VPN profile in the fallback chain until it can establish a connection.
Fallback chain:
Configure the VPN Profiles
Configure the VPN profiles for the three gateways as shown in the example scenario.
Step 1. Set up the VPN Gateways
Create a VPN profile for each of the three VPN gateways.
- In the Barracuda VPN Client window, click Preferences. The Barracuda VPN Control window opens.
- Click New in the left navigation pane to launch the Profile Wizard. You can also right-click the window's main area and select New (Wizard) or New.
- In the Remote Server field, enter the IP address or host name of the first gateway. E.g.:
externalvpn.mycompany.com - Select the Remember my user name check box so that the client will reconnect to this server without prompting users for their username.
- Click Next.
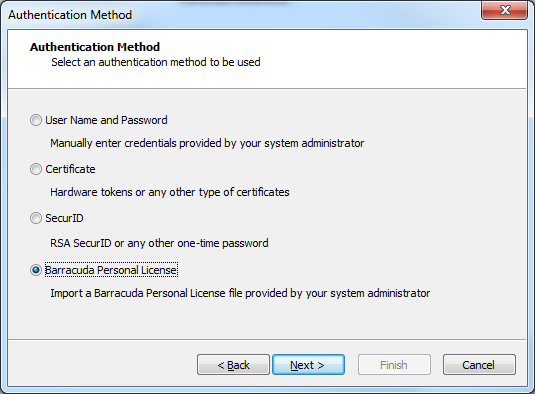
- On the Authentication Method screen, select your authentication method:
- If you choose User Name and Password, you must configure additional settings to save the password locally if you do not want the client to constantly prompt users for a password when changing gateways.
To automatically reconnect in the background, select Certificate or Barracuda Personal License.
For more information on configuring a profile and choosing the correct authentication method, see How to Create VPN Profiles.
Configure the two remaining profiles with your respective parameters. The two remaining profiles used in the example scenario are named
hqvpnandbranchvpn, and they point to identically named VPN servers.
Step 2. Configure externalvpn.mycompany.com
- In the Barracuda VPN Control window, right-click the externalvpn.mycompany.com entry and select Modify Profile.
- In the Properties window, click the Advanced Settings tab.
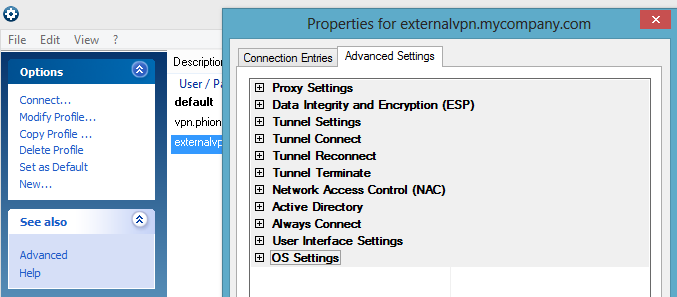
- In the Tunnel Connect section, set Enable VPN Tunnel Probing to Yes. This setting ensures that the client will always use the fastest available gateway.
- In the Tunnel Reconnect section, set WLAN Roaming, Fast Reconnect, and Reconnect immediately to Yes.
- In the same section, set Fallback Profile to hqvpn.
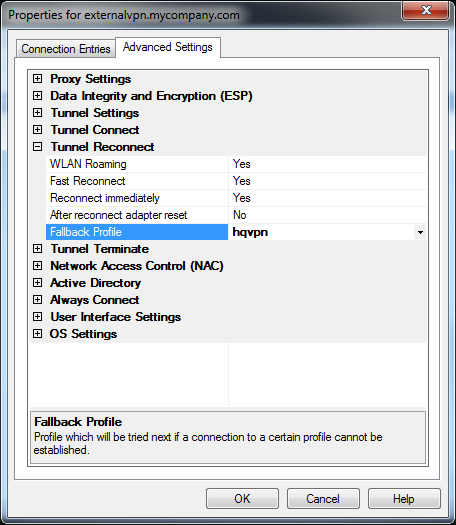
With this option set, the next gateway in the chain will be tried if the primary gateway is not reachable. - Because the
externalvpn.mycompany.comgateway is used when the client is not connected to the company network, you should disable it in the company network. - Although the external URL of a company's VPN server should not be reachable from within a cleanly configured company network, you can accelerate the switch to the next fallback profile by enabling the client to detect the company's Active Directory (AD) service.
In the Active Directory section, configure the following settings:- Set Probe Active Directory to Yes.
- In the Active Directory IP field, you can enter one or more known IP addresses for the MSAD service to help the client quickly detect the AD service.
In the User Interface Settings section, configure the following settings:
If you configured username and password authentication, set Remember logon user name to Yes to disable login prompts.
To store credentials after they are entered, set Use MS Credential Manager to Local.
To disable the informational pop-up window that displays connection status changes, set Show Popup to No.
Click OK to save the configuration.
Step 3. Configure hqvpn
Configure the hqvpn profile with the same settings as the external profile, with these three exceptions:
- In the Tunnel Reconnect section, set Fallback Profile to branchvpn. This way, the branch network's VPN gateway is defined to be the next gateway in the chain.
- Disable Active Directory probing. In the Active Directory section, set Probe Active Directory to No.
Define
hqvpnas the default profile by right-clicking its list entry in the Barracuda VPN Control window and selecting Set as Default. The client will automatically start with this profile in the fallback chain when it tries to establish a connection.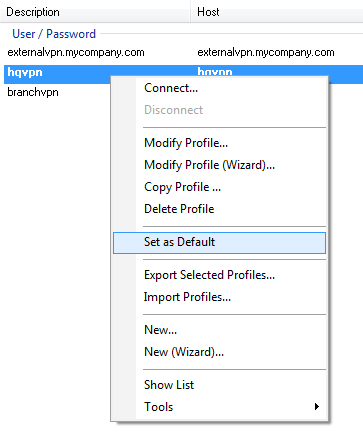
Step 4. Configure branchvpn
Configure the branchvpn profile with the same settings as the hqvpn profile, with these two exceptions:
- In the Tunnel Reconnect section, set Fallback Profile to externalvpn.mycompany.com. This closes the fallback chain so that the external VPN gateway will be tried next if none of the company's internal VPN gateways is reachable.
- Do not select branchvpn as the default profile.