

This article refers to the Barracuda Cloud Archiving Service and Barracuda Archive Search for Outlook. For best results, download the latest version from the Users > Client Downloads page. Archive Search for Outlook supports Outlook versions 2013, 2016, 2019, 2021, and Outlook for Microsoft 365.
Note the following are not supported by Archive Search for Outlook:
- Outlook for Mac versions
- New version of Windows Mail, Outlook for Windows.
ADMX files require Windows Server 2008 or higher. For details on using ADMX files with earlier versions of Windows Server, see the Microsoft TechNet article Managing Group Policy ADMX Files Step-by-Step Guide.
Archive Search for Outlook is not supported on the Microsoft App Store version of Outlook.
Download Archive Search for Outlook
To download the latest version of Archive Search for Outlook:
- Log in to https://login.barracudanetworks.com, and click Archiver in the left pane.
- Go to Users > Client Downloads, and scroll to the Archive Search for Outlook section.
- Click Download Now to the right of Archive Search for Outlook Deployment Kit.
Locale
The language for the Archive Search for Outlook options is determined by your Microsoft Office installation locale. Supported languages for the add-in include:
- DE - German
- EN - US English
- ES - Spanish (Continental)
- FR - French
- IT - Italian
- JP - Japanese
- NL - Dutch
- PL - Polish
- CN - Chinese
Step 1. Install the Deployment Kit
Use the following steps to install the Archive Search for Outlook Deployment Kit:
- Log in to the Barracuda Cloud Archiving Service as an administrator.
- Navigate to the Users > Client Downloads page, and in the Archive Search for Outlook section, click Download Now to the right of Archive Search for Outlook Deployment Kit to download the BMAOutlookAddInDeploy.msi file.
- Run the.msi file to launch the Barracuda Deployment Kit Wizard.
- Follow the onscreen instructions to install the deployment kit including the ADMX files and local-specific ADML files.
- On the Domain Controller, copy all ADMX files to the C:\Windows\SYSVOL\$Domain\Policies\PolicyDefinitions directory, where $Domain is your domain, and copy all ADMX files to the appropriate sub-directories. For more information, refer to the Microsoft TechNet article Managing Group Policy ADMX Files Step-by-Step Guide.
Step 2. Configure Archive Search for Outlook
Start the Group Policy (GPO) Editor for the domain where you will be installing the Archive Search for Outlook. You can edit the default policy or create a new policy object and link it to the desired container, for example, the particular OU containing the computers of users that will be using Archive Search for Outlook.
In the GPO Editor, navigate to User Configuration\Administrative Templates\Barracuda\Message Archiver, e xpand the Archive Search for Outlook node , and click Archiving Service.
Double-click the Cloud Archiver Service policy URI, and select Enabled.
Click Apply , and click OK to configure the policy. For an explanation of the available settings, click the Extended tab in the policy.
Step 3. Deploy the MSI File
If you do not already have a network share for GPO software deployment, you must create one. The share must be accessible from all of the machines on which the software is to be deployed. The permissions for the share must give read access to the Everyone group, and the permissions for the underlying NTFS folder must give read access to the Authenticated Users group.
- Copy the .msi file(s) to the share you created in the previous step.
Open the GPO Editor for the organization that is to use Archive Search for Outlook, for example, the default domain policy.
Either edit the default policy, or create a new policy object, then link it to the desired container. For example, the particular OU containing the computers on which the add-in is to be installed.
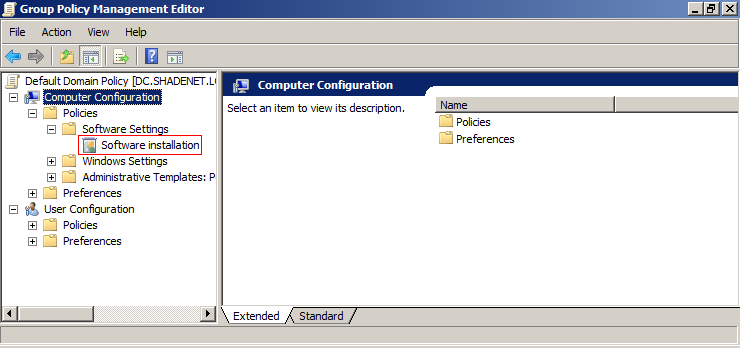
- In the GPO, navigate to Computer Configuration > Policies > Software Settings > Software Installation :
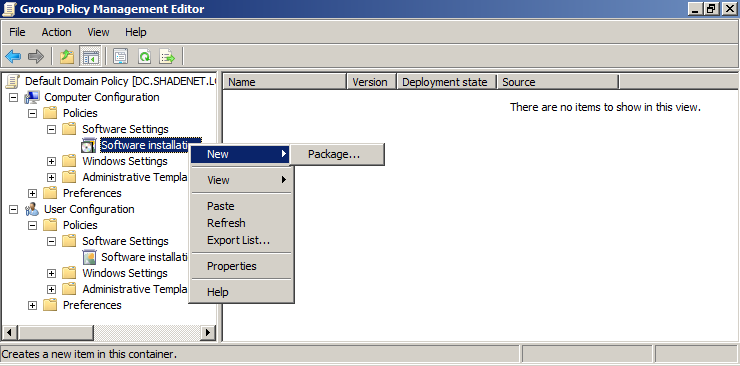
- Right-click Software Installation, point to New, and click Package:
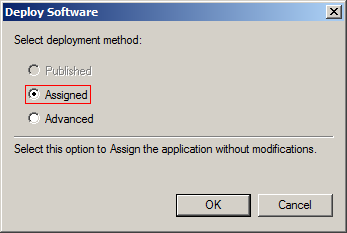
- Enter the UNC path to the. msi file located in the shared folder. For example, enter: \\fileserver\deploy
- Click Open. In the Deploy Software dialog box, click Assigned:
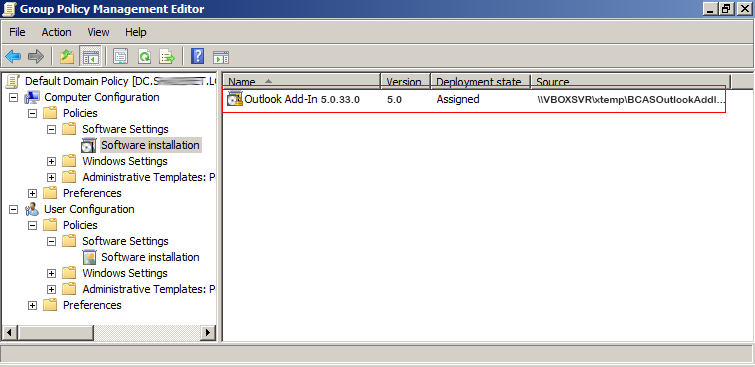
- Click OK . The policy displays in the GPO Editor window:
Deploy the Add-in to Machines with 64-bit Windows and 32-bit Outlook
If any of the machines in your environment have a 64-bit version of Windows installed but are using a 32-bit version of Outlook, you must deploy the 32-bit MSI to these machines. If you are also deploying the 64-bit MSI for machines with both 64-bit Windows and 64-bit Outlook, both software deployment policies will apply to the machines with 32-bit Outlook, which will result in both MSIs being installed on these machines. Since Outlook only loads the add-in that matches its bitness, this should not cause any problems.
- In the GPO Editor, navigate to Computer Configuration > Policies > Software Settings , and click Software Installation .
- Right-click the 32-bit Barracuda Outlook Add-In, and click Properties .
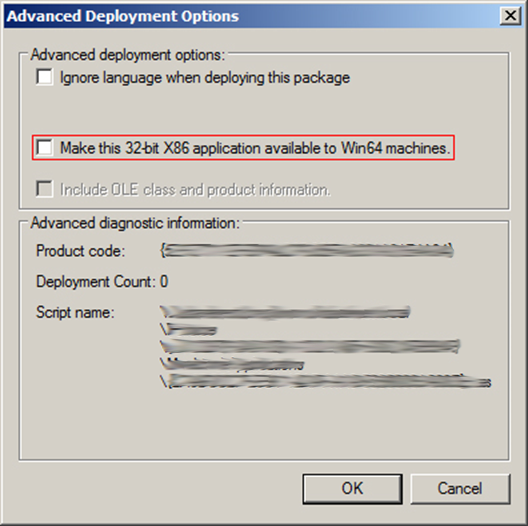
- Click the Deployment tab, and click Advanced. In the Advanced deployment options section, select Make this 32-bit X86 application available to Win64 machines:
- Click OK. In the Properties dialog box, click Apply, and click OK to save your settings and close the dialog box.
Step 4. Test the Deployment
Complete the following steps to test the Archive Search for Outlook deployment.
- Restart a computer that is joined to the domain.
- Verify that the Add-In is installed when you log in and that the configured policies are applied.
Step 5. Notify Users
Once the MSI file is successfully deployed, send the Archive Search for Outlook access details to your users. For additional resources, refer to the following Campus articles:
Troubleshooting
Following is a list of troubleshooting tips:
- A common cause of failure is that the user and/or the user's computer does not have adequate access to the share location. Verify that all access and network privileges are configured appropriately.
- Verify you are running the latest version of the Barracuda Outlook Add-In.
Verify that the software deployment policy defined in Step 3. Deploy the MSI File was created for computers, not users, and that Assigned was selected in the Deploy Software dialog box.
- Additional error messages are available in the Event Log on the domain computer; if you do not find the desired information in the Event Log, consider enabling verbose logging and restarting the computer.
- For additional information on fixing Group Policy issues, see Fixing Group Policy problems by using log files on the Microsoft TechNet website.