

This article refers to the Barracuda ArchiveOne Enterprise version 7.1. You must have access rights granted by your administrator to use Barracuda Advanced Discovery.
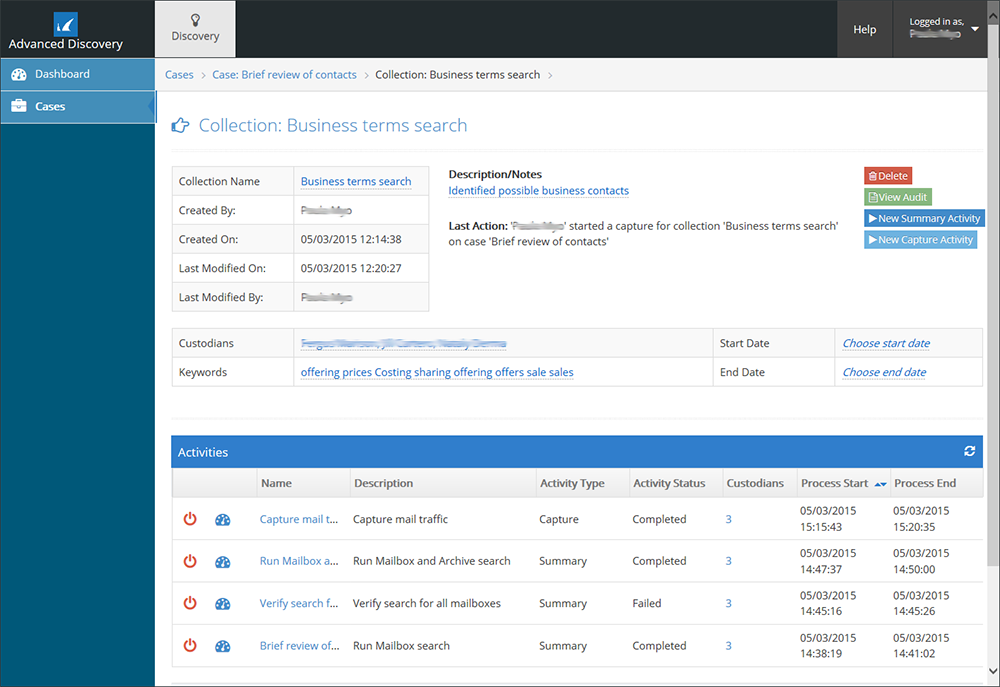
Click Cases in the left pane to view a list of cases. Click on a case name in the table to view case details, click the plus (+) icon to view a list of collections for the case, and click the collection name to view collection details:
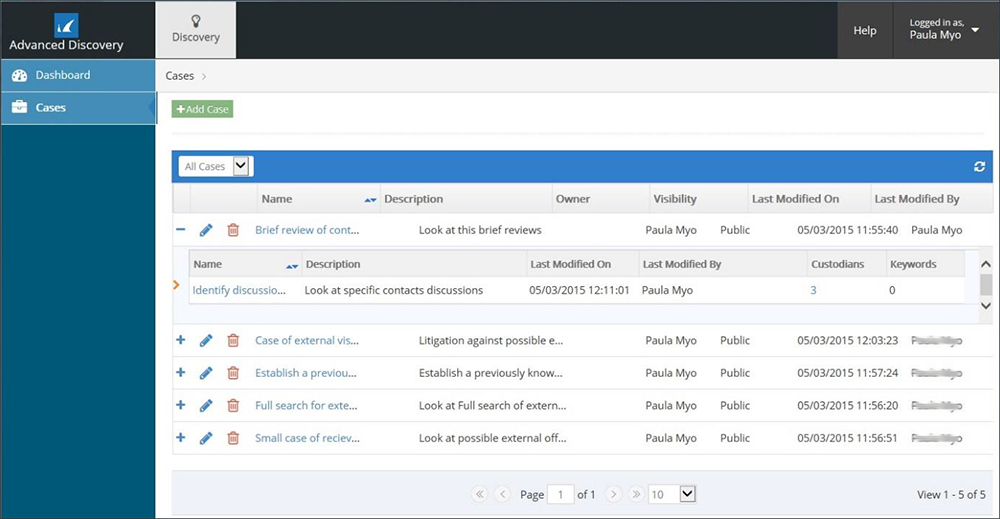
You can set case visibility as:
- Public – The case is visible to, and can be modified by, all users
- Read-only – The case is visible to all users but can only be modified by the case owner
- Private – The case is only visible, and can only be modified by, the case owner
You can view cases based on grouping. Use the drop-down menu at the top of the table to select how to display cases:
- All – Displays all cases
- My – Displays cases owned by you
- Private – Displays cases that are private and owned by you
- Read-only – Displays cases set to Read-only
- Public – Displays cases that have visibility set to Public
Cases
Add a Case
To add a case,
- Click Add Case at the top of the page; the Enter the case details dialog box displays:
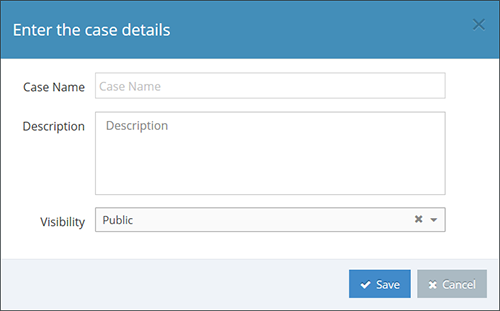
- Enter a name to represent the case in the Case Name field, enter a case description, and select the case Visibility from the drop-down menu.
- Click Save.
Edit a Case
To edit a case,
- Click on a case name to view case details and a list of collections.
- Click on the case field you want to edit:
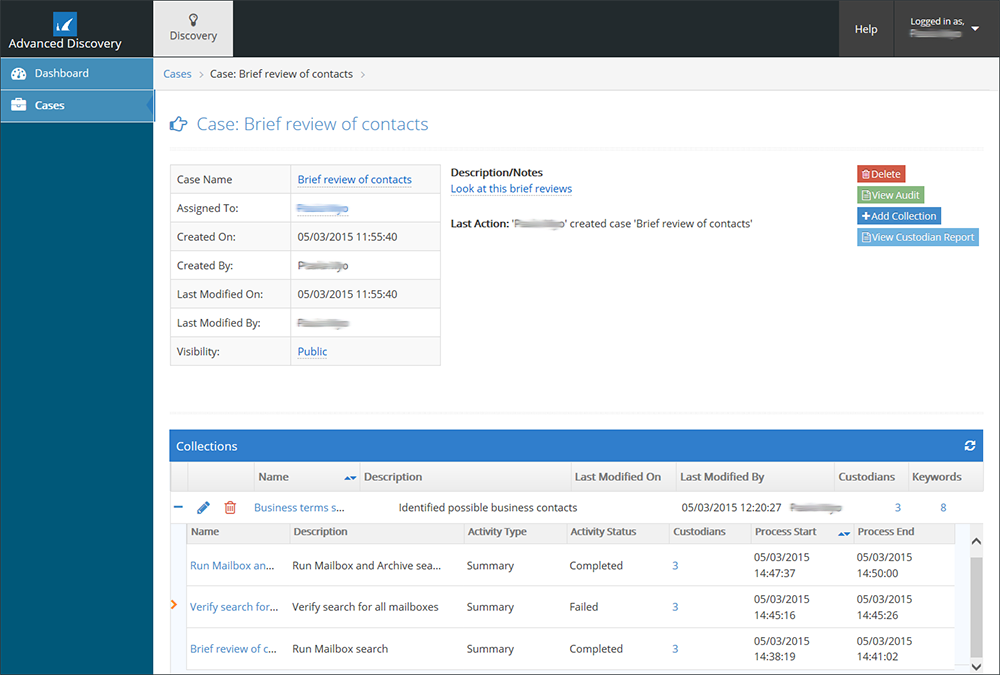
Delete a Case
To delete a case,
- Select a case, and click Delete on the Case Details page.
- Confirm you want to delete the selected case in the warning dialog.
Collections
Add a Collection
To add a collection,
- Click Add Collection on the Case Details page.
- The Enter the collection details dialog box displays:
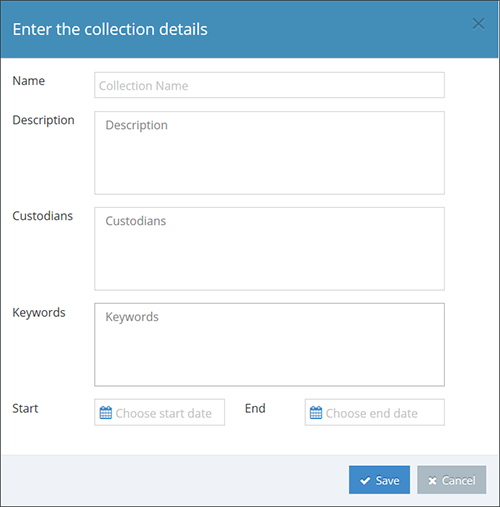
- Enter the following details:
- Name – Enter a name to identify the collection
- Description – Enter a collection description
- Custodians – Select custodians for the list of mailboxes
- Keywords– Enter keywords to represent the collection
- Start/End – Select the start and end dates
- Click Save to add the collection.
Edit a Collection
To edit a collection,
- Select a case, and then select a collection on the Case Details page.
- Click on a collection field to edit the content:
Delete a Collection
To delete a collection,
- Select a case, and select the collection you wish to delete.
- Click Delete on the Collection Details page.
- Confirm you want to delete the selected collection in the warning dialog.
Reports
View an Audit Report for a Case
To view the audit report for a case,
- Select a case, and click View Audit on the Case Details page.
- The Audit Report displays audit events and related objects for the selected case:
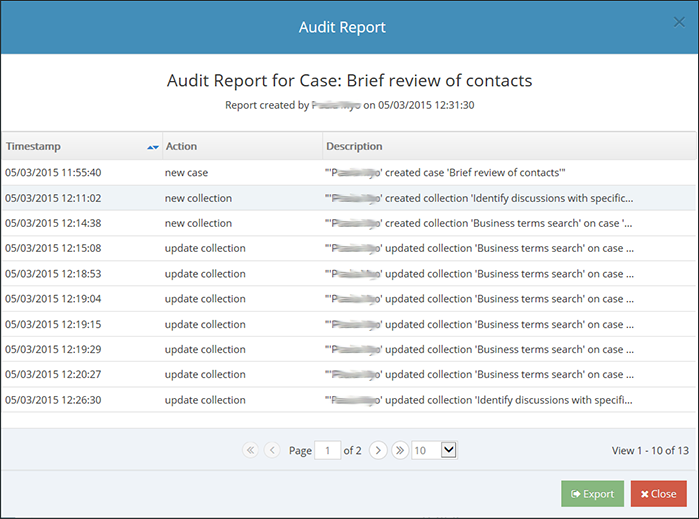
- To export the report as a .csv file, click Export.
View an Audit Report for a Collection
To view the audit report for a collection,
- Select a case, select a collection, and click View Audit on the Collection Details page.
- The Audit Report displays audit events and related objects for the selected case.
- To export the report as a .csv file, click Export.
View a Custodian Report
To view a custodian report,
- Select a case, and click View Custodian Report on the Case Details page.
- The Custodian Summary Report displays a list of collections on which a capture has been run:
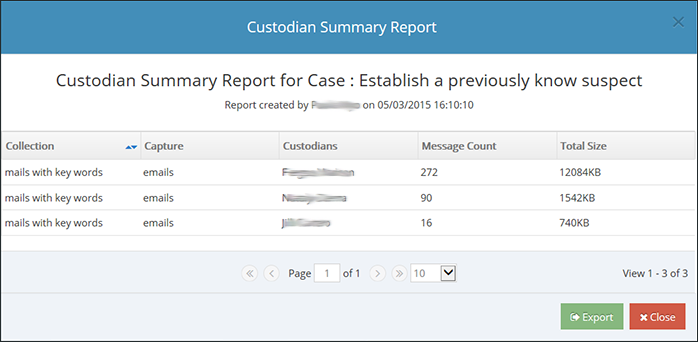
- To export the report as a .csv file, click Export.
Activities
Create a Summary Activity
To start a summary activity,
- Go to the Collection Details page, and click New Summary Activity; the Enter activity details dialog box displays:
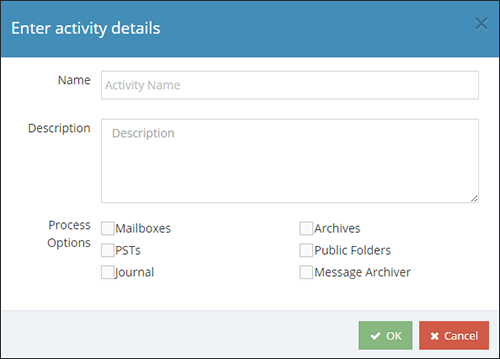
- Enter the following details:
- Name – Enter a name to represent the activity, or leave blank and a name is automatically generated
- Description– Enter a description of the activity
Process Options – Select where to search for messages
Click OK to add the summary activity.
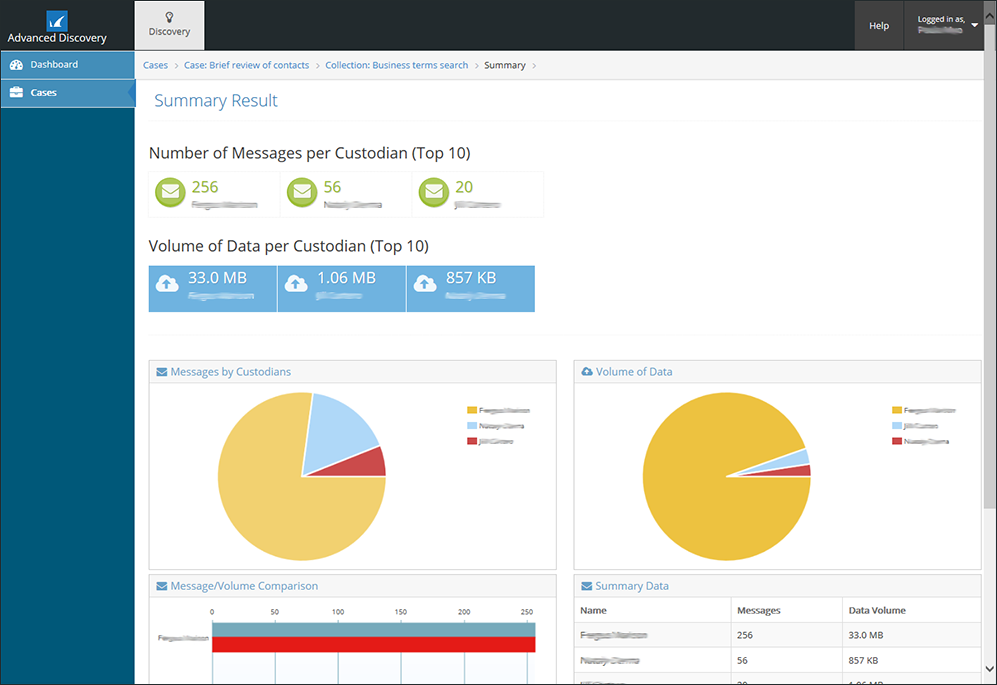
View Summary Activity Results
To view the results of a completed summary activity,
- Once a summary activity is complete, click on the name of the activity in the Collection Details page.
- The Summary Results displays statistics about the found messages:
Create a Capture Activity
To start a capture activity,
- Go to the Collection Details page, and click New Capture Activity; the Enter activity details dialog box displays:
- Enter the following details:
- Name – Enter a name to represent the activity, or leave blank and a name is automatically generated
- Description– Enter a description of the activity
Process Options – Select where to capture messages
Click OK to add the capture activity.
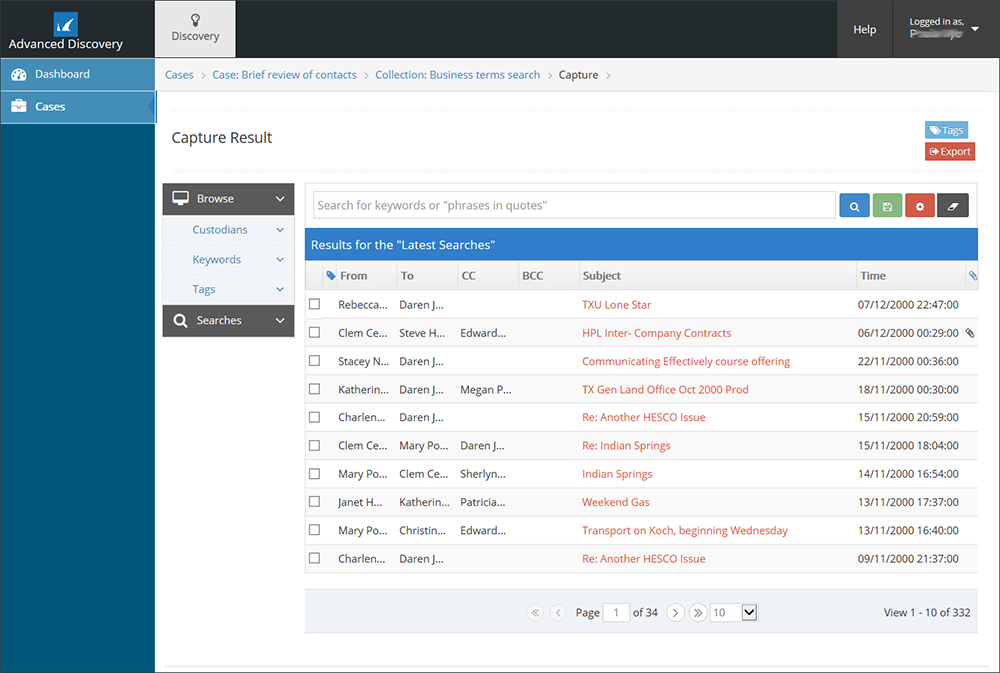
View Capture Activity Results
To view the completed capture results,
- Once a capture activity is complete, click on the name of the activity in the Collection Details page.
- The Capture Results displays a list of messages that were found. From this view you can by keywords, click on the subject text of a message to view message details, or use the advanced search option to further refine the list:
Filter Capture Activity Results
- Click Browse to filter the list by predefined criteria:
- Custodians – Displays all custodians in the capture. Select one custodian to filter results so that only messages relating to that custodian display.
- Keywords – Displays all keyword used in the capture. Select a keyword to filter the results so that only messages relating to that keyword display.
- Tags – Displays all tags applied to the capture. Select one tag to filter the results so that only messages relating to that tag display
- Click Search and select a saved search on which to filter the list of messages.
- Click Tags to organize messages based on tags; create, modify, or delete a tag, or apply a tag to one or more messages:

- Export – Click to select one or more messages to export to a PST file. The exported file is written to a shared folder configured by your system administrator.
View or Abort a Running Activity
To view activity status,
- Click the Status (
 ) icon in the activities list to view the status of the running activity:
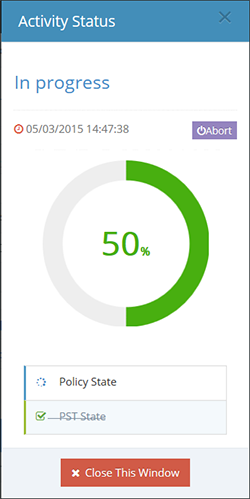
- Click Abort if you wish to stop the activity in progress, or click Close This Window to allow the activity to complete.