

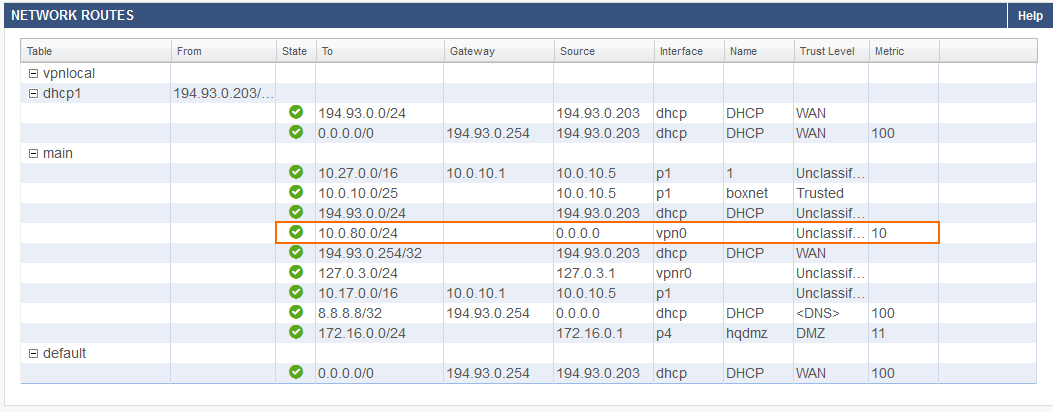
If your authentication server is located at a remote location connected via a site-to-site VPN tunnel. By default the firewall uses source-based VPN routing. To be able to connect to the remote authentication server the VPN routes must be added to the main routing table. VPN routes are always added with a metric of 10.
Before you begin
- Verify that at least one static interface configuration or the management IP address is part of the local published network you want to use for the site-to-site VPN tunnel.
- Go to NETWORK > Routing and verify that the VPN routes for the remote published networks will not break your existing routing configuration.
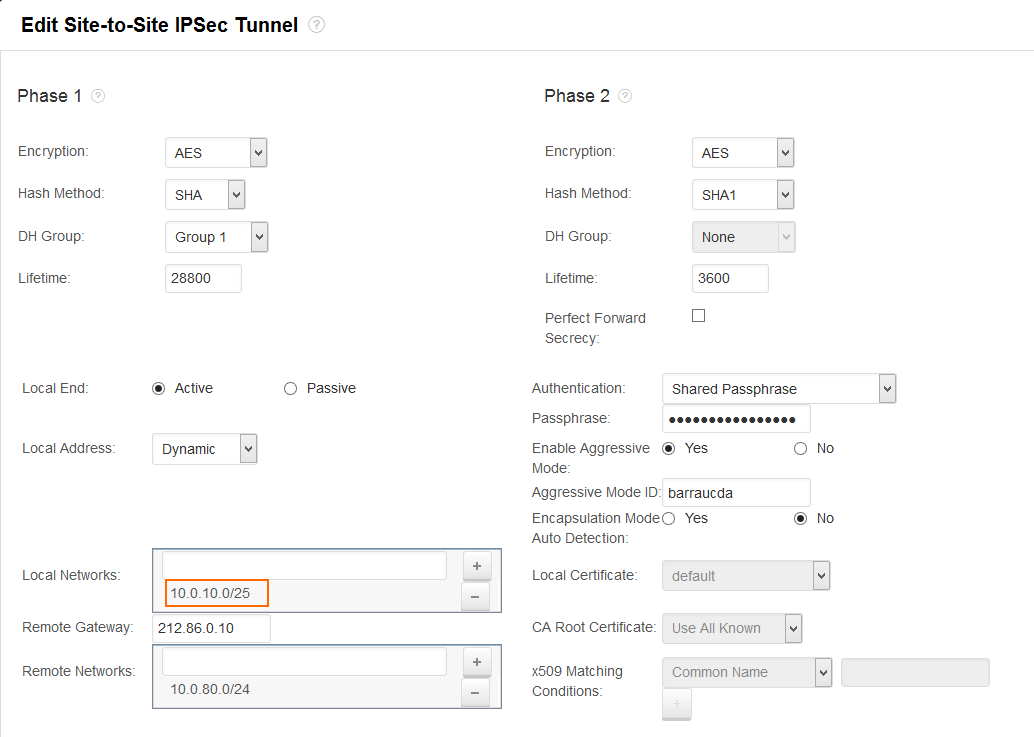
Step 1. Configure a site-to-site VPN tunnel
Configure a site-to-site VPN tunnel. At least one local published network must be directly attached to the firewall and configuration as a static network interface or as the management network.
For more information, see How to Configure a Site-to-Site VPN with IPsec or Example - Configuring a Site-to-Site IPsec VPN Tunnel.
Step 2. Change VPN settings to add VPN routes to main routing table
In expert mode, switch from the default source-based routing to adding the VPN routed to the main routing table.
- Go to VPN > Settings.
- Append
&expert=1to the URL to switch to expert mode. - In the VPN Routes section, set Add VPN Routes to Main Routing Table to Yes.
- Enter the VPN Interface IP address. The IP address must meet the following criteria:
- The IP address must be in one of the site-to-site VPN local published networks.
- The IP address must be assigned to a static network interface as a primary or secondary IP address, or the management or secondary IP address in the management network.
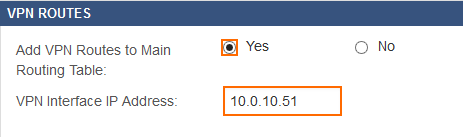
- Click Save.
Go to NETWORK > Routing and verify that the VPN routes are now in the main routing table:
Step 3. Configure authentication server
Configure the external authentication server. Click Test Connection to verify that the firewall can connect to the remote authentication server through the site-to-site VPN.
For more information, see How to Configure an External Authentication Service