

About Microsoft Exchange Information Store Backups
Having an Exchange Information Store backup is an important part of a disaster-recovery plan for any server hosting Exchange mail services. An Exchange Information Store backup allows you to restore an entire Exchange database back into production as well as to a recovery group for the purpose of restoring individual mailboxes.
Before creating an Exchange Information Store backup set, make sure that you are familiar with the backup type restrictions and recommendations.
Creating an Exchange Information Store Backup
To create an Exchange Information Store backup, perform the following steps.
- Navigate to the Computer page. See Navigating to the Computer Page for instructions.
The Computer page is displayed.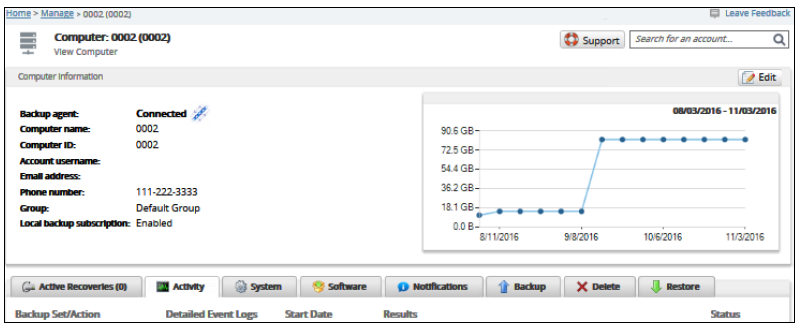
- Click the Backup tab.
The Backup Selections page is displayed.
- In the Backup Type pane, click Exchange Information Store.
The Select page is displayed.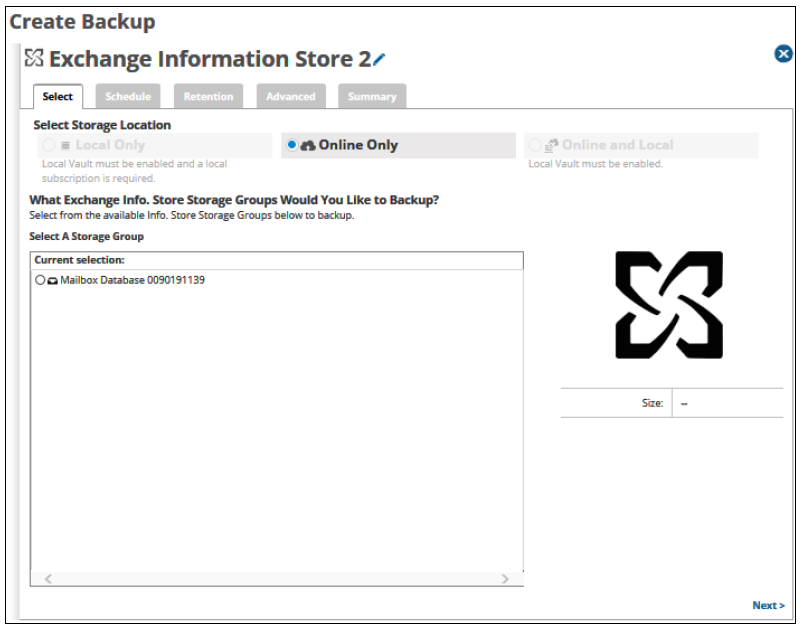
- Click the Backup Name to provide a new name for the backup set or accept the default. See Changing Backup Set Names.
- At the Select Storage Location section, click one of the following radio button options.
Note: This procedure applies to all options. See Backup Options for more information.- Local Only (Local Vault must be enabled, and a local subscription is required. Data is not backed up to the cloud.)
- Online Only (An enabled Local Vault disables this option.)
- Online and Local (Local Vault must be enabled.)
- At the Current Selection pane, select the storage group to be backed up.
Clicking the arrow at the right of the items displays more storage groups.
The storage group’s name and size are displayed at the far right.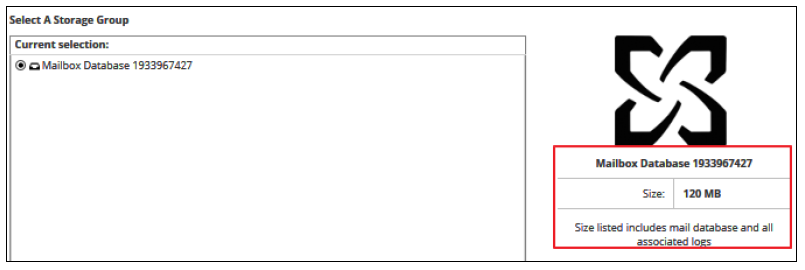
- Click Next.
The Schedule page is displayed.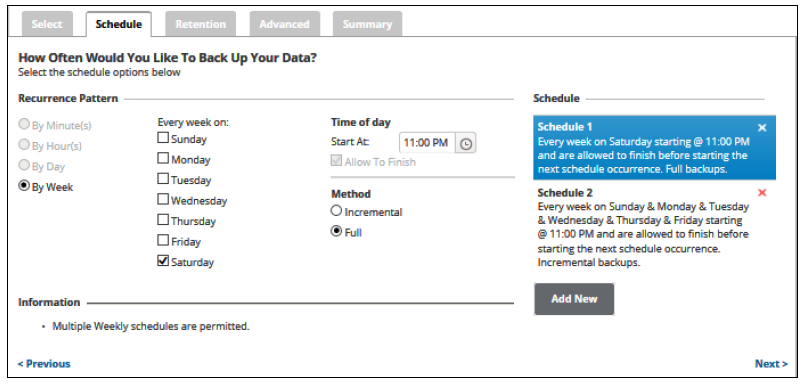
- Accept or edit the default schedule. See Adding a New Daily or Weekly Schedule for more information.
Note:- Multiple weekly schedules are permitted (if they do not overlap).
- The Allow to Finish check box is always selected and grayed-out.
- Select a backup method radio button, Incremental or Full.
Note: If you choose Full, every backup runs a full. If you choose Incremental, the first backup is a full and the subsequent backups are incremental. - After setting the schedule, click Next.
The Retention page is displayed.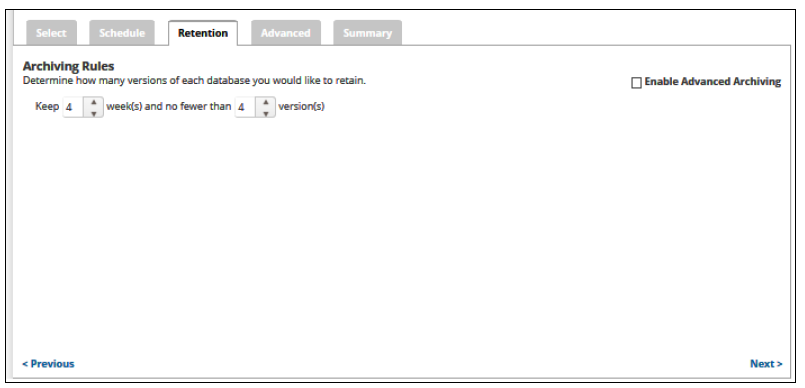
- Select the number of versions you wish to archive.
Note: The default retention is kept 4 weeks and no fewer than 4 versions. - Optionally, select the Enable Advanced Archiving check box. For Advanced Archiving information, see Archiving Rules.
The Advanced Archiving fields are displayed.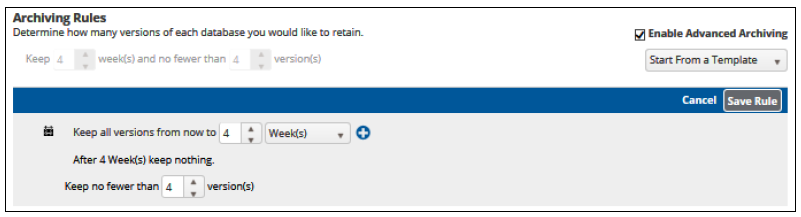
Example: The setting of a daily backup kept for 30 days and no fewer than 10 versions mean that 30 versions are kept. However, a setting of once a week means that after 10 weeks, 10 versions are kept. - Make your selections, click Save Rule, and then click Next.
The Advanced page is displayed.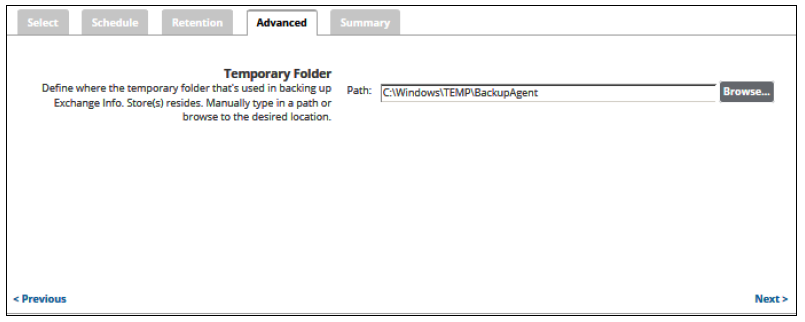
Requirement: You must specify a temporary folder located on a disk with enough space. - At the Temporary Folder field, accept the default, type a new path, or click the Browse button to locate the temporary folder that is used in backing up. See Browsing to a Folder.
- After making your selections, click Next.
The Summary page is displayed.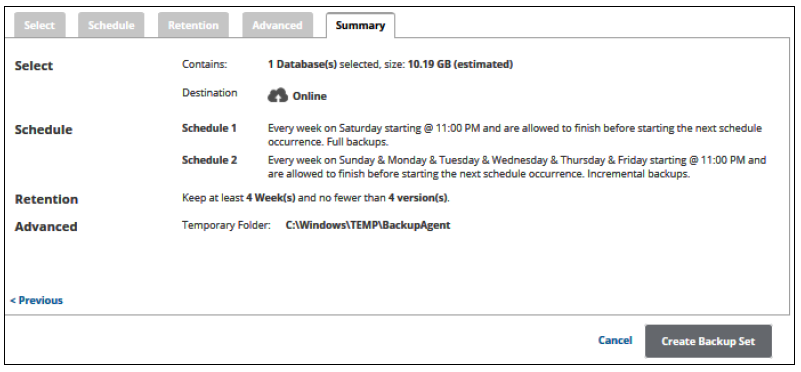
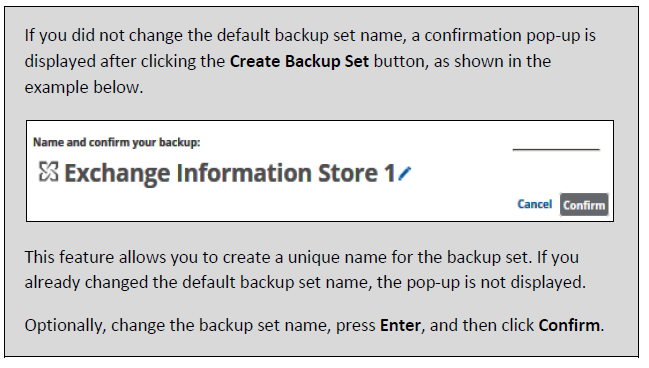
- At the Summary page, verify your backup selections, and then click Create Backup Set.
The Backup Selections page is displayed with the latest backup set.