

Applicable Products
These instructions apply to the following products:
- Barracuda Intronis Backup - MSP
How to Create a Hyper-V Standard Backup Set
Hyper-V Standard backup sets offer a complete, image-style backup of Hyper-V virtual machines. Hyper-V backup sets can be stored online and/or locally, giving you the ability to have duplicate copies for improved disaster-recovery protection.
Before creating a Hyper-V Standard backup set, make sure that you are familiar with the backup type restrictions and recommendations.
Click here for instructions on Hyper-V 2016 Standard Backup.
Prerequisites
The following prerequisites should be met in order to ensure Hyper-V backups run successfully.
- The Backup Agent must be installed directly on the Hyper-V host which houses the virtual machines you want to back up.
- The virtual machines you intend to back up must have Integration Services up-to-date.
- The virtual machines you intend to back up must not have any dynamic volumes at the guest level. The virtual hard drive can be dynamic (host level) since this requirement only applies to how the volumes within a virtual machine are formatted.
-
(Optional But Recommended) Have the Backup Agent service run with local administrator rights.
Note: Intronis Backup cannot currently back up clustered Hyper-V hosts. If you plan on backing up Hyper-V virtual machines housed on clustered hosts, we recommend you install the backup software on each individual virtual machine and create an image backup set.
Creating a Hyper-V Standard Backup Set
- Log into ECHOplatform and go to the Manage tab. Navigate to the computer account to which you want to add a Hyper-V Standard backup set.

- Go to the Backup tab.

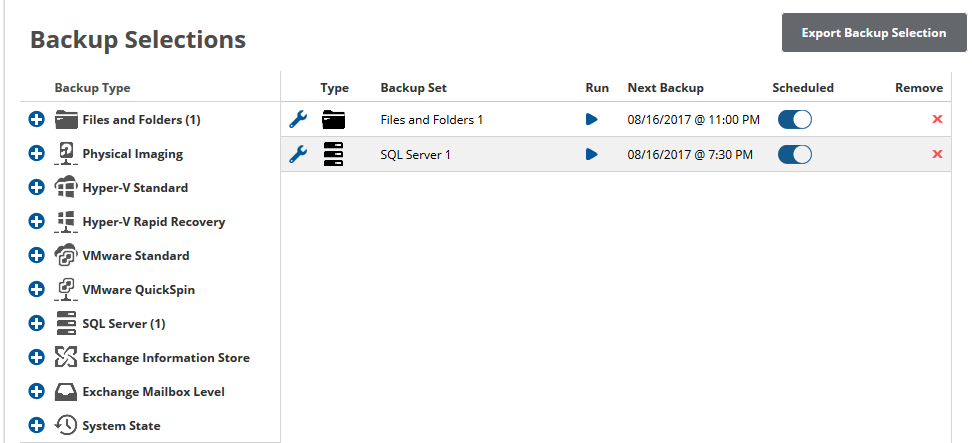
- Click on the Create button next to Hyper-V Standard in the Backup Type section.
-
First,Provide a name for this backup set. To do this:
- Click the pencil text at the top of the screen in order to be able to edit the text.
- Enter the new name.
- To save, click the green check mark.
- If you need to cancel, click the red X.
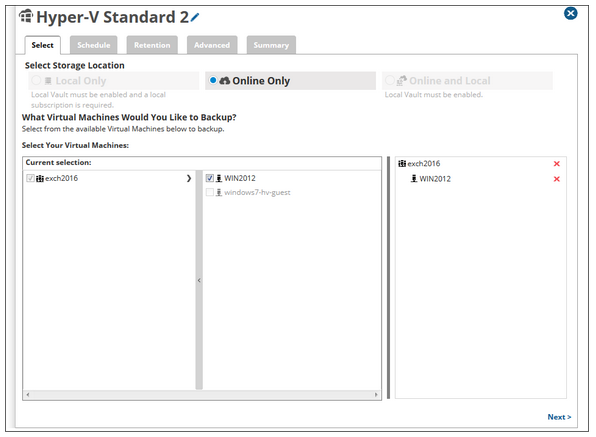
- Then, select whether you want the new backup set to store its backups Local Only, Online Only, or Online and Local.
Note: Depending how you have the Backup Agent and computer account configured, you may only see one or two of the storage type options. Choose which virtual machines you want included in the backup set and hit Next. If a virtual machine on the list is grayed-out, that virtual machine is likely included in another Hyper-V Standard backup set or is incompatible with Hyper-V backups.
Click the Schedule tab.
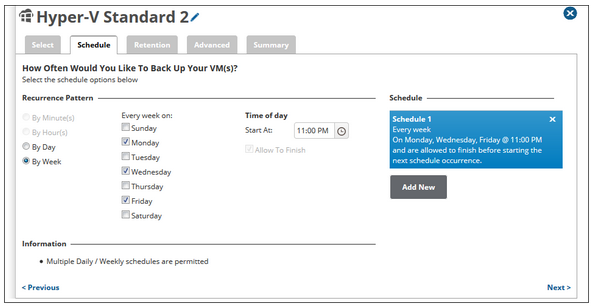
-
Set a schedule for the backups by choosing a recurrence interval (minutes, hours, days, or weeks) and either how often the backup will run or on which days the backup will run. If you want to add more than one schedule, click the Add New button.
Keep in mind that if multiple Hyper-V backup sets (Standard or Rapid Recovery) run concurrently, all those involved will be slowed down. Additionally, it is strongly recommended a Hyper-V Standard backup and a Hyper-V Rapid Recovery backup of the same virtual machine not overlap.
Click Next or select the Retention tab.
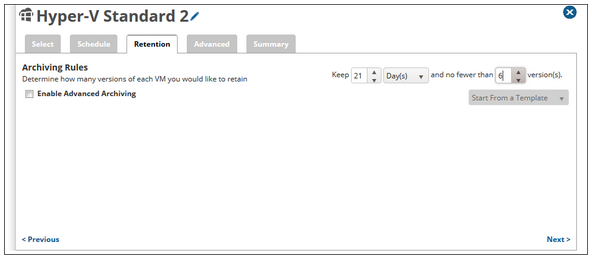
On the Retention page, choose an archiving rule for this backup set (how many versions to keep). You can choose to use the default rule or enable an advanced archiving rule.
Click Next or select the Advanced tab to continue.
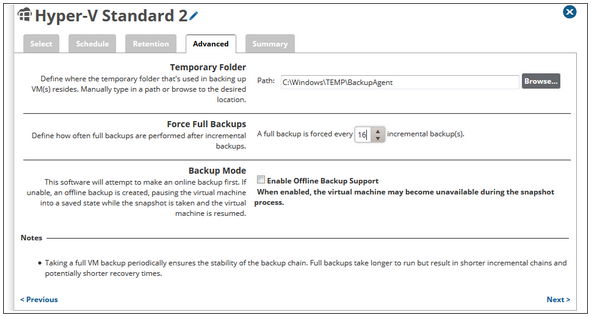
Choose a temporary folder location with at least 1-2 GB free and pick an interval for how often full backups will be taken. When choosing how often to take full backups, be aware the greater the interval, the longer backup chains will be – this will likely lead to retention exceeding that of your archiving rule.
Pick whether or not to Enable Offline Backup Support which will pause virtual machines during the snapshot phase if an online snapshot is unsuccessful.
-
To see a summary of the backup set, hit Next or click the Create Backup Set button to finish creation of the backup set.