

Creating a Mailbox Level Backup Set
Before creating an Exchange Mailbox level backup set, make sure that you are familiar with the backup type restrictions and recommendations.
- Log into ECHOplatform and go to the Manage tab. Navigate to the computer account to which you want to add a Mailbox Level backup set.
- Go to the Backup tab.
- Click on the Create button next to Exchange Mailbox Level.
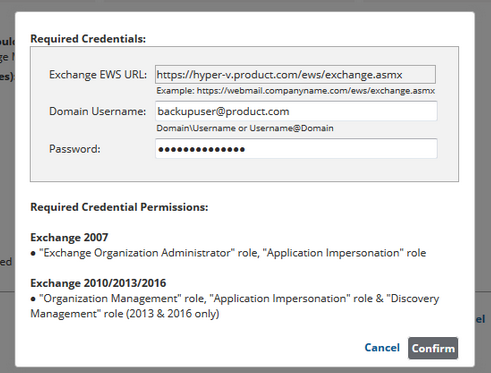
A pop-up will appear prompting you for the EWS URL and the service account's username (in UPN form) and password. If you do not know the EWS URL, you can find it by opening Exchange Management Shell and entering the following command:
Get-WebServicesVirtualDirectory | Select name,*url* | fl
We recommend you use the external URL but others may work. Once entered, click Confirm to validate the address and credentials.
First, provide a name for this backup set. To do this:
- Click the pencil text at the top of the screen in order to be able to edit the text.
- Enter the new name.
- To save, click the green check mark.
- If you need to cancel, click the red X.
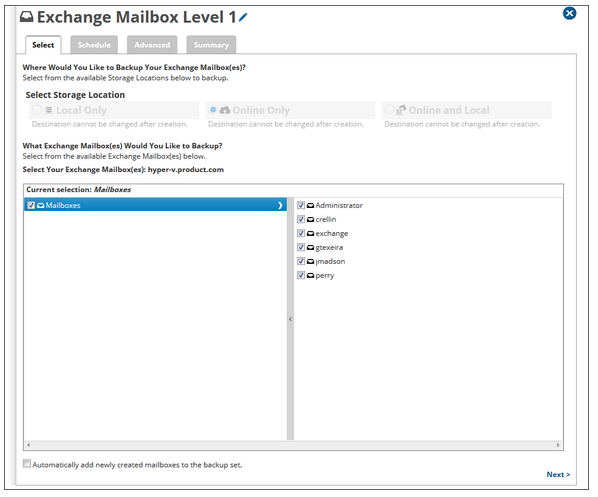
If the credentials you entered are accepted, you will be taken to the Select tab of the backup set editor.
First, provide a name for this backup set. To do this:
- Click the pencil text at the top of the screen in order to be able to edit the text.
- Enter the new name.
- To save, click the green check mark.
- If you need to cancel, click the red X.
Note: Depending how you have the Backup Agent and computer account configured, you may only see one or two of the storage type options.
Choose which mailboxes to back up by placing a check next to them and decide if new mailboxes will be included in the backup set by selecting the Automatically add newly created mailboxes to the backup set option at the bottom.
When done, click Next, or select the Schedule tab.
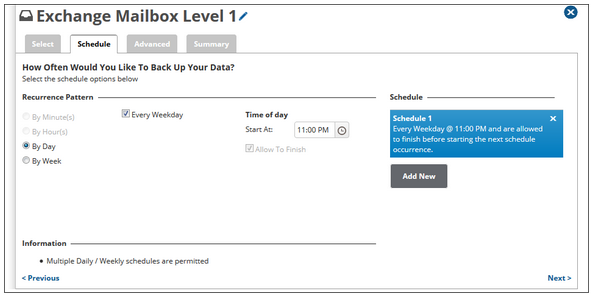
Set a schedule for the backups by choosing a recurrence interval (minutes, hours, days or weeks) and either how often the backup will run or on which days the backup will run. If you want to add more than one schedule, click the Add New button.
If you choose a By Week recurrence interval, you can choose to let backups finish on their own or, if you uncheck the Allow to Finish box, forcibly cancel the backups at a given time. If you choose the latter, any mail items backed up before the cancelation time will not be lost.
Click Next, or select the Advance tab.
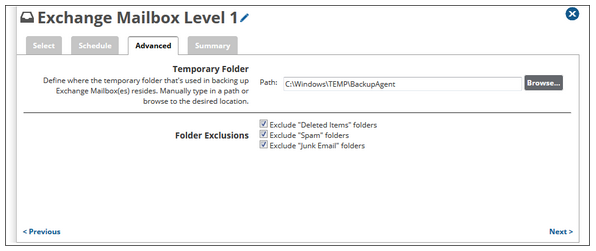
On the Advanced tab, choose the temporary folder (will need 1-2 GB of free space) and whether "Deleted Items", "Spam", or "Junk Email" folder will be backed up.
Click Next to see a summary of the backup set or click Create Backup Set to finalize the backup set creation.