

Applicable Products
These instructions apply to the following products:
- Barracuda Intronis Backup - MSP
Overview
VMware QuickSpin restores are speedy because the recovery VMs are standing by locally at the customer’s site, ready to be started to replace their disabled production counterparts.
VMware QuickSpin creates a recovery VM on a local vCenter/ESX host. In addition, with VMware QuickSpin, you can create and update a recovery VM on a host that is in a cluster.
VMware QuickSpin Restore Tabs

The following table provides a description of the page.
| Page | Description |
|---|---|
| Select | Select at least one available revision and/or VM to restore. |
| Recovery Type | Select how to verify and recover your data to the restore destination.
|
| Summary | A list of your selections is displayed. If necessary, power off non-critical VMs on the destination to ensure sufficient resources are available to start the recovery VMs. If the VMs you have chosen to restore are currently being backed up, the backup of the VMs are canceled to allow the restore to proceed. You need to add the VMs to an existing backup set or create a new one to ensure that the VM is protected. Ensure you remove the original VMs from the backup sets to avoid unnecessary errors. |
Restoring VMware QuickSpin
To restore a VMware QuickSpin backup, perform the following steps.
- Navigate to the Computer page.
The Computer page is displayed.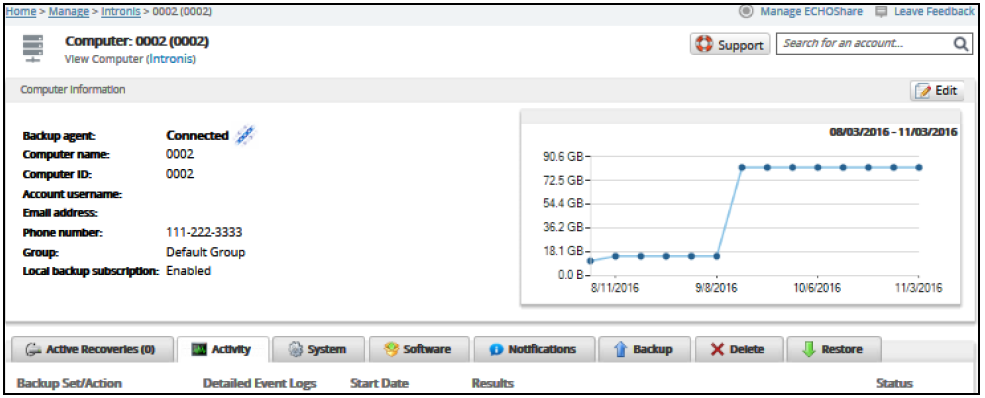
- Click the Restore tab.
The Restore Selections page is displayed.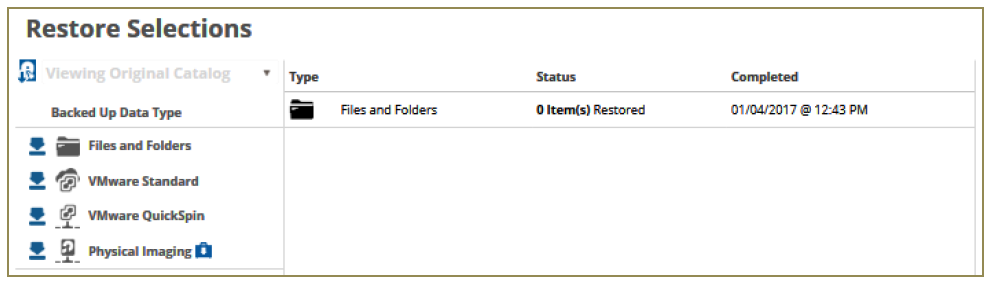
- Click the restore
 icon of the backup type you want to restore.
The Select page is displayed.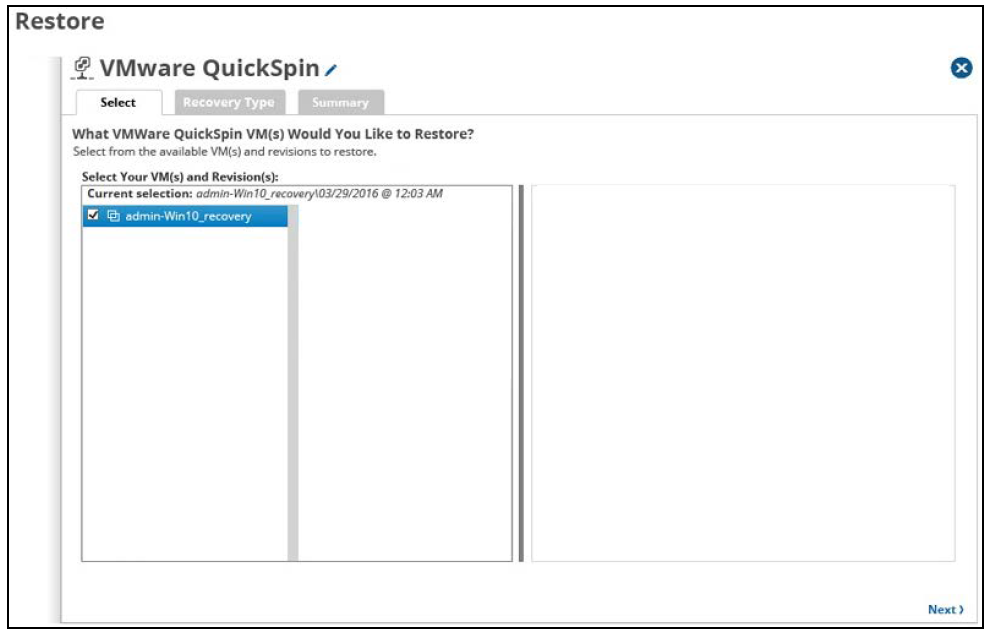
- In the Current Selection pane, select the VMs and revisions to be restored.
Clicking the arrow at the right of the VM displays more revisions of the VM.
Your selection is displayed in the right pane. Click the remove icon to remove any selections, or clear the item check box.
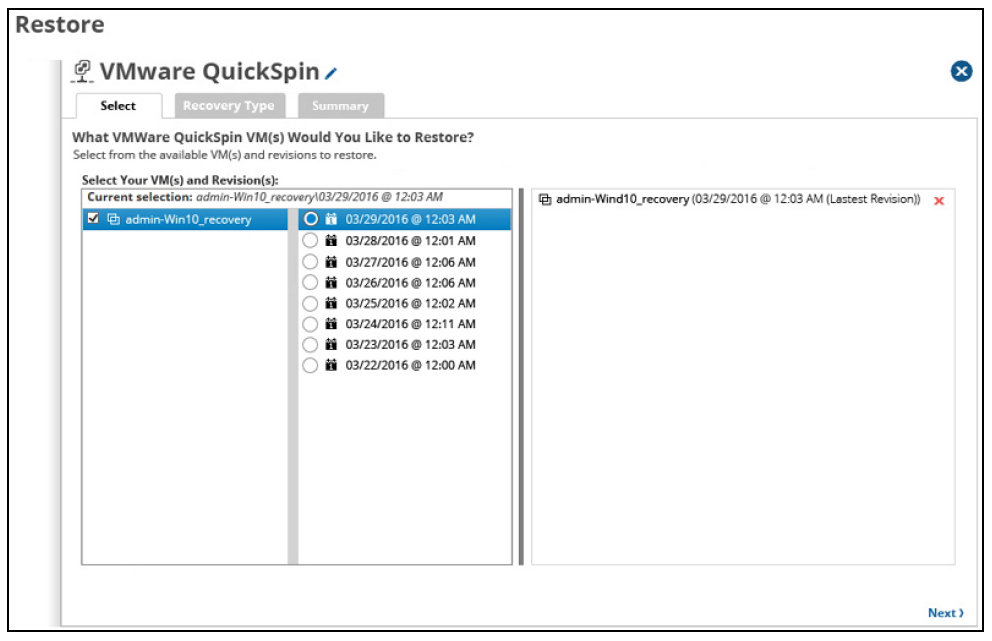
- Click Next.
The Recovery Type page is displayed.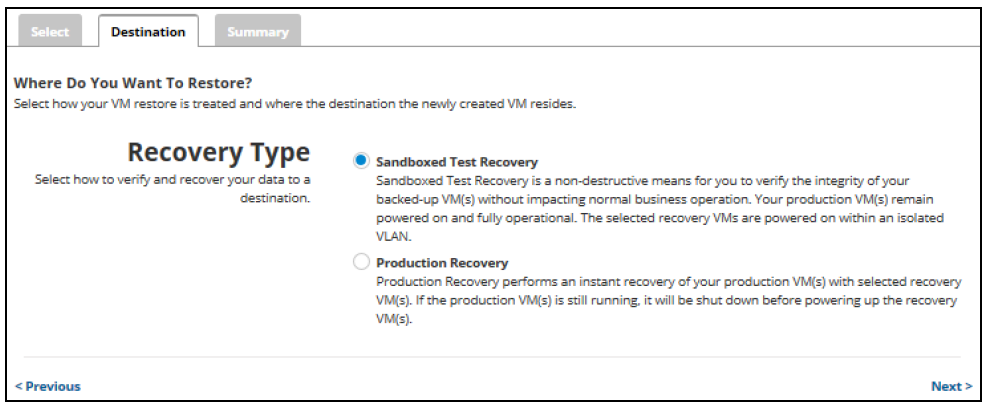
Notes:- Use Sandboxed test recovery as a non-destructive means for you to verify the integrity of your backed-up VMs without affecting normal business operation. Your production VMs remain powered on and operational. The selected recovery VMs are powered on within an isolated VLAN.
- Use Production recovery to perform an instant recovery of your production VMs with selected recovery VMs. If still running, the production VM is shut down before powering up the recovery VMs.
- Select a Restore type radio button.
If you select Sandboxed Test Recovery (default option):- The source/production VMs are not shut down.
- The recovery VMs selected are started on their own separate VLAN to avoid conflicts with the production VMs.
- Backups to the recovery VMs do not continue as long as the recovery VMs are powered on.
- The source/production VMs are shut down.
- The recovery VMs selected are started on the production network. They assume the role of the original production VMs.
- Backups to the recovery VMs do not continue as long as the recovery VMs are powered on.
- Click Next.
The Summary page is displayed.
Note: For this example, the Production Recovery option is displayed.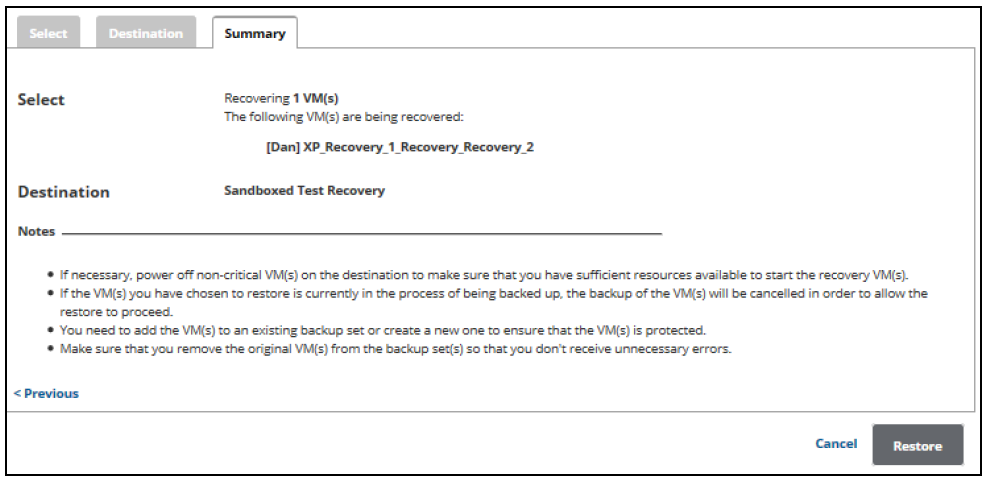
Notes:- If necessary, power off non-critical VMs at the destination so sufficient resources are available to start the recovery VMs.
- If the VMs selected for restore are currently being backed up, the backup of the VMs are canceled to allow the restore to proceed.
- Add the VMs to an existing backup set or create a new one to ensure that the VMs are protected.
- Remove the original VMs from the backup sets to avoid unnecessary errors.
- Verify your selections, and then click the Restore button.
If you selected Production Recovery at the Destination page, then the following confirmation pop-up is displayed.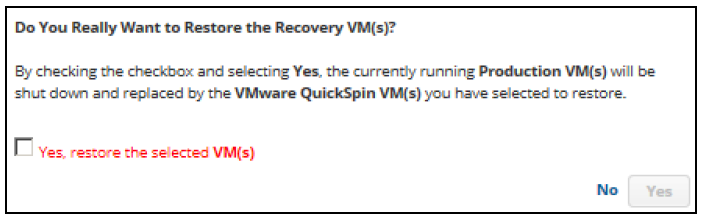
By checking the checkbox and selecting Yes, the currently running Production VM(s) are shut down and replaced by the VMware QuickSpin VMs you have selected to restore. - Click the Yes, restore the selected VM(s) check box, and then click Yes.
If you selected Sandboxed Test Recovery at the Destination page, then the following confirmation pop-up is displayed.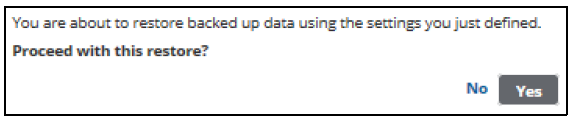
- Click Yes.
- The Restore Selections page is displayed the latest restore.