Barracuda CloudGen Firwall F380 Rev. A, F400 Rev. B, F600 Rev. C and Barracuda CloudGen WAN T400
Quick Installation Guide
For a short description on how to use the slides, see Quick Installation Guide .
Installation Guide for 1U Rack Mounts
This second quick installation guide is designed for 1U rack mounts. The packaging includes:
- 1 pair of inner slides to connect to the firewall.
- 1 pair of outer slides for installation on the frame.
2 pairs of short brackets for the front side of the outer slides.
- 1 pair of long brackets for the rear side of the outer slides.
Connect Inner Slides to Firewall
- Locate the right inner slide (the slide that will be used on the right side of the firewall when facing the front of the firewall).
- Align the four square holes on the right inner slide against the hooks on the right side of the firewall as shown below:
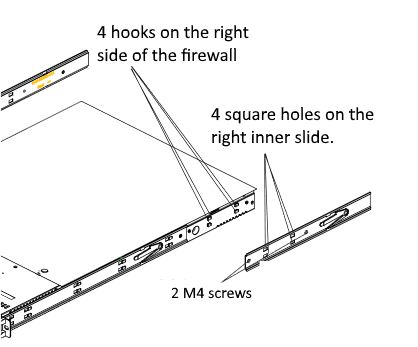
- Securely attach the slide to the right side of the firewall. Use two M4 flat head screws. Repeat the steps 1-3 for the left inner slide.
Install Outer Slides on the Frame
- Measure the distance from the front rail of the rack to the rear rail of the rack.
- Attach a short bracket to the rear side of the right outer slide.
- Attach a long bracket to the front side of the right outer slide.
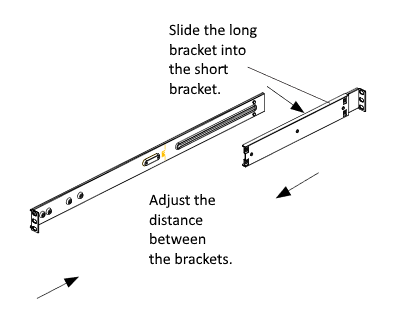
- Adjust the short and long bracket to the proper distance so that the slide fits into the frame.
- Secure the slides to the frame with screws. Repeat steps 1-4 for the outer slide.
Securing the Slide Assemblies into the Frame
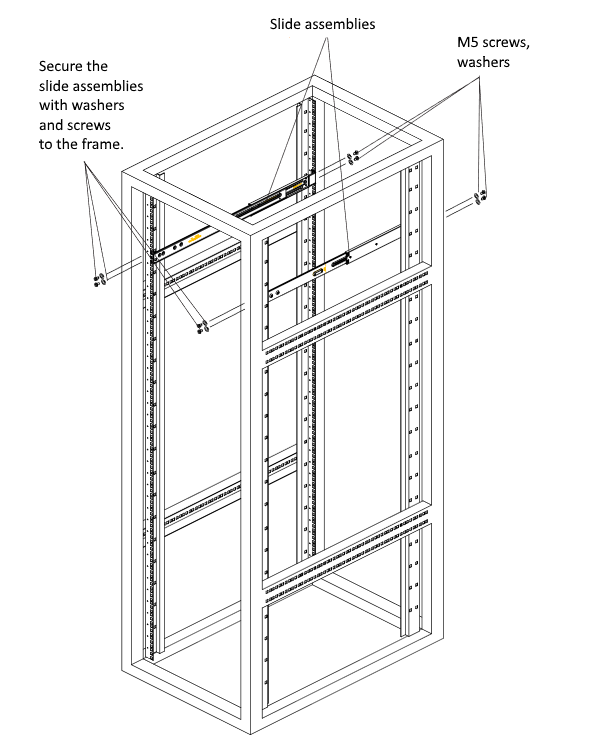
After you have installed the short and long brackets to the outer slides, you are ready to install the slide assemblies to the frame.
Use washers and M5 screws to secure the slide assemblies to the frame.
Installing the Inner Slides Into the Rack
- Push the inner slides, which are attached to the firewall, into the grooves of the outer slides that are attached to the frame as shown below:

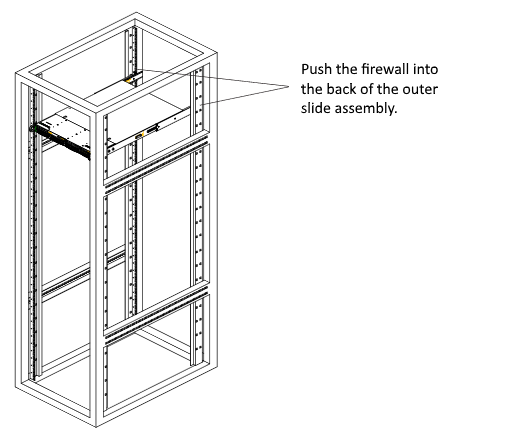
- Push the firewall all the way to the back of the outer slides as shown below: