

The alternate method of backing up Linux systems–Linux systems the Barracuda Backup Agent for Linux cannot support–and UNIX systems, is the network file-share backup via SSHFS. Prior to configuring the file share backup, ensure that SSH is enabled on the system and that the system account Barracuda Backup is to use has adequate permissions to access the shares, directories, and files it will be protecting.
Use the following steps to configure a file share backup for Linux/UNIX systems using SSHFS:
- Log in to Barracuda Backup and select the associated Barracuda Backup device in the left pane or in the devices table (for customers with multiple Barracuda Backup devices).
- Go to the Backup > Sources page, and click Add a Computer.
- Enter a computer description and enter the IP address or fully qualified domain name in the Computer name field.
- From the Computer Type drop-down menu, select Linux / Unix:
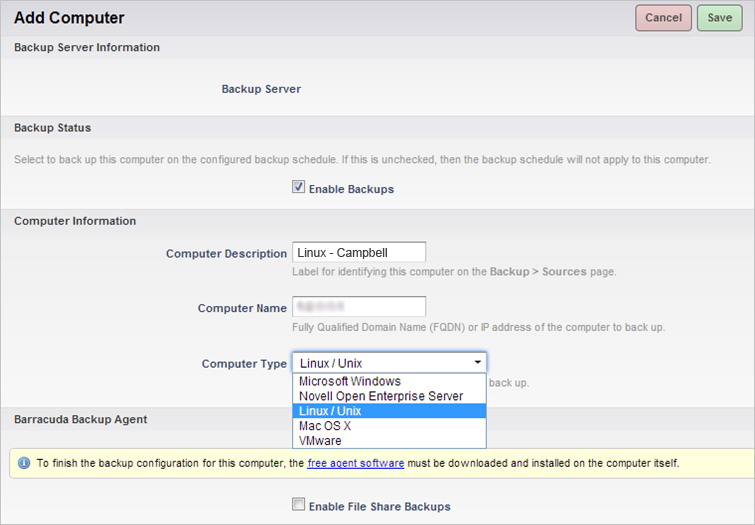
- Select Enable File Share Backups; the Linux/Unix (SSHFS) Information section displays:
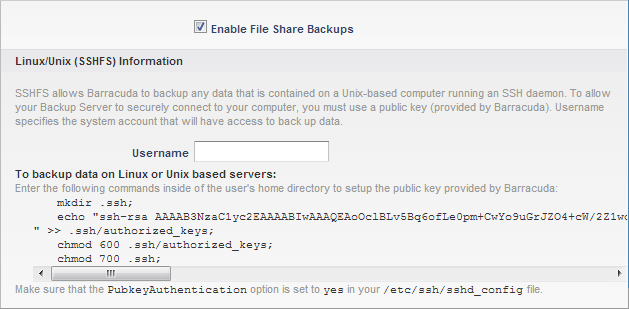
- Enter the Username for the system account that is to have access to back up data.
- In the To backup data on Linux or Unix based servers section, copy the commands to your clipboard.
- On the Linux/UNIX system, determine the location of the ssh directory, including the authorized_keys file, in the user's home directory:
- If a username different than root is used, place the ssh directory, including the authorized_keys file, in the user's home directory.
- If the root account is used, place the ssh directory, including the authorized_keys file, in the root home directory
- Log in to the Linux/UNIX system using an ssh client such as PuTTY, and paste and run the commands copied in step 7 into the appropriate directory based on step 8 to set up the public key provided by Barracuda Networks:


-
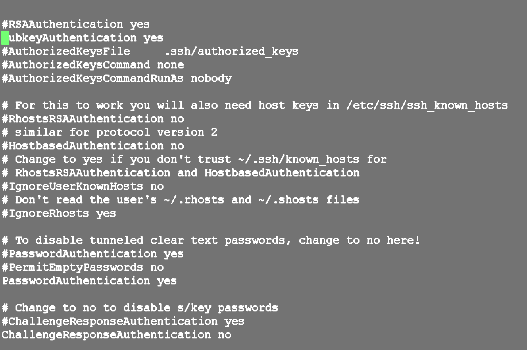
On the Linux/UNIX system, navigate to /etc/ssh and open the file sshd_config file:

- In the file sshd_config, locate the line PubkeyAuthentication yes, remove the pound sign "#":
 .
. -
Run the following command to restart sshd:
/etc/init.d/sshd restart - When the configuration is complete, click Save in the Barracuda Backup web interface. The Add Data Source page displays. Continue with Configure Linux/UNIX File Shares for Backup below.
Configure Linux/UNIX File Share for Backup
Now that the Linux/UNIX system is configured for SSHFS backup in the section above, you can begin adding specific shares to back up. You can backup at the root level and back up all child directories or connect to specific shares/directories one-by-one.
To configure Linux/UNIX file share for backup:
- On the Add Data Source page, enter a Data Description for this source/share.
- From the Data Type drop-down menu, select File Share - SSHFS.
- In the File Share Information section, enter the full path of the directory to be backed up in the Share Name field, and click Test Share; if the connection is successful, a message displays the connection status, for example, Status: Successfully connected to computer. If the connection is not successful, verify you can connect to the share with the configured username, access the system from Barracuda Backup, or that Barracuda Backup has the correct permissions to access the data.
-
If you have successfully added the share, click Save. You can continue adding shares by clicking Add Data Source for this system on the Backup > Sources page, and repeating steps 1 - 3.