

With Barracuda’s instant VMware virtual machine (VM) recovery feature, Barracuda LiveBoot, you can immediately restore a VM into your production environment by running it directly from the backup. LiveBoot instant VM recovery helps improve recovery time objectives (RTO) and minimizes disruption and downtime of production VMs. Using LiveBoot to recover a VM is like having a "temporary spare" for a VM: users remain productive while you can troubleshoot an issue with the failed VM.
When LiveBoot instant VM recovery is performed, Barracuda Backup acts as the datastore for your VMware ESXi server and the VM image is mounted to an ESXi host directly from the compressed and deduplicated backup.
By default, all changes to virtual disks that take place while the VM is running are logged to auxiliary redo logs residing on the NFS server (backup server or backup repository). These changes are discarded as soon as a restored VM is removed or merged with the original VM data when VM recovery is finalized.
To finalize instant VM recovery, you can do one of the following:
- Use Storage vMotion to quickly migrate the restored VM to the production storage without any downtime. In this case, original VM data will be pulled from the NFS datastore to the production storage and consolidated with VM changes while the VM is still running. Note that Storage vMotion is only available with select VMware licenses.
- If a Storage vMotion license is not available, the VM must be shut down first before a datastore migration can be performed, requiring a bit of downtime.
Beside disaster recovery matters, LiveBoot instant VM recovery can also be used for testing purposes. Instead of extracting VM images to production storage to perform regular DR testing, you can run a VM directly from the backup file, boot it, and make sure the VM guest OS and applications are functioning properly. To avoid networking conflicts with the production VM, you can choose to boot the VM with a disconnected network interface.
LiveBoot Instant VM Recovery
To LiveBoot a VMware virtual machine from the cloud interface:
- Log in to Barracuda Backup, go to Restore > LiveBoot, and click Add LiveBoot.
- In the Add VMs for LiveBoot dialog box, andn select the VMs you want to recover:
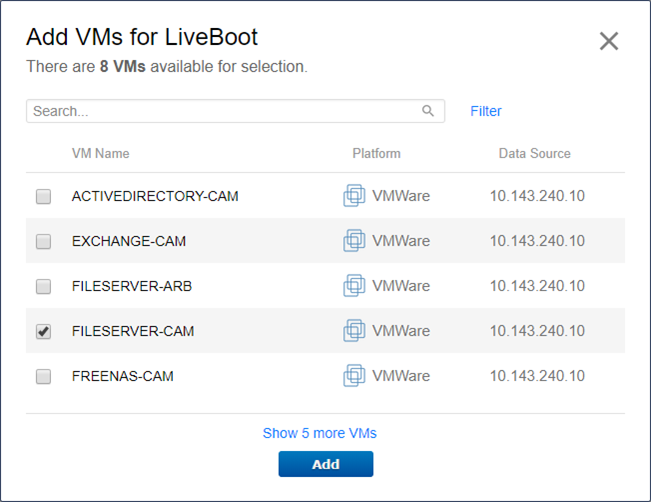
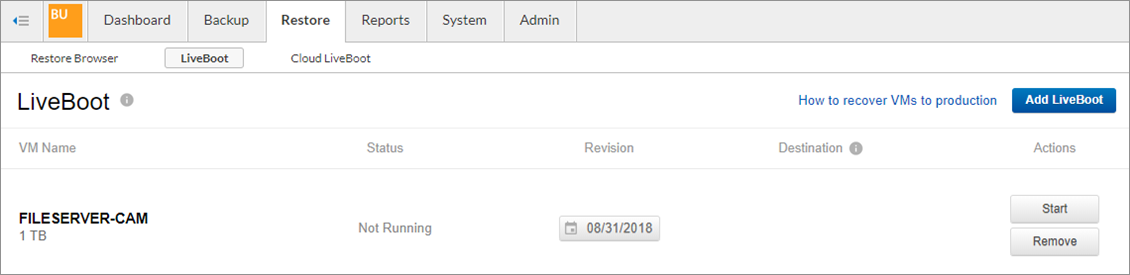
- Click Add. The selected VMs are added to the LiveBoot page. Click Start for the VM you want to restore:
- In the Start VM dialog box, configure the following:
-
Boot/restore location – this can be the original (backed up) location, an alternate location, or a new location not currently configured in Barracuda Backup.
VM name – Choose whether to keep the default <vmname>_LiveBoot name, or enter a new name.
Recovery options – Choose whether to boot the VM with network connectivity. Booting a VM without network connectivity prevents conflicts if the original VM is still running. You can also choose to customize which virtual hardware components are restored with the VM.
-
Click Boot. The VM is restored to the selected ESXi host, while using the Barracuda Backup as an NFS datastore.
If successful, the Status changes to Running on the LiveBoot page.
If LiveBoot was used as a test or you do not need to keep any changes to the running VM, click the Stop button, then click Destroy. This turns off the VM in vSphere, then permanently deletes the LiveBoot instance. If you need to keep the changes to the running VM and/or move it to production storage, continue with the section that follows.
Migrate Virtual Machine to Production
To finalize instant VM recovery, you can do one of the following:
- Use Storage vMotion to quickly migrate the restored VM to the production storage without any downtime. In this case, original VM data will be pulled from the NFS datastore to the production storage and consolidated with VM changes while the VM is still running. Please note that Storage vMotion is only available with select VMware licenses.
- If a Storage vMotion license is not available, the VM must be shutdown first before a datastore migration can be performed, requiring a bit of downtime.
Use the following steps to use vMotion to migrate the VM to a different datastore:
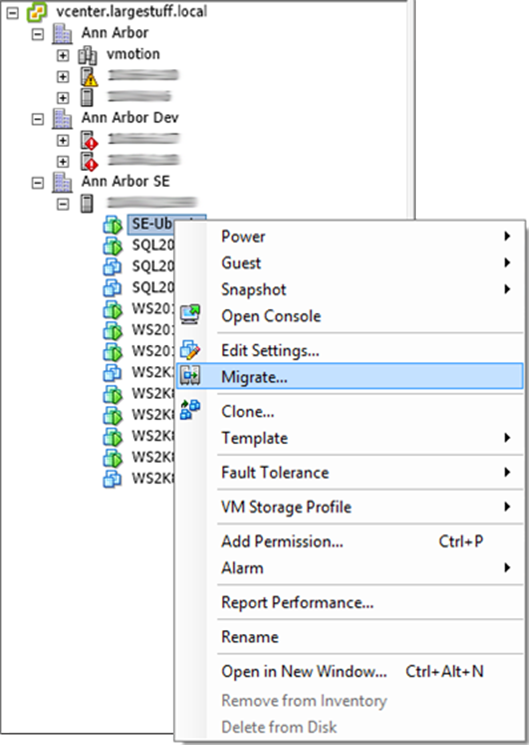
- Log in to VMware with your vSphere client.
- Right-click on the VM that was recovered using LiveBoot, and click Migrate:
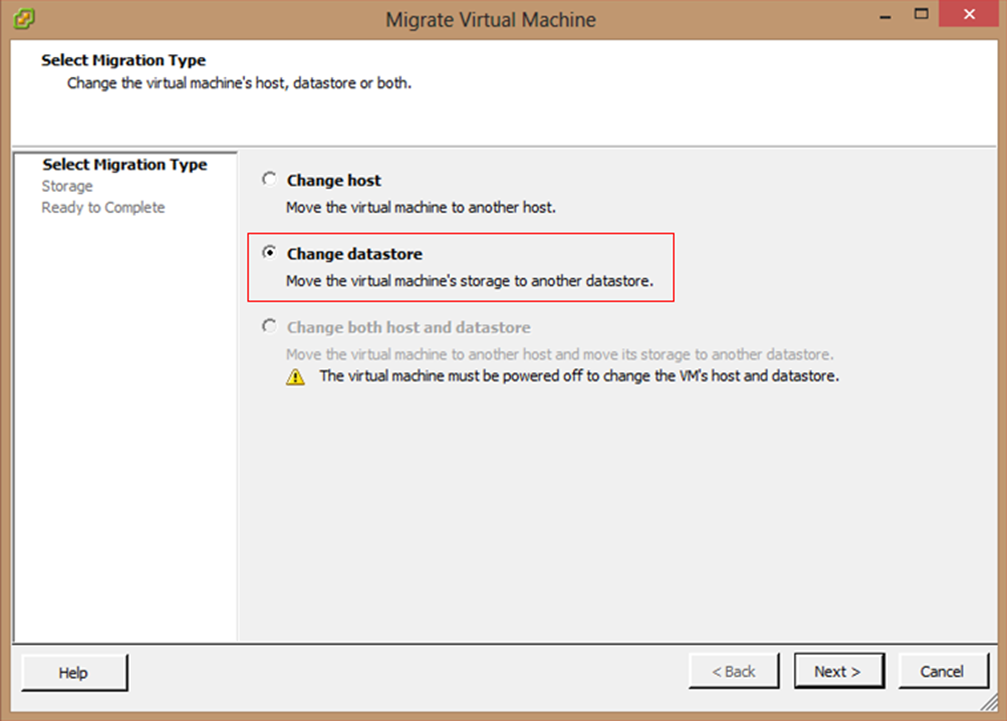
- In the Migrate Virtual Machine page, select Change datastore:
- Click Next. In the Storage page, select the destination storage:
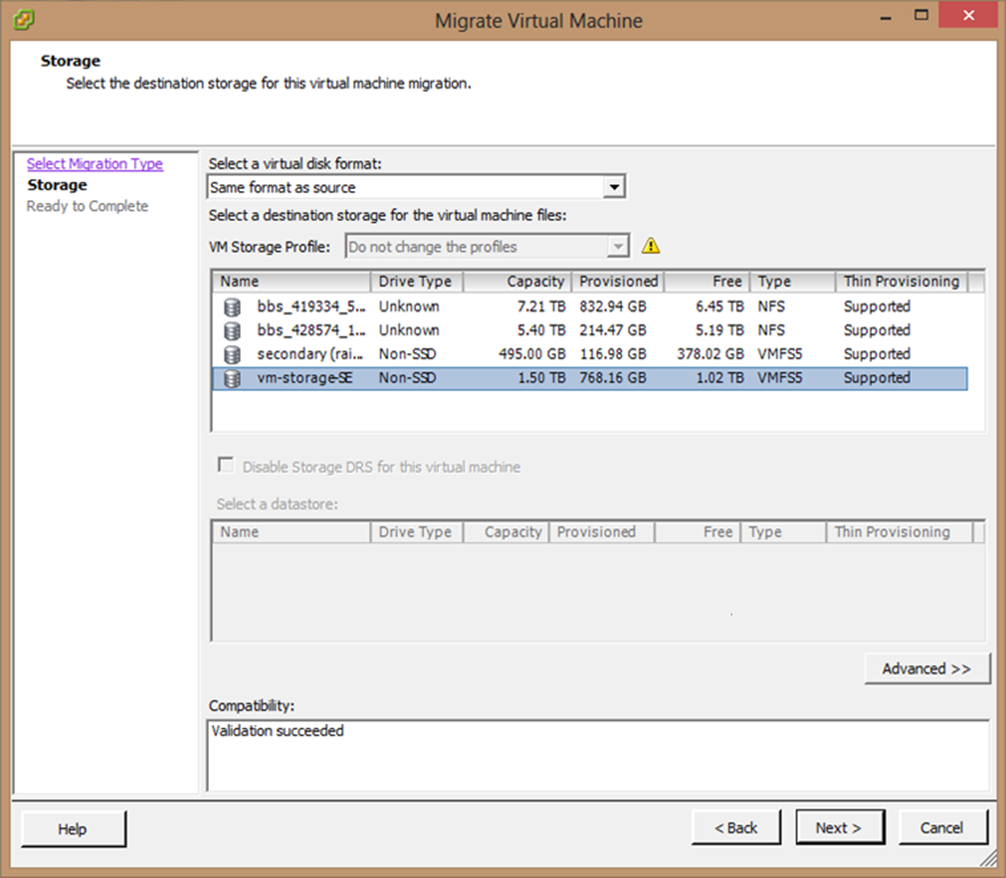
Click Next, and click Finish in the Ready to Complete page.
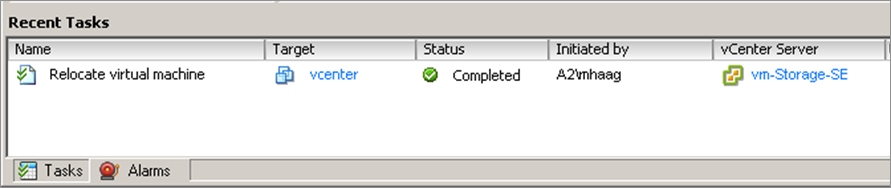
In vSphere, the Relocate virtual machine task displays under the Recent Tasks:
Click on the host where the VM was running, and click the Configuration tab.
Right-click the LiveBoot/Barracuda NFS datastore, and click Unmount.