

To ease deployment, Firewall Insights devices are available as pre-built OVA images that can be imported into your VMware Hypervisor. You do not need to create or configure a virtual machine. Before deploying the Firewall Insights device, verify that the host system meets the minimum storage requirements, and review the resource recommendations for the production system. You can deploy the firewall using either the VMware vSphere Client or the VMware OVF Tool (ovftool).
Before You Begin
- For information regarding the sizing of your CPU, disk, and RAM, see Deployment.
Before you start Firewall Insights for the first time, disconnect the network interface card.
- Download the VMware OVA image from the Barracuda Download Portal.
Use the VMware vSphere Client
- Download the OVA image for your Firewall Insights from the Barracuda Download Portal.
- Connect to your VMware Hypervisor using the vSphere Client.
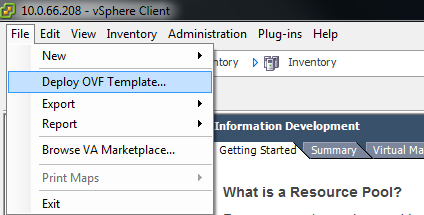
- Click File > Deploy OVF Template.
- In the deployment wizard, click Browse and select the OVA image. Click Next to proceed.
- Enter a name for the virtual machine to be created. Click Next to proceed.
- Select the resource pool where Firewall Insights will be created. Click Next to proceed.
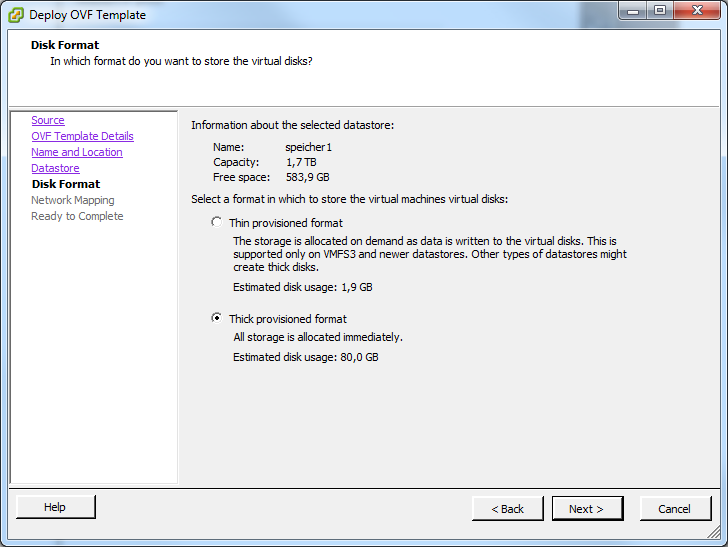
Select the data store that the Firewall Insights device should be installed on.
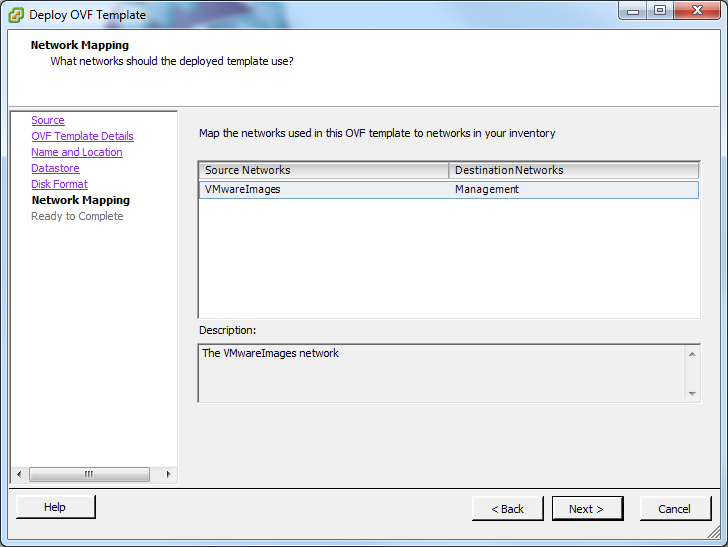
- Map to the required network in your existing inventory and then click Next to proceed.
- After the deployment wizard summarizes all your settings, click Finish to start the deployment process. After successful deployment, the Firewall Insights device is displayed in your VMware Hypervisor inventory list.
- Select the Firewall Insights device from the list on the left and click Edit Settings to disconnect the network interface card before you boot for the first time.
- Select the Firewall Insights device from the list on the left and click Edit Settings to edit settings such as Disk Provisioning with appropriate values. See Deployment.
- Continue with Next Step below.
Use the VMware OVF Tool
- Download the VMware OVF Tool from vmware.com. Use the following command:
ovftool -datastore=datastorename ovaimage vi://server-ip
Note the following:-
datastore– The name for the data store. -
ovaimage– The path and name of the OVA file. -
server-ip– The IP address for the virtual appliance.
-
- Configure the resources pool and the network mapping within the VMware virtual machine settings.
- Continue with Next Step below.
Next Step
After deploying the Firewall Insights device, continue with How to Configure Network Settings and Licensing on First Boot and Getting Started.