

Training Campaigns are specialized types of Email Campaigns that invite users to take a training course. The instructions in this section are similar to those for an Email Campaign with a few distinct differences.
Before You Begin – Training Content
Before you create the campaign, import the training content into your Security Awareness Training instance. Training content must be imported so you can associate it with your Training Campaign.
Refer to Training Content for instructions.
Create the Campaign
- Navigate to Campaigns > Campaign Manager.
- Click New.
- For the Campaign Type, select Training. The Campaign Type for a specific campaign cannot be changed later.
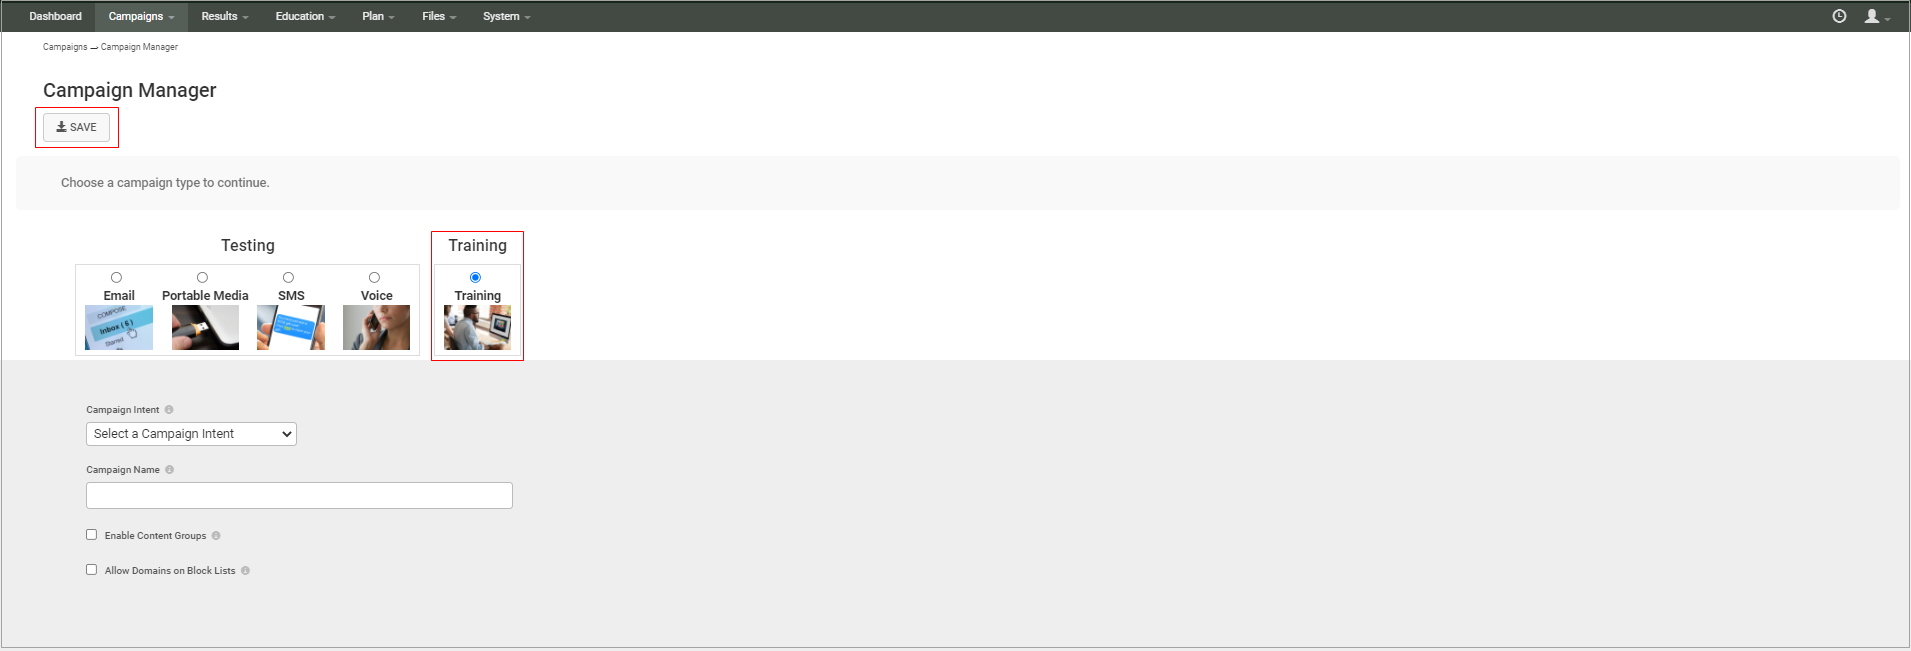
- Enter the following information. These values can be changed at any time.
Campaign Intent – The intent for Training Campaigns must be Education.
- Campaign Name – Enter a descriptive name for the campaign.
- Description – Optional. Enter text to describe the campaign.
- Enable Content Groups – Optional. Select this option if you want to use content groups in this campaign.
Allow Domains on Block List – Optional. Select this option to override settings that do not allow campaigns to run with a blocked domain in either a sending email or landing page. Note that emails from blocked domains will likely be blocked from delivery and users will likely not be able to click links to these blocked domains, so your campaign results might not be accurate with this override.
- Click Save. The page refreshes. At the top of the page, you can edit the information you entered in Step 4.
- Lifecycle Status displays Upcoming. This is a new campaign and has not yet been activated.
Set the Schedule
This information is exactly the same as a basic email campaign.
In the Scheduling section, specify the following information. The system will randomly send campaign emails in the window you define with Start and End Dates.
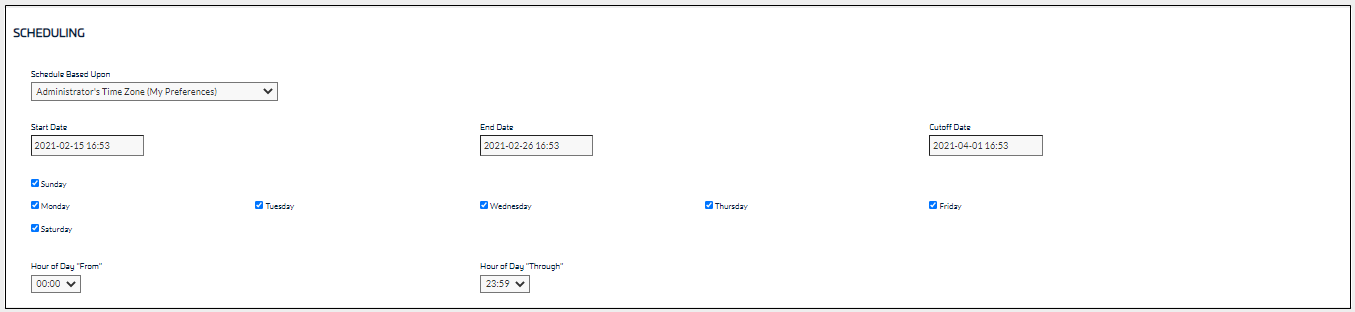
- Schedule Based Upon – Select the time zone for which you want to base the campaign schedule.
- Administrator's Time Zone – Use the time zone you set in My Preferences under the profile icon
 .
. - Target's Time Zone – Use the time zone for the target's location, as specified in the Address Book.
- Administrator's Time Zone – Use the time zone you set in My Preferences under the profile icon
- Start Date – Select a date and time on which to start the campaign.
- End Date – Select a date and time on which to end the campaign, up to one year after the Start Date. Late messages (messages sent out after their scheduled time) can be sent up until the Cutoff Date.
- Cutoff Date – Select a date and time when results will no longer be collected for reporting. To ensure that you receive all of the results reporting, specify the Cutoff Date to be after the End Date. Having time between the End Date and Cutoff Date provides a cushion to account for factors that might delay a target's interacting with an email, like weekends and vacations.
- Days of the Week – Select one or more days of the week on which to send campaign emails.
- Hour of Day "From", Hour of Day "Through" – Select a time range during which you want to send campaign messages.
Specify Targets
In the Targets section, specify the following information:
- Emails to Send – Enter the number of emails you want to send in this campaign. The actual number of emails will not exceed the number of matching Address Book entries – in other words, each email address receives no more than one email from each campaign. If you specify fewer Emails to Send than the number of matching email addresses, the system will randomly select email addresses to receive the emails.
Example: There are 50 matching email address entries. If you specify 50 emails to send, each address will receive an email. If you specify 20 emails to send, 20 of the email addresses will be randomly selected to receive the email.- Set to X Matching Email Address Entries – Click this shortcut button to set the Emails to Send based on the number of matching email address entries from your selected Address Books with Advanced Filters applied.
- Use Address Book Groups – Optional. Select to use a single Address Book Group, rather than specifying a large number of individual address books. Then select the specific Address Book Group below. For additional information about Address Book Groups, refer to How to Create an Address Book.
- Select Address Books – Select one or more Address Books to include in the campaign. Click the magnifying glass to view the number of entries of an Address Book and to edit it.
- Show Advanced Filters – Click to display optional hidden filters.
Advanced Filters are used to determine which addresses in an Address Book to use as targets for the campaign. These same fields are also present in Address Books. Entering information in these fields in the campaign filters Address Book entries based on these criteria. So you can decide to send only to employees of a certain company, at a certain site, and at a certain organization level – like sending email only to Barracuda Networks employees at the Campbell, California office who are at the Director level.
Note that Advanced Filter fields do not support Boolean search terms.- Start/End Hire Date – Date range for hire date of recipients. Used, for example, to train new hires or to refresh users of a certain level of seniority.
- Organization Area – Part of the organization, like department or division, corresponding to the email address entry.
- Organization Level – Title or management level corresponding to the email address entry.
- Organization Tenure – How long the person has been with the organization. Can be a numerical or alphabetical entry.
- Company – Name of the organization corresponding to the email address entry.
- Country – Geographic country corresponding to the email address entry.
- Region – Geographic region where the email address is located, like EMEA or Northeast.
- Site/Location – Descriptor for the location of the email address, like Manufacturing or Downtown Branch.
- State – Geographic state corresponding to the email address entry.
- Source – The source of the email address. This field can be an Open Source Intelligence source or perhaps data from human resources or a response from a certain marketing campaign.
- Program Term Group – Automatically displays user level for contact selection.
- Employment Type – Descriptions of employment, like Exempt, Non-Exempt, Seasonal, Temporary, and so on.
- Cost Center – Unit within the organization where costs related to the email address entry are charged.
- Custom Fields – Enter any information you know to be in one of the custom fields in an Address Book.
- Start/End Hire Date – Date range for hire date of recipients. Used, for example, to train new hires or to refresh users of a certain level of seniority.
- Enforce Template Uniqueness – Select this checkbox to ensure that these email addresses have never received the email template you are about to specify.
Specify the Content
- In the Content section, click Add New Email Template. In the dialog box, click Yes to save the current campaign and add the email template. The Content Center displays available email templates.
Review the available templates to find the one you want to use in your campaign. You can optionally click Create Email Template at the top of the page to create a new template.
- Click the magnifying glass
 for the template you select.
 - Select the appropriate action. Available actions depend on whether the content has already been imported into your Security Awareness Training instance.
Note: You must edit the email template to link to the correct training content. Editing the template is described in the next section, Customize the Email Template. Consider just copying/importing the template now, then customizing it when you get to the next section.- If the content is already imported into your Security Awareness Training instance, the following actions are available.
- Copy and Add to My Recent Campaign – Duplicates the template and associates it with the most recently accessed campaign. Following the steps in this article, that is the campaign you just created.
- Copy and Edit – Duplicates the template and opens the editor so you can customize the template. Note that this option does not associate the template with your campaign.
- Add to My Recent Campaign – Associates the template with the most recently accessed campaign. Following the steps in this article, that is the campaign you just created.
- Edit – Opens the editor so you can customize the template. Note that this option does not associate the template with your campaign.
- If the content is not already imported into your Security Awareness Training instance, the following actions are available:
- Import and Add to My Recent Campaign – Adds the content to your instance and associates it with most recently accessed campaign. Following the steps in this article, that is the campaign you just created.
- Import and Edit – Adds the content to your instance and opens the editor so you can customize the template.
- If the content is already imported into your Security Awareness Training instance, the following actions are available.
- To specify additional templates, click Return to Content Center. Repeat Step 3 to add more templates. If you add multiple templates, Security Awareness Training will randomly assign a template to each email address selected when you generate the campaign.
To continue creating your campaign, click Go to My Recent Campaign. If needed, you can also click Back to Recent Campaign in the upper-right corner of the Content Center page. - Back in the Content section of your campaign, click Add New Email Account for Sending.
- If you add multiple email addresses here, Security Awareness Training will randomly assign a sender email address to each contact email address selected when you generate the campaign.
- To optionally specify additional sending email addresses, contact Barracuda Networks Technical Support.
- Select an Email Account Name from the list that will be the sender of your outbound campaign emails.
- Select an Email Server Domain from the list that will be the domain of the sender of your outbound campaign emails.
Customize the Email Template
- Remaining in the Content section, click the pencil icon
 to edit the email template you selected. If you have more than one email template, repeat the steps in this section for each template.
 - Edit the template, as described in Email Templates. Editing the Message section is essential to the training campaign and is described in the following steps.
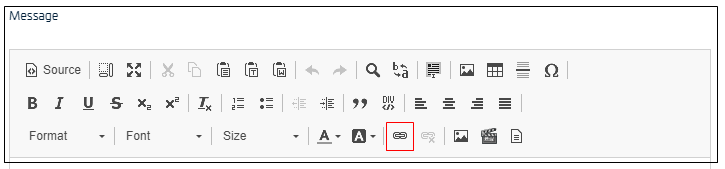
- When you edit the email template, scroll down to the Message section. Edit the Message, customizing it for your organization.
- Create a link to the training content, either by selecting an existing button or text to point to the training content or by creating new text. Be sure to select the content that will
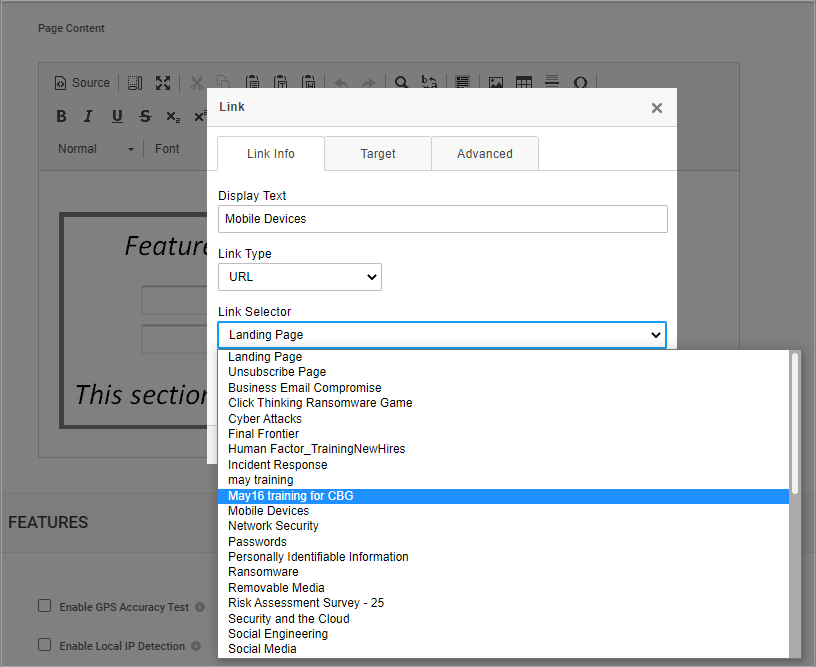
- In the Message section toolbar, click the link icon.
- In the Link window:
- Confirm that the Display Text is the text you created or selected in Step 2 above.
- Select the Link Type of URL.
- In the Link Selector, select the training content you want to use for this campaign. This is the training you worked with in Training Content earlier.
If you do not see the training content you want to use, make sure you imported it into your campaign.
- Optionally, change the settings on the Target and Advanced tabs.
- Click OK.
- When you have finished editing the email template, click Save at the top of the page.
- In the upper right corner of the page, click Return to Recent Campaign.
Training Reminders
You can choose to send reminder emails to individuals who have not yet completed the training for this campaign. For example, you might want to use more urgent language in this template, to encourage these users to take action.
Alternatively, you can send reminders on an ad hoc basis. Specify a training template here if you want to use it for the ad hoc reminders. Refer to Approving a Training Campaign, Going Live, and Sending Reminders for details.
To enable training reminders:
- Select the Reminders On checkbox. This option must be selected for training reminders to be sent.
- Specify the following settings:
- Reminder Frequency – Select how often you want the email reminders to be sent, after each user receives their initial training campaign email. (Example: selecting 5 days means a reminder will be sent every 5 days.) Reminders will be sent to users either until they complete the training or until the campaign cut-off date.
- Reminder Send Hour – Select the approximate time of day you want to send reminder emails. Emails are only sent on the days you specify in the Schedule section above.
- Optionally, select or create an email template to send as the training reminder.
You can select only one template for the training reminder. If you select multiple templates, the system will use the last one you select.
You can change the training reminder template before the campaign goes live.- Click Add New Training Reminder Template. In the dialog box, click Yes to save the current campaign and add the email template. The Content Center displays available email templates.
Review the available templates to find the one you want to use as a training reminder. You can optionally click Create Email Template at the top of the page to create a new template.
- Click the magnifying glass for the template you select.
- Select the appropriate action. Available actions depend on whether the content has already been imported into your instance of Security Awareness Training.
Note: You must edit the email template to include the training content. Editing the template is described in the Customize the Email Template section above. Consider copying/importing the template now, then customizing it when you get to the next section.
- If the content is already imported into your instance of Security Awareness Training, the following actions are available.
- Copy and Add as Training Reminder Template – Duplicates the template and associates it with the current campaign. Click Go to My Recent Campaign to return to the campaign. Alternatively, click Edit New Email Template to edit the template immediately, or click Close to remain in the Content Center.
- Add as Training Reminder Template – Associates this template with the current campaign. Click Go to My Recent Campaign to return to the campaign. Alternatively, click Edit New Email Template to edit the template immediately, or click Close to remain in the Content Center.
- Edit Now – Opens the editor so you can customize the template. Note that this option does not associate the template with your campaign. After you edit the template, click Save, then click Back to Recent Campaign.
- If the content is not already imported into your instance of Security Awareness Training, the following actions are available:
- Import and Add to My Recent Campaign – Adds the content to your instance and associates it with most recently accessed campaign. Following the steps in this article, that is the campaign you just created.
- Import Now – Adds the content to your instance. Click Edit New Email Template to edit the template immediately. Alternately, return to the recent campaign without editing or return to the Content Center.
- If the content is already imported into your instance of Security Awareness Training, the following actions are available.
Specify Approval Comments
If the Approval Required box is selected, this campaign must be approved before you can Go Live with the campaign. If you choose, you can enter comments to the reviewer in the Approval Comments box.
Specify Advanced Settings
- Optional. Select the Hide Campaign Results box to hide the results from view. The results will still be collected. You might choose to use this setting when a campaign is past its cutoff date, so only current campaigns display in the results.
- Optional. Select an image to associate with this campaign. Click Browse to select the image.
Save the Campaign
When you have completed all of the required actions above, click Save to save the campaign. The page refreshes.
Generate the Campaign
Under General Settings, in the Stage area, click Generate  . Click Yes when prompted. The campaign generates.
The generation process can take several minutes. You can move away from the screen or even log out without interrupting the generation process.
Continue with the next step, Approving a Training Campaign, Going Live, and Sending Reminders.