

Installing the Barracuda Firewall Policy Manager follows the same procedure as performing firmware updates and is done in Barracuda Firewall Admin. Download the Firewall Policy Manager installation file from the Barracuda Networks download portal and install it on a dedicated CloudGen Firewall. In order to assign users that should have administrative rights to create and manage applications and rules on the Firewall Policy Manager, configure LDAP authentication.
System Requirements
- Windows Vista, Windows 7, Windows 8/8.1, or Windows 10
- 8 GB RAM
- 4 CPU cores
- 256 GB SSD storage
Download and Install the Firewall Policy Manager
Step 1. Download the Installation File from the Barracuda Download Portal
- Go to the Barracuda Networks download portal and download the Barracuda Firewall Policy Manager. For more information, see How to Download Applications, Updates, and Hotfixes.
Step 2. Install the Firewall Policy Manager
- Log into the CloudGen Firewall.
- Go to Control > Box.
- In the left menu, expand the Operating System section and click Install Update.
- Select the FPM package and upload it. For mor information, see How to Manually Install Updates via Barracuda Firewall Admin in the CloudGen Firewall documentation.
- Reboot the CloudGen Firewall.
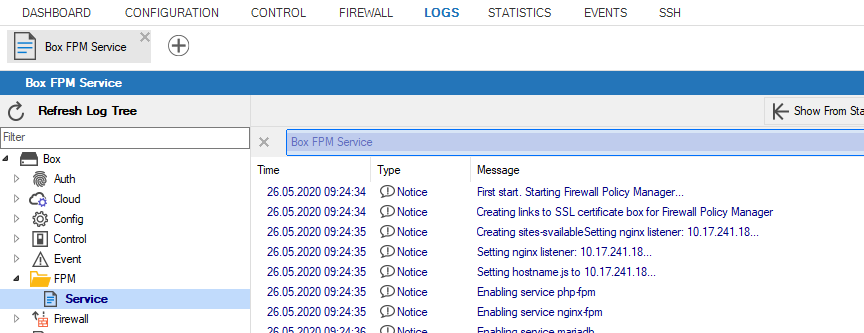
You can check the logs to verify that all services are running. Click the LOGS tab and browse to the FPM folder.
Step 3. Configure Network Settings
On the CloudGen Firewall, check and configure DNS and time settings and set up email notifications for the Firewall Policy Manager.
- Go to Box > Administrative Settings.
- In the left menu, select DNS Settings.
- Verify that a DNS server is configured. For more information, see How to Configure DNS Settings.
- In the left menu, select Time Settings/NTP.
- Check the NTP settings and verify that Time Server IP or Name is configured. For more information, see How to Configure Time Server (NTP) Settings.
- In the left menu, select Notifications.
- Configure the CloudGen Firewall to send email notifications. For more information, see How to Configure System Email Notifications.
Step 4. Configure LDAP Authentication
Configure authentication settings
- Go to CONFIGURATION > Configuration Tree > Box > Infrastructure Services > Authentication Service.
- In the left navigation pane, select LDAP Authentication.
- Click Lock.
- Enable LDAP as external directory service.
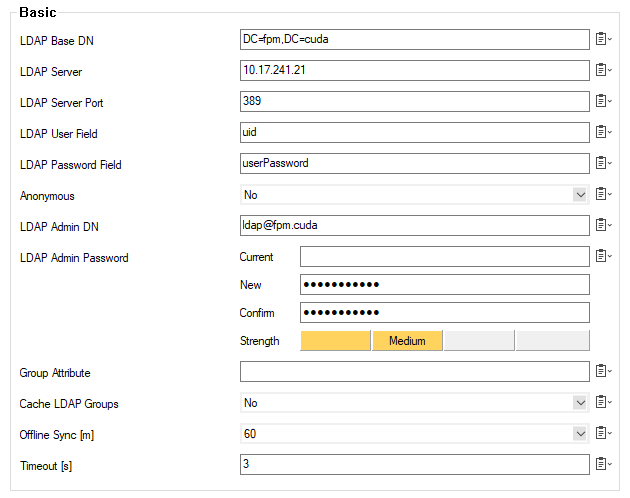
- In the Basic table, add an entry for the Base DN.
- In the LDAP Base DN field, enter the Distinguished Name for the Firewall Policy Manager.
- Enter the LDAP Server IP address and LDAP Server Port (default: port
389). - In LDAP User / Password Field, enter the name of the user identification and the password attribute in the LDAP directory. For more information on LDAP settings, see How to Configure LDAP Authentication.
- Cick Send Changes and Activate.
Access the Firewall Policy Manager
- Open a web browser.
- Go to
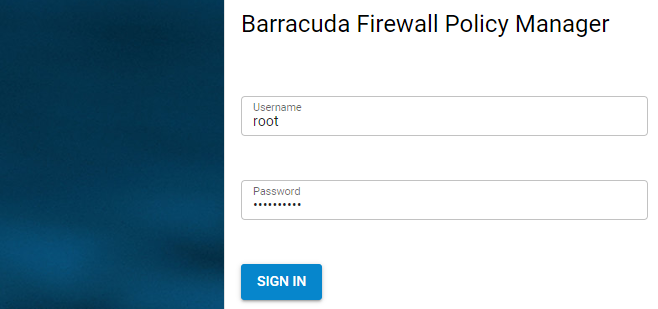
https://<management IP address of your CloudGenFirewall> - Log in with the following credentials:
- Username:
root - Password: Enter your password.
- Username:
- Click Sign In.
The Firewall Policy Manager web interface dashboard opens, showing the Applications page. For a detailed description of tabs and settings, see Firewall Policy Manager Web Interface.
Next Steps
Get started with the Firewall Policy Manager. Assign administrative user groups, link your asset management database, and configure IPS (Intrusion Prevention System). For more information, see Get Started.