

The Firewall Policy Manager web interface lets you access and manage your applications and rules through a modern web browser. To access the Firewall Policy Manager, open a web browser and go to https://<management IP address of your Firewall Policy Manager>.
Information on the Firewall Policy Manager web interface is arranged in the following tabs:
- Applications – The Applications tab provides an overview of all configured applications and allows administrators to create and process applications using the Firewall Policy Manager ticketing system.
- Rules – The Rules tab displays all created rules and their assigned status in a listed view. From here, administrators can create and process firewall rules using the Firewall Policy Manager ticketing system.
- Dependencies – The Dependencies tab shows all firewalls that currently have rules applied and gives information on how firewalls, rules, and applications interact with each other. Expand and filtering functions provide a detailed view on all entries' network dependencies.
Advanced Tab – The Advanced tab lets administrators manage advanced settings such as user groups, Intrusion Prevention System (IPS) policies, Control Center assignment, and backups. Rules with status "Queued" are also listed in this section.
Applications Tab
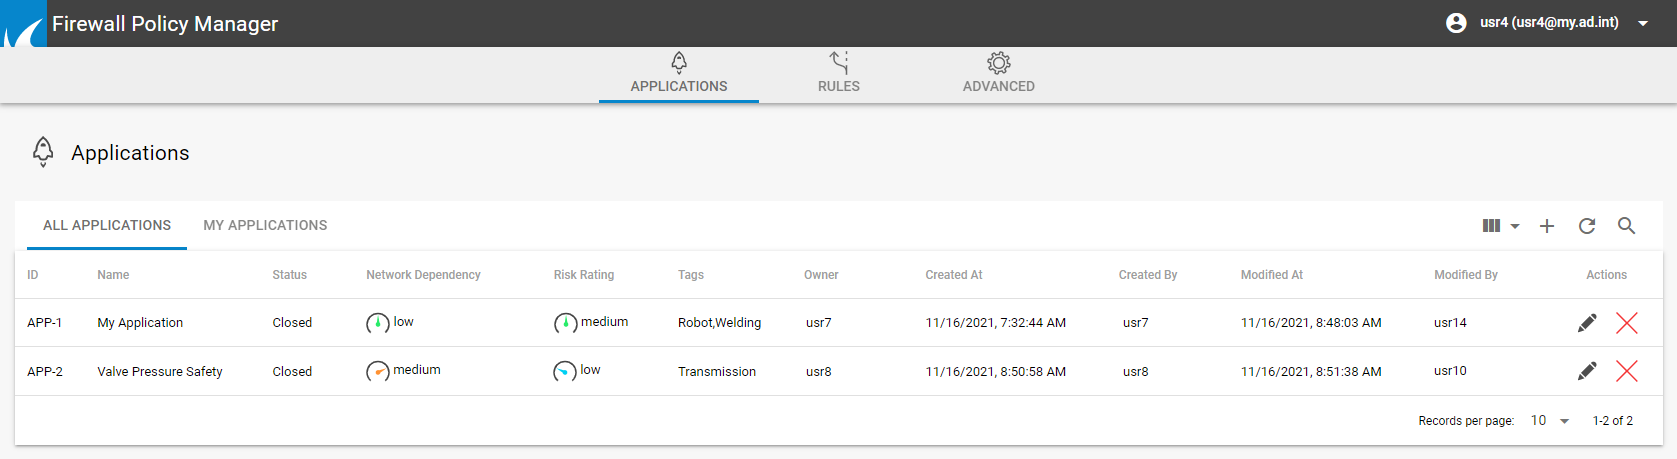
The information displayed on the Applications page is listed in the following columns if available and configured:
- ID – Displays the unique identification number of the application.
- Name – Displays the name of the application.
- Status – Displays the application status. There are five options available for the status:
- Open – The application is created and can be assigned for approval.
- Assigned to – The application is assigned to an administrator for approval.
- Approved by –The application has been approved by an administrator.
- Queued – The application is waiting for assignment to a Control Center.
- Closed – The application is closed and can be assigned to a rule.
- Rejected –The application has been rejected and cannot be assigned to a rule.
- Network Dependency – Shows the network dependency of the application.
- Risk Rating – Displays the risk rating of the application.
- Tags – Displays the operating environment the application belongs to.
- Owner – Displays the administrator who is the owner of the application.
- Created / Modified – Displays the time the application was created or modified and the administrator who created the entry.
- Actions – The actions that can be performed to the application.
- To access detailed information on an application in the list, click the edit icon (
 ) on the right of an entry.
 - To delete an application from the list, click the delete icon (
 ).
).
- To access detailed information on an application in the list, click the edit icon (
To access or hide details, click the columns icon (![]() ) and select the applicable settings.
) and select the applicable settings.
For more information, see: How to Create Applications.
Rules Tab
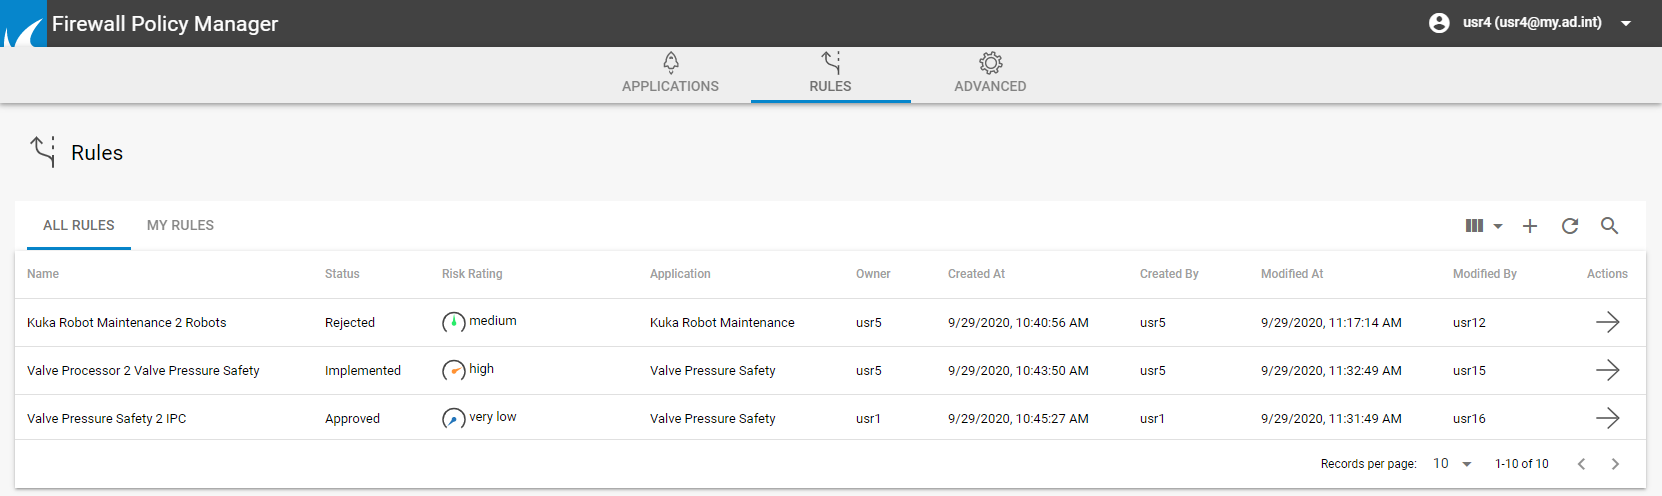
The information displayed on the Rules page is listed in the following columns if available and configured:
- ID – Displays the unique identification number of the rule.
- Name – Displays the name of the rule.
- Status – Displays the rule status. There are five options available for the status:
- Open – The rule is created and can be assigned for approval.
- Assigned to – The rule is assigned to an administrator for approval.
- Approved by –The rule has been approved by an administrator.
- Closed – The rule is approved and can be used on firewalls.
- Rejected –The rule has been rejected and cannot be used.
- Risk Rating – Displays the risk rating of the rule.
- Application – Displays the application the rule has been assigned to.
- Owner – Displays the administrator who is the owner of the rule.
- Created / Modified – Displays the time the rule was created or modified and the administrator who created the entry.
- Actions – The actions that can be performed to the rule.
- To access detailed information on a rule in the list, click the edit icon () on the right of an entry.
- To delete a rule, click the delete icon ().
- To access detailed information on a rule in the list, click the edit icon (
To access or hide details, click the columns icon (![]() ) and select the applicable settings.
) and select the applicable settings.
For more information, see: How to Create Rules.
Dependencies Tab
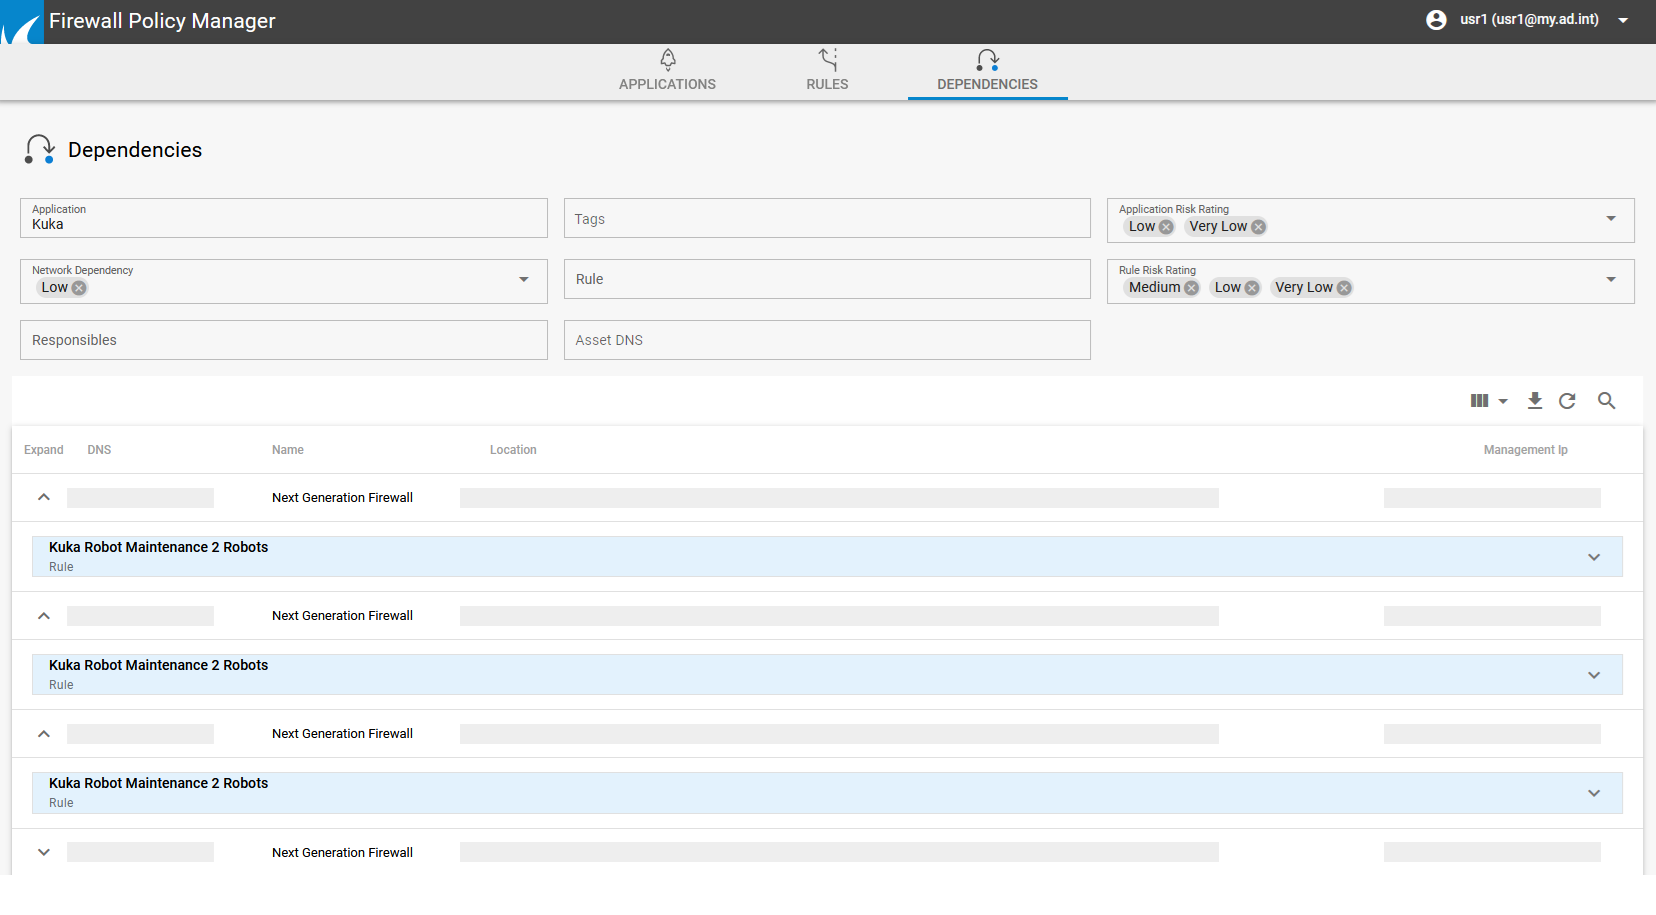
The Dependencies tab merely serves informational purposes and lists all firewalls that currently have rules applied. Expand a list entry to view the rules, applications, and users associated with a firewall. Click on a detail to access further information in the dependency tree.
The default columns displayed on the Dependencies page, provide the following information:
- Expand – Offers an expand option for information in the lower section of the window.
- DNS – Displays the DNS server name of the CloudGen Firewall.
- Name – Displays the name of the CloudGen Firewall.
- Location – Displays the location of the CloudGen Firewall.
- Management IP – Displays the management IP address of the CloudGen Firewall.
To access further details, click the columns icon (![]() ) and select the applicable settings.
) and select the applicable settings.
Managing Policy Information
To filter a list according to specific criteria (such as status, risk rating, or dependency), click the search icon (![]() ) on the top right of the column field and enter the criteria you want to search for. To reset the list entry view, click the refresh icon (
) on the top right of the column field and enter the criteria you want to search for. To reset the list entry view, click the refresh icon (![]() ). On the Applications and Rules page, click My Applications/My Rules on the top left of the column field to display only entries created by the logged-in user.
). On the Applications and Rules page, click My Applications/My Rules on the top left of the column field to display only entries created by the logged-in user.
Actions
The following actions can be performed to the application.
- Clicking the edit icon () on the right of an entry in a list opens the details window where you can view additional information on the application, rule, or dependency.
- To delete an entry from the list, click the delete icon ().
Advanced Tab
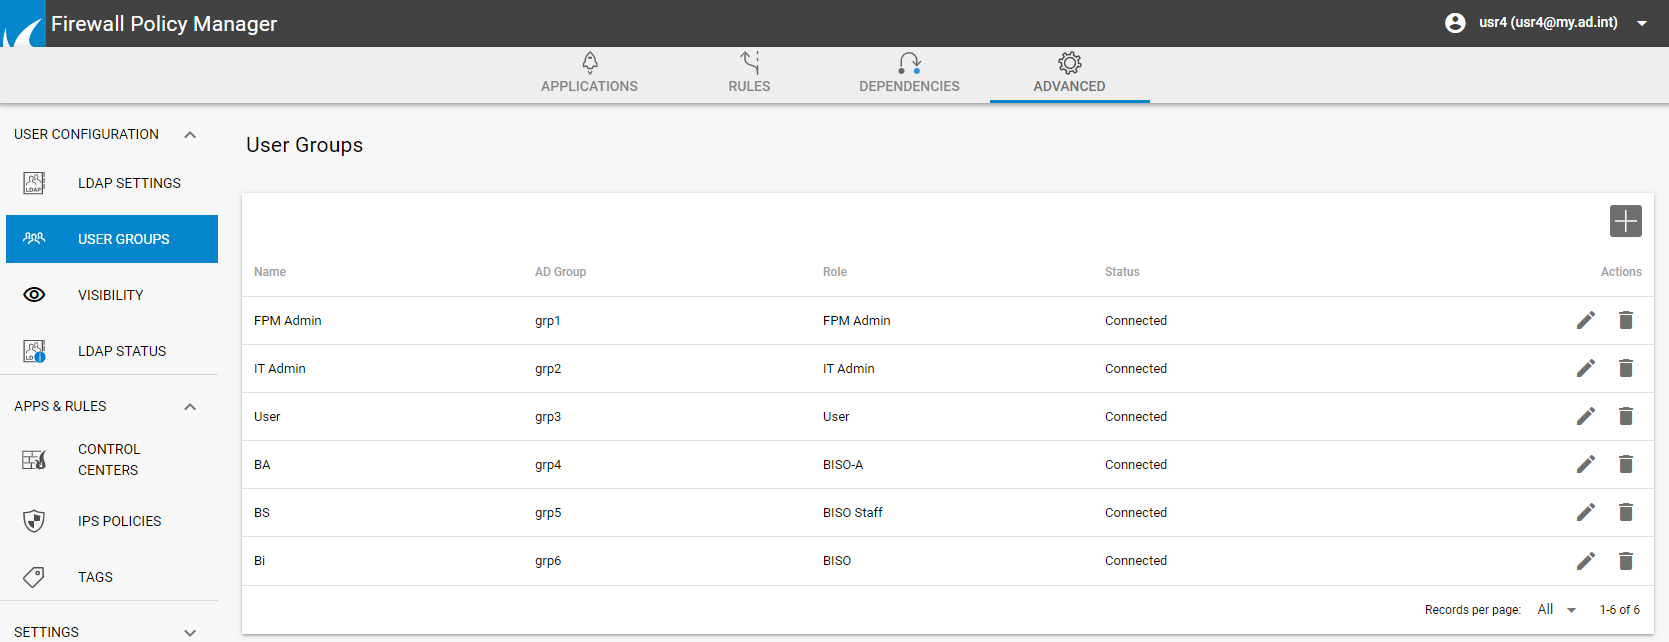
The menu displayed on the Advanced page provides the following settings:
- User Configuration – Lets administrators configure user groups and LDAP authentication.
- Apps & Rules – Lets administrators add Control Centers and define operational environments for selection within rules. Allows management of Intrusion Prevention System (IPS) policies.
- Settings – Allows specification of an SMB path to a backup server, provides backup functionalities, and allows export of configuration entities. Allows configuration of session idle time and HTTPS certificate management.
- System – Provides information on rules with status "Queued" and shows the configuration history. Allows configuration of asset management settings and lets administrators create filters for different firewall models.
For more information, see: Advanced Settings.
Customizing Interface Settings
To configure the display for the Firewall Policy Manager, customize the web interface settings according to your requirements.
- On the top right of the Firewall Policy Manager window, click on the username to expand the settings menu.
- Select Settings. The interface settings window opens.

- Customize the following settings:
- Choose the Language.
- Select which tab should open as the web interface Default page.
- Enable Adjustable column size for better flexibility when navigating through records.
- To enable filtering for your user's entries, enable My records filter.
- Enable Notifications to be displayed on the interface.
Changes made on the settings page are saved automatically.
Logging Off
To log out of the Firewall Policy Manager,
- Click on the username on the top right of the Firewall Policy Manager window.
- Expand the username menu and select Logout.
