

The Barracuda Firewall Policy Manager lets administrators with appropriate permissions create applications that can then be assigned to firewall rules. Creating an application is done in the Applications configuration. Application entries can be edited and changed at any time. When adding an application, an application owner group is automatically created in the background, so that the owner of the application belongs to the group. In order to give other administrators read and write access to entries created by this user, they can also be added to the group.
Create an Application
Create an application and assign users that should be member of the owner group.
- Log into the Barracuda Firewall Policy Manager.
- Click the Applications tab.
- On the top right, click + to add an application. The Create Application window opens.
- Define the following settings:
- Name – Enter a descriptive name for the application.
- Tags – Select the operational environment the application belongs to. This can be configured in the Apps & Rules section. For more information, see Advanced Settings.
- Manager – Select the administrative user who should be responsible for the application.
- Technical Contact – Select one or more alias administrators that should have access to the application entry.
- Department (optional) – Enter a cost center for the application.
- Description – Enter an optional description.
- Network Dependency – Define the network dependency of the application based on criteria depending on the rules it should apply to, rated from High to Low.
- Risk Rating – Assess the risk of the application based on criteria depending on the network dependency, rated from Critical (highest risk) to Very Low (lowest).
- IP – Enter the IP address of the application.
- Protocol – Select the protocol(s) used by the application. You can select TCP, UDP, or TCP/UDP.
- Port – Enter the port the application listens on.
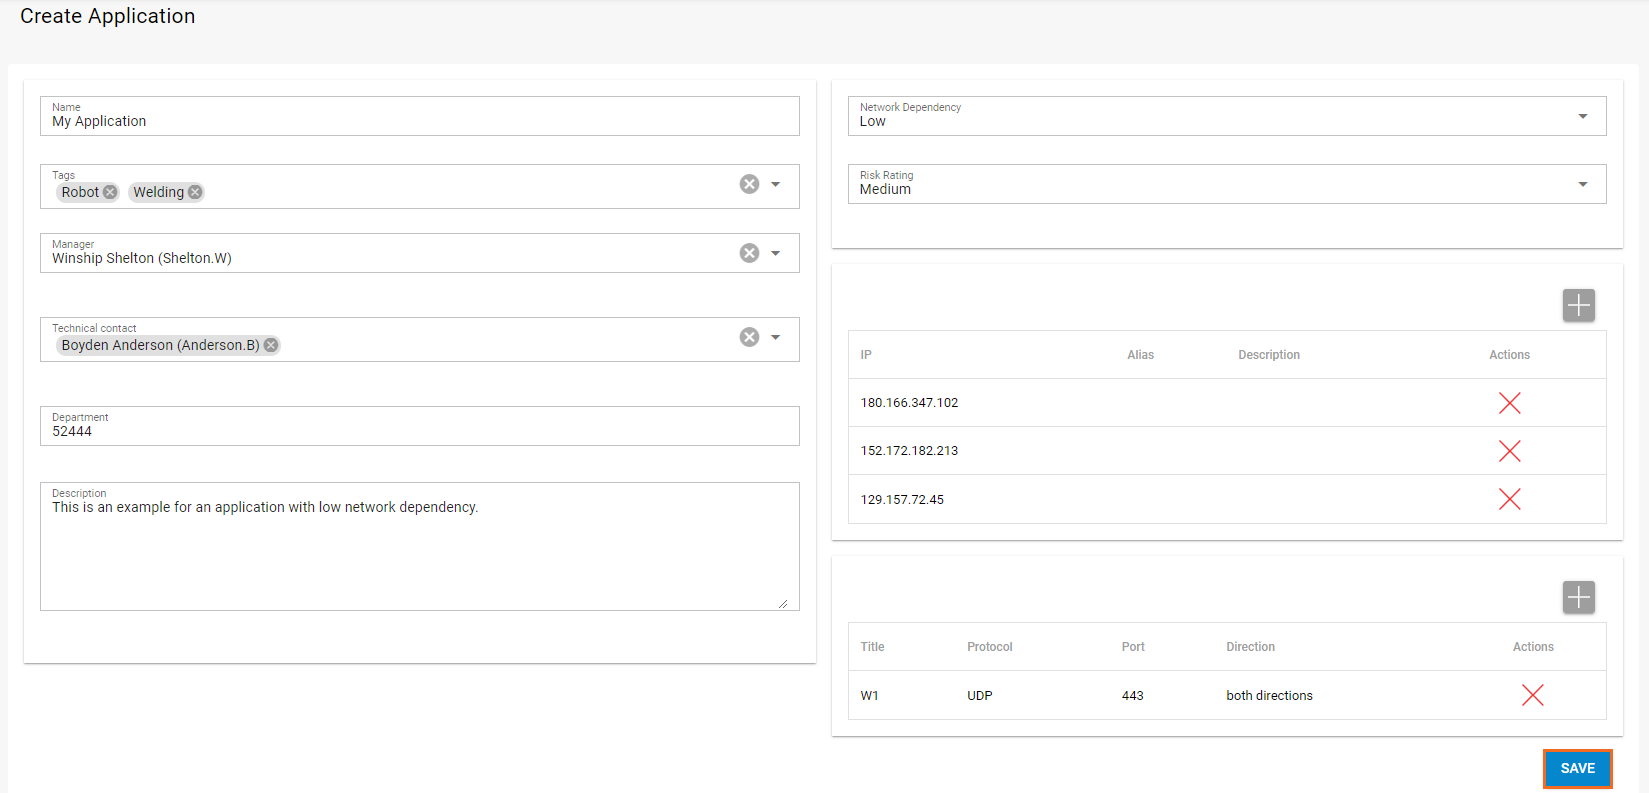
- Click Save to save your configuration
After completing these steps, the application is listed under Applications with the status "Open".

The application owner can now assign the ticket to the next instance for review. To access the settings, click the edit icon (![]() ) on the right of an application entry in the list. To request approval for the application, expand the status (Open) on the top right of the window and select Request.
) on the right of an application entry in the list. To request approval for the application, expand the status (Open) on the top right of the window and select Request.

The application status now changes to Assigned <Assignee>.

A user with appropriate permissions can now change the status to Approved or Rejected or return the ticket.

For more information on the processing of rules, see Application and Rules Assignment.
Customizing Application Details
When editing an application, a new sidebar becomes available, offering a settings menu that allows further customization of the ticket. Here, users with appropriate permissions can change details, add comments and attachments, and view the ticket history. To access the settings, click the edit icon (![]() ) on the right of an application entry in the list.
) on the right of an application entry in the list.
The following settings are available:
Details
Here, administrators with appropriate permissions can modify the information that has been added when the ticket was created. The mask looks the same as the Create Application window.
To request approval for an application, expand the status on the top right of the window and select the action to be performed.
Comments
This section allows you to add comments to an application during the ticketing process. To add a comment, click Comment.

To add a comment, click + the top right of the window, enter your comment, and click Save. To request approval for a comment, expand the status and select the action to be performed.
Attachments
Here, administrators with appropriate permissions can upload attachments to the ticket.

To add an attachment, click + the top right of the window and locate the file you wish to add to the application. To upload the file, click the upload icon. To request approval for an attachment, expand the status and select the action to be performed.
History
This section shows the ticket history. To narrow down the view, expand columns and enable the information to be displayed.

To adjust the columns to be displayed on the page, click the columns icon (![]() ) on the top right of the window and select the desired settings. To adjust the number of page entries, expand Records per page and set a number. To request approval, expand the status and select the action to be performed.
) on the top right of the window and select the desired settings. To adjust the number of page entries, expand Records per page and set a number. To request approval, expand the status and select the action to be performed.
Next Step
Users with appropriate permissions can now assign the application to a rule and apply the policy to firewalls in the network.
For more information, see How to Create Rules.