

Create a firewall rule and select an application as source or target. When selecting a firewall for rule assignment, Barracuda CloudGen Firewalls can be searched in the asset database; third-party firewalls can be searched as well, based on predefined patterns.
Before You Begin
- Create an application. For more information, see How to Create Applications.
- Introduce the Control Center-managed firewalls on the Firewall Policy Manager. For more information, see Add Your Firewall Control Centers in Get Started.
Create a Rule
- Log into the Barracuda Firewall Policy Manager.
- Click the Rules tab.
- In the top-right corner, click + to add a rule. The Create Rule window opens.
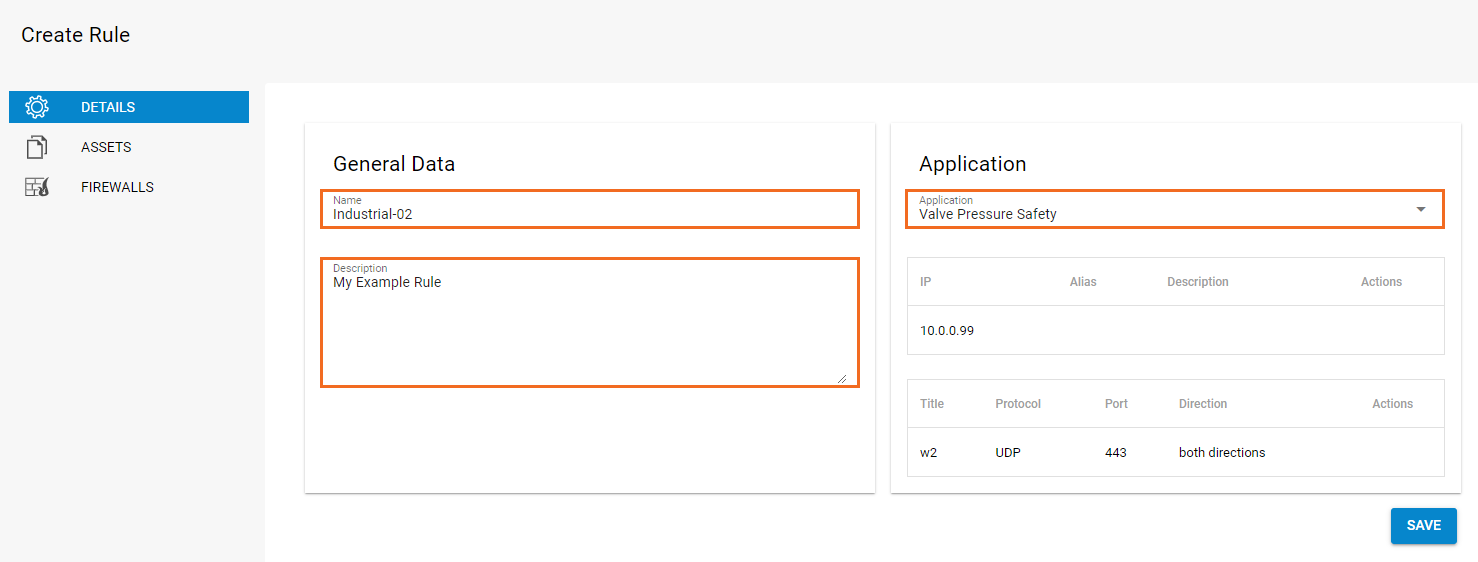
Configure the Rule Details
- In the General Data section:
- Enter a Name for the rule.
- Enter a Description.
In the Application section, select the application the rule should apply to. IP address, Protocol, and Port are filled in automatically.
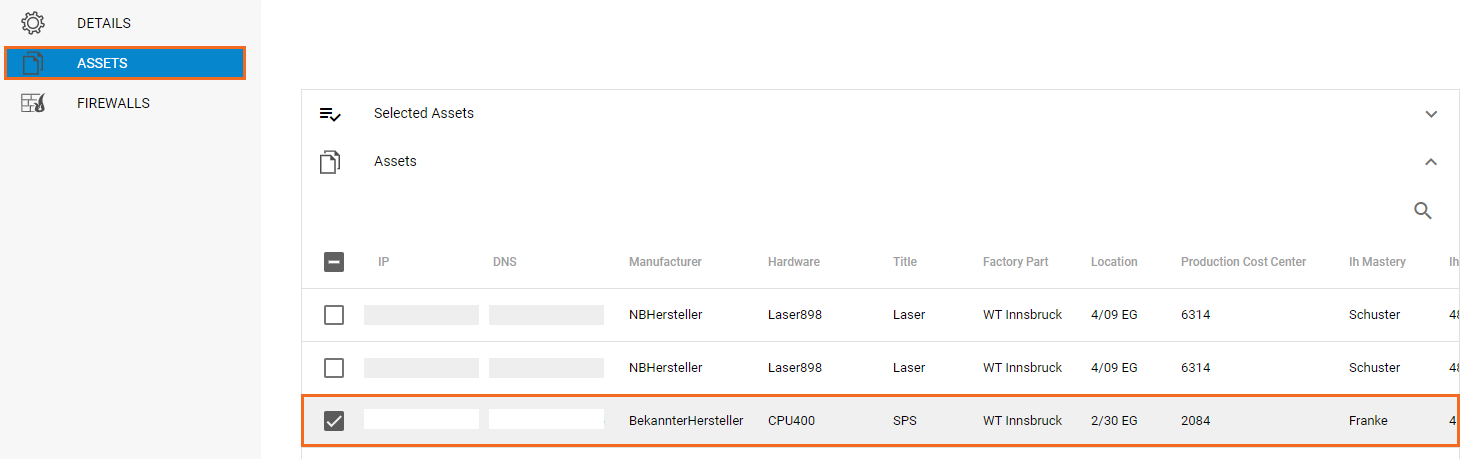
Configure Assets for the Rule
- Click the Assets link on the left. The Assets window opens.
- Expand the Assets list by clicking the arrow icon on the right.
Select the check box next to the asset the rule should apply to.
Apply the Rule to Your Firewalls
After a rule has been created that contains an application as source or target, and the status of the request was set to "Approved CISO", the rule can be assigned to Control Center-managed firewall units.
- Click the Firewalls link on the left. The Firewalls window opens.
- In the top section, select an Intrusion Prevention System profile (IPS Policy) for the rule.
- Expand the Firewalls list below and select the CC-managed units the rule should be applied to.
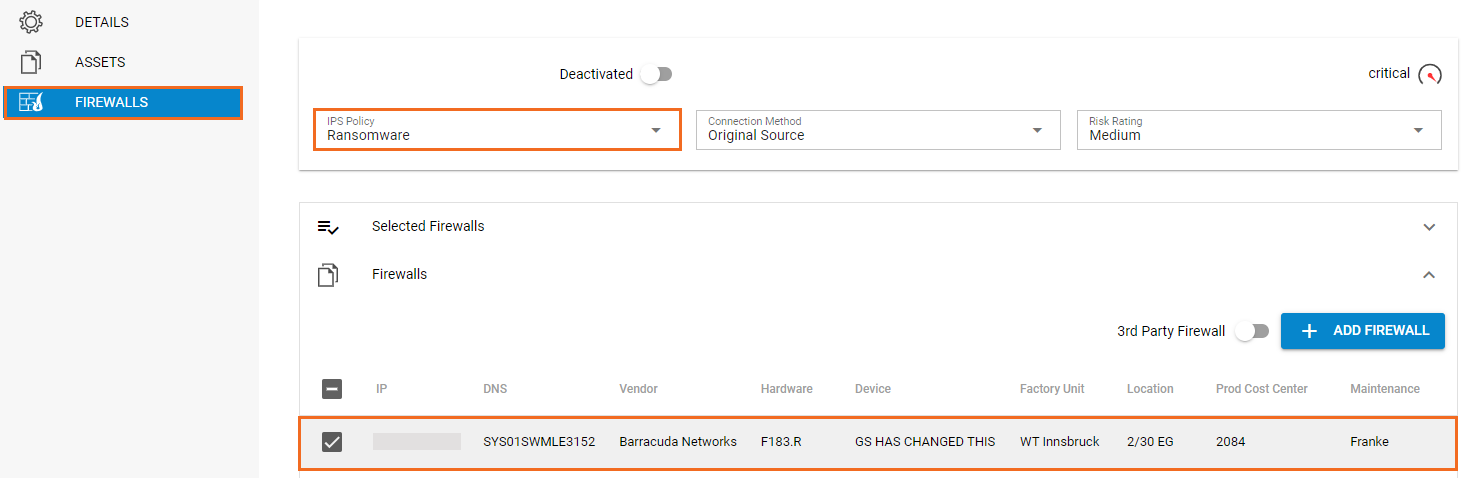
- Click Save to save your configuration
After completing these steps, the rule is listed under Rules. To request approval for a rule, expand the status (Open) on the top right of the window and select Request. For more information on the processing of rules, see Application and Rules Assignment.
When a rule has been assigned to a Control Center, the ticket is given the status "Queued" until the rule gets successfully implemented on the managed firewall units. If the transfer to a Control Center does not work, set the ticket status to "Return" and re-process the rule. As soon as the rule is successfully processed, it has the status "Implemented" and becomes visible in the ruleset of the selected firewalls. To view the rule, log into a CC-managed Firewall and go to Forwarding Rules, or, when using a Distributed Firewall Service, access the Local Ruleset.