

To create a Hyper-V Rapid Recovery backup set, perform the following steps.
- Navigate to the Computer page.
The Computer page is displayed.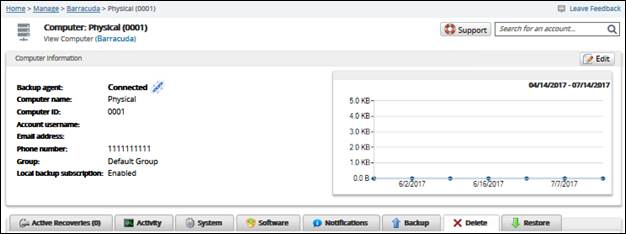
- Click the Backup tab.
The Backup Selections page is displayed.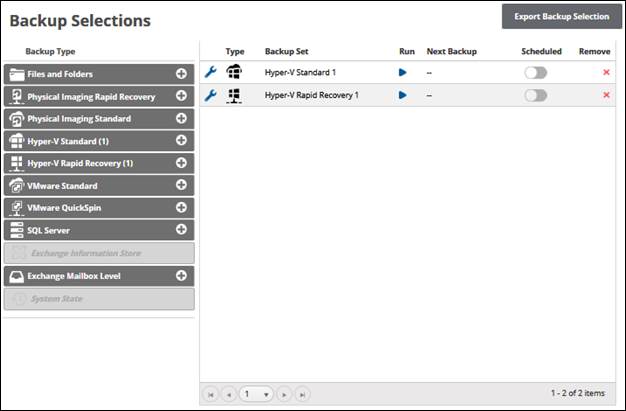
- In the Backup Type pane, click Hyper-V Rapid Recovery.
The Select page is displayed.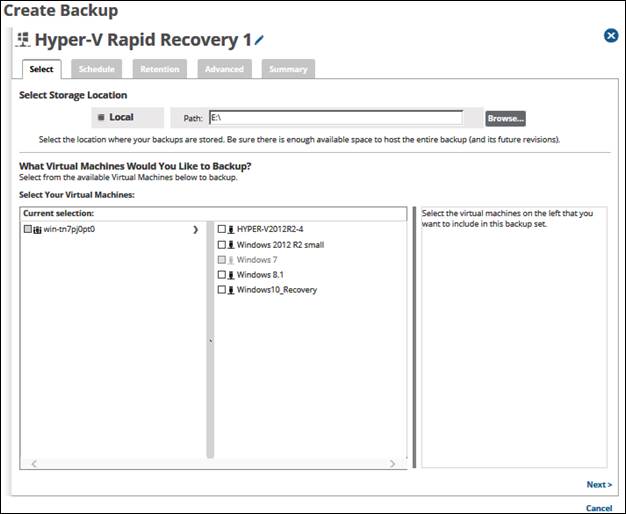
- Click the Backup Name to provide a new name for your backup set or accept the default.
At the Select Storage Location Path field, type a path, or click the Browse button to select the storage location of your backup.
In the Current selection pane, select the virtual machines you would like to back up.
Clicking the arrow
 at the right of the VM displays more revisions of the VM.
Your selections are displayed in the far-right pane. Click the remove icon to remove any selections or clear the item check box.
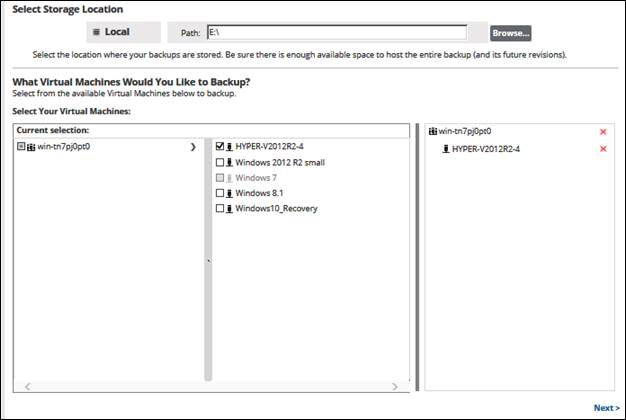
- At the Name field, type a unique name for the backup set.
- After making your selections, click Next.
The Schedule page is displayed.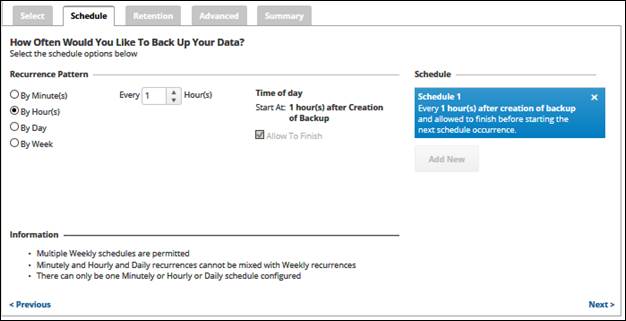
Accept or edit the default schedule.
Your schedule is displayed in the Schedule column. Click the remove icon
 to delete schedule.
After setting your schedule, click Next.
The Retention page is displayed.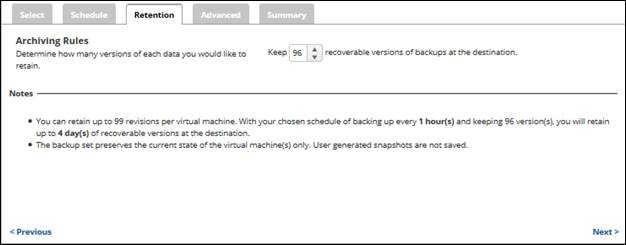
Specify how many recoverable versions of backups at the storage location you would like to retain, and then click Next.
The Advanced page is displayed.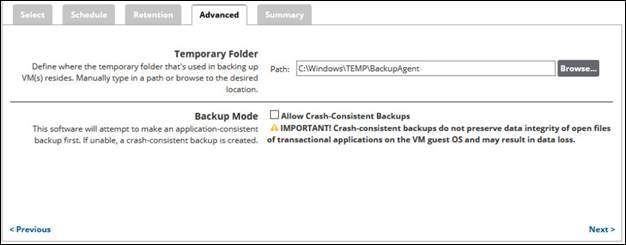
- In the Temporary Folder field, accept the default, type a new path, or click the Browse button to locate the temporary folder that is used during backing up.
Optionally, in the Backup Mode section, select the Allow Crash-Consistent Backups check box.
Pre-Windows Server 2016 versions display a different backup mode option as shown below.

When enabled, the virtual machine may become unavailable during the snapshot process.
The software attempts an online backup first. If unable, an offline backup is created. The virtual machine is paused and put into a saved state while the snapshot is taken, and then the virtual machine resumes operation. VMs in a saved or a paused state can be backed up. The imported recovery VMs are in a saved state in both cases.
Tip: This mode is useful if an online backup cannot be taken. For instance, if the guest VM has dynamic disks, this mode allows guest VMs to be backed up in a non-quiesced, offline state.
- Click Next.
The Summary page is displayed.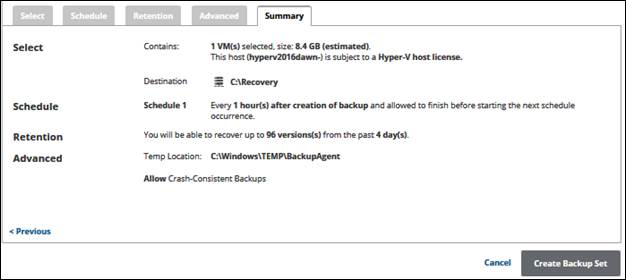
- After reviewing your selections, click the Create Backup Set button.
Your scheduled backup is displayed on the Backup Selections page.