

Restoring a Hyper-V virtual machine from a Hyper-V Rapid Recovery backup set allows you to recover a machine quickly, reducing downtime. There are two restore methods for restoring the entire virtual machine; one is to prepare the existing files in Local Storage to be used by the restored virtual machine while the other is to copy the entirety of the virtual machine files to a new location. The first option is much faster and will allow you to restore the virtual machine in minutes while the second option will take longer as it needs to copy the virtual hard disks. This article will show you how to accomplish both types of Hyper-V Rapid Recovery restores.
Hyper-V Rapid Recovery Restore
This chapter includes the following topics:
Overview
Rapid Recovery is a restore option that allows you to recover a failed system as a Hyper-V virtual machine in fifteen minutes or less from local storage.
The major benefit of Hyper-V Rapid Recovery is the new set of recovery options afforded to the small business to recover from any local business outage. Each option covers specific customer use cases and insures against business downtime. These options include:
- Rapid Recovery – recovery-in-place
- Rapid Recovery – object-level recovery
- Copy-mode recovery
Rapid Recovery – Recovery-in-Place
The main Rapid Recovery option for these backups is a recovery-in-place, in which your Hyper-V files are made available very quickly so that they can be imported into Hyper-V Manager and booted.
Rapid Recovery – Object-level Recovery
This option allows you to recover individual files and folders from a customer’s local Hyper-V backup directly through the management portal. This feature allows granular restore of data in protected Hyper-V VMs without having to mount the disks and explore their contents through Windows explorer.
Copy-mode Recovery
You also can do a full-copy restore of VM data to another location. This type of restore is useful for providing a more permanent recovery solution. The full contents of the VM’s disks (not just a differencing disk) are copied to a location that can serve as better permanent storage from which to run a production VM. This restore is useful for getting a copy of a VM from a certain point-in-time to either run or store elsewhere.
Restoring Hyper-V Rapid Recovery Backups
To restore a backup with Hyper-V Rapid Recovery, perform the following steps.
- Navigate to the Computer page.
The Computer page is displayed.
- Click the Restore tab.
The Restore Selections page is displayed.
- Click the backup type you want to restore.
The Select page is displayed with Rapid Recovery selected as the default.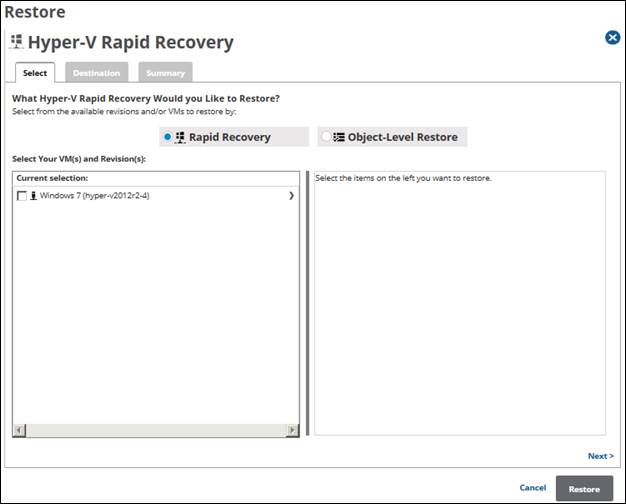
In the Current Selection pane, select the VM and revisions you would like to restore.
Clicking the arrow
 at the right of the items displays more revisions.
The selection is displayed in the far-right pane. Click the remove icon to remove any selections or clear the item check box.
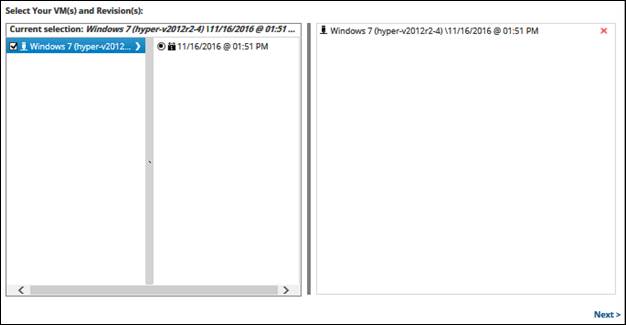
Click Next.
The Destination page is displayed.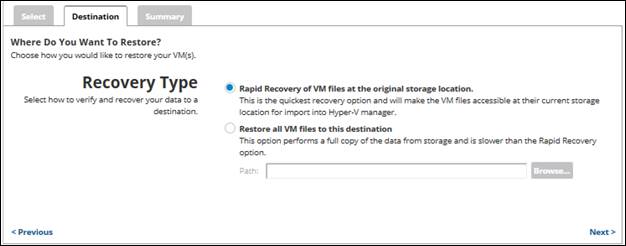
- Select a recovery option button.
- If you selected the Restore all VM files to this destination option, at the Path field, type a path, or click the Browse button to select the storage location of the restore.
After selecting the storage location of the restore, click Next.
The Summary page is displayed.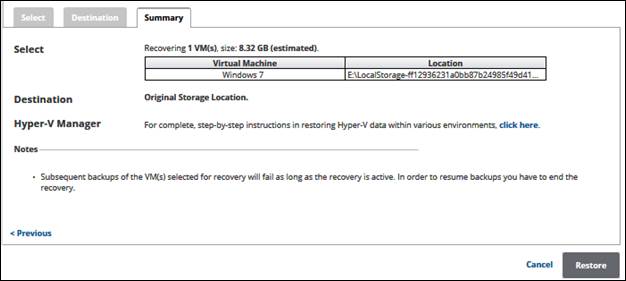
Optionally, for more information about restoring Hyper-V data within various environments, click the link
Verify your selections, and then click the Restore button.
The confirmation pop-up is displayed.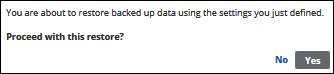
- Click Yes.
The Restore Selections page is displayed showing the status of the restore.
Restoring Hyper-V Object-level Rapid Recovery
To restore a backup at the Hyper-V Object-level, perform the following steps.
- Navigate to the Computer page.
The Computer page is displayed.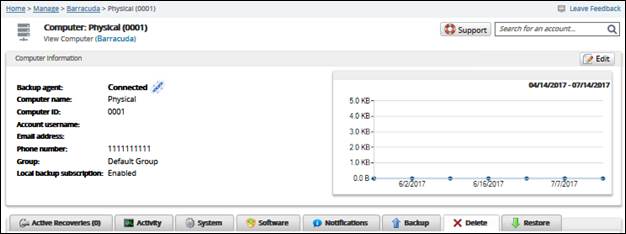
- Click the Restore tab.
The Restore Selections page is displayed.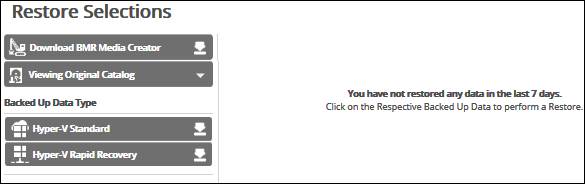
- Click the backup type you want to restore.
The Select page is displayed with Rapid Recovery selected as the default.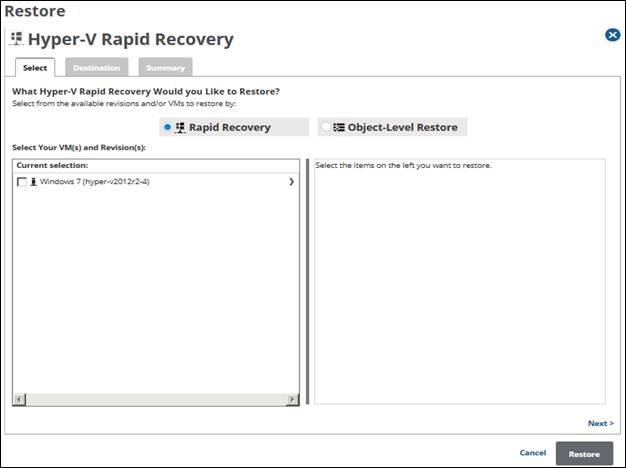
- Select the Object-Level Restore radio button, as shown below.

In the Current Selection pane, select the VM, the disks, and revisions you would like to restore.
NotesYou can choose only one revision to restore per selected VM.
Clicking the arrow
at the right of the items displays more files and folders.The selection is displayed in the far-right pane. Click the remove icon
to remove any selections or clear the item check box.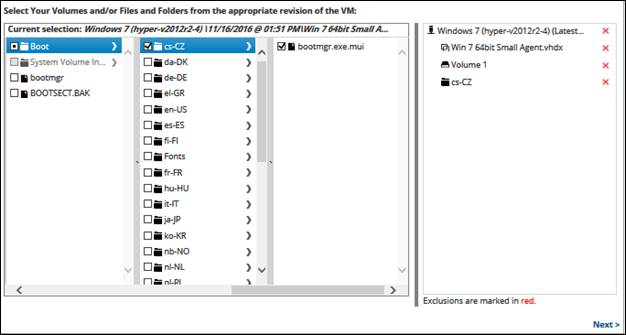
- Click Next.
The Destination page is displayed.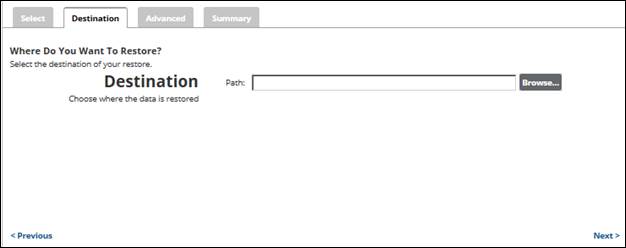
- In the Path field, type a path, or click the Browse button to select the storage location of the restore.
- After selecting the storage location, click Next.
The Advanced page is displayed.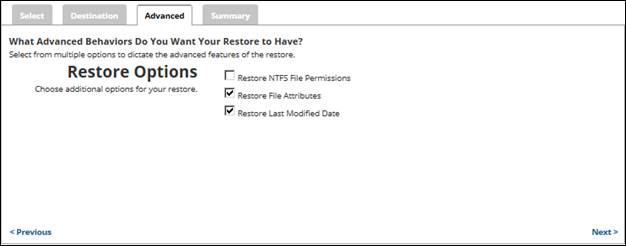
- Optionally, select any of the following options to specify the advanced features of the restore:
- Restore NTFS File Permissions
- Restore File Attributes
- Restore Last Modified Date
- Click Next.
The Summary page is displayed.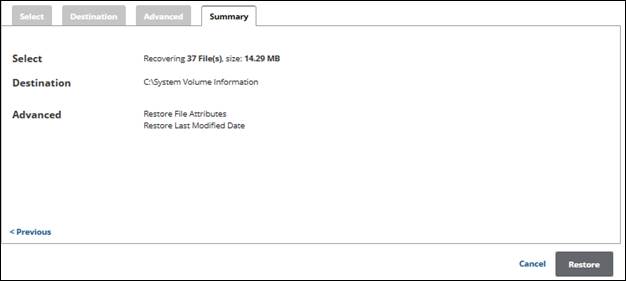
- Verify your selections, and then click the Restore button.
The confirmation pop-up is displayed.
- Click Yes.
The Restore Selections page is displayed showing the status of the restore.