

To back up VMware Standard, perform the following steps.
- Log into the management portal and navigate to the Computer page. See Navigating to the Computer Page for instructions.
The Computer page is displayed.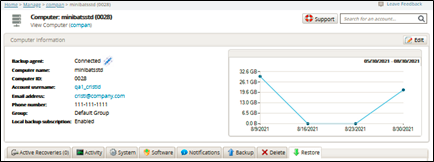
- Click the Backup tab.
The Backup Selections page is displayed.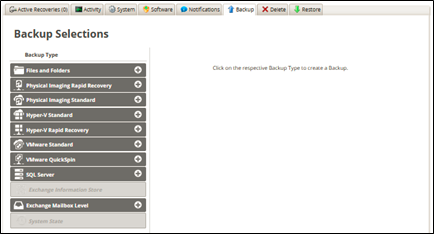
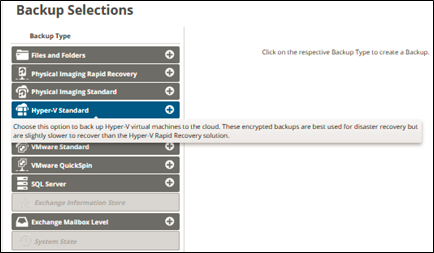
In the Backup Type pane, click VMware Standard, as shown below.
The Select page is displayed.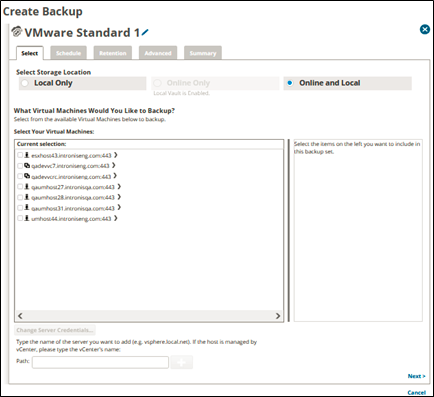
Click the Backup Name to provide a new name for the backup set or accept the default. See Changing Backup Set Names.
At the Select Storage Location section, click one of the following radio button options.
Note: This procedure applies to all options. See Backup Options for more information.- Local Only (Local Vault must be enabled, and a local subscription is required. Data is not backed up to the cloud.)
- Online Only (An enabled Local Vault disables this option.)
- Online and Local (Local Vault must be enabled.)
For this example, Local Only is selected, as shown below.

At the Current selection pane, select the VMs to be backed up.
Note: You are required to select at least one VM. Any VMs that are included in other backup sets are grayed out.Clicking the arrow at the right of the items displays more revisions of the VM.
The Change Server Credentials at the bottom of the page is also enabled, as shown below. See Changing Server Credentials.

If the selected virtual machines' host is not already recognized, add the IP address of the ESX/ESXi host or vCenter machine managing the virtual machines. See Adding a New ESXi or vCenter Server.
If the Backup Agent needs credentials to authenticate with the server you added, it should prompt you for them.Note: Changing server credentials is primarily used if admin credentials on the host or vCenter have changed since the last backup set was created.
If the following error message is displayed, you must provide a valid certificate, otherwise your system security is at risk.
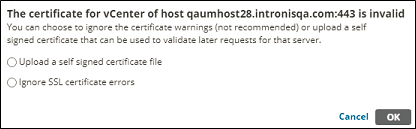
- To upload a self-signed certificate, click the Upload a self-signed certificate file and then click OK.
The Open dialog is displayed where you can select the certificate. See Self-signed Certificates.
Your selection is displayed in the right pane. Click the remove icon to remove any selections or clear the item check box.
Note: vApps are currently not supported for backup. - Click Next to continue.
The Schedule page is displayed.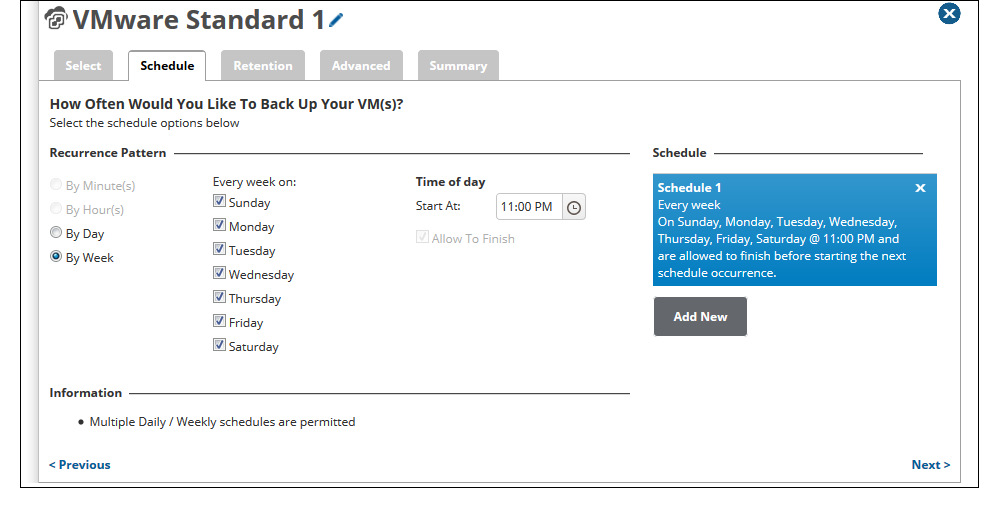
Set a schedule for the backups by choosing a recurrence interval (minutes, hours, days, or weeks) and either how often the backup runs or on which days the backup runs. If you want to add more than one Daily or Weekly schedule, click the Add New button. See Backup Schedules for more information.
Note: if multiple VMware backup sets (Standard or QuickSpin) run concurrently, all those involved are slowed down. Additionally, it is strongly recommended a VMware Standard backup and a VMware QuickSpin backup of the same virtual machine not overlap.
Notes:
Multiple daily/weekly schedules are permitted (if they do not overlap).
The Allow to Finish check box is always selected and grayed out. - After setting the schedule, click Next.
The Retention page is displayed.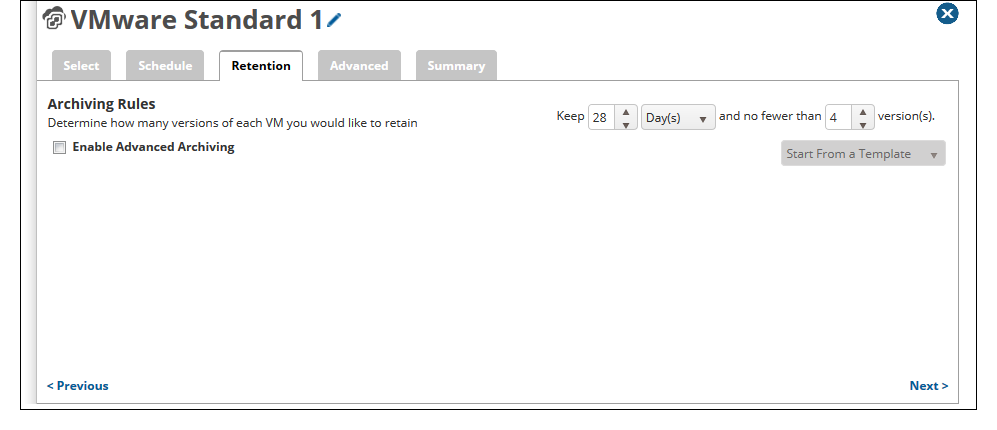
- Select the number of versions you wish to archive.
Note: The default is no fewer than 4 recoverable versions of backups at the destination for 28 days.
The backup set preserves the current state of the virtual machines only. User-generated snapshots are not saved. Optionally, select the Enable Advanced Archiving check box. For Advanced Archiving information, see Advanced Archiving Rules.
The Advanced Archiving fields are displayed.
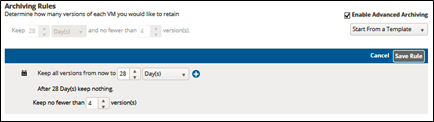
Make your selections, click Save Rule, and then click Next.
The Advanced page is displayed.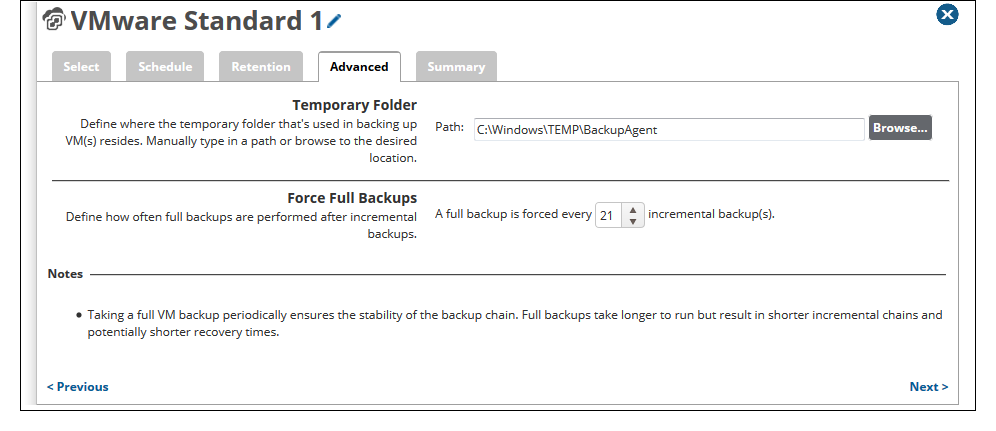
Requirement: You must specify a temporary folder located on a disk with enough space.
At the Temporary Folder field, accept the default, type a new path, or click the Browse button to locate the temporary folder that is used in backing up. See Browsing to a Folder.
At the Force Full Backups section, use the arrows to specify how often full backups are performed after incremental backups.
Note: The default setting is a full backup is forced every 21 incremental backups.
TIP: Taking a full backup periodically ensures the stability of the backup chain. Full backups take longer to run but result in shorter incremental chains and potentially shorter recovery times.
- To see a summary of the backup set, click Next.
The Summary page is displayed.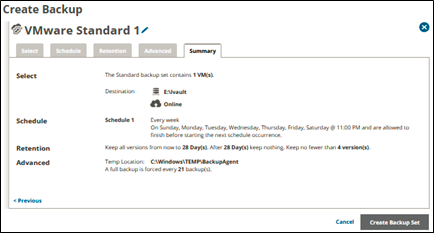
After reviewing your selections, click the Create Backup Set button.
If you did not change the default backup set name, a confirmation pop-up is displayed after clicking the Create BackupSet button, as shown in the example below.

This feature allows you to create a unique name for the backup set. If you already changed the default backup set name, this pop-up is not displayed.
Optionally, change the backup set name, press Enter, or click the green check mark, and then click Confirm.
The scheduled backup is displayed on the Backup Selections page.