

To create an Exchange Mailbox Level backup, perform the following steps.
- Log into the management portal and navigate to the Computer page. See Navigating to the Computer Page for instructions.
The Computer page is displayed.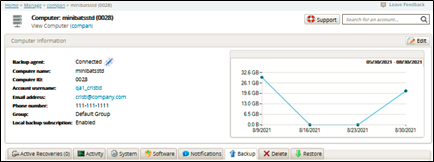
Click the Backup tab.
The Backup Selections page is displayed.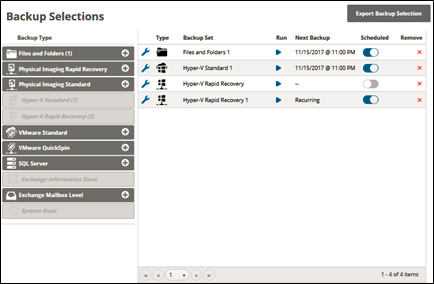
In the Backup Type pane, click Exchange Mailbox Level.
The credentials pop-up is displayed.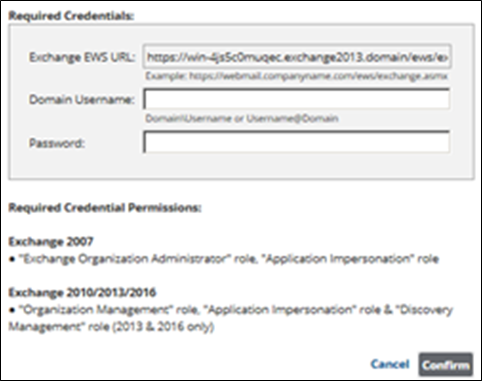
After typing your credentials, click Confirm.
The Select page is displayed.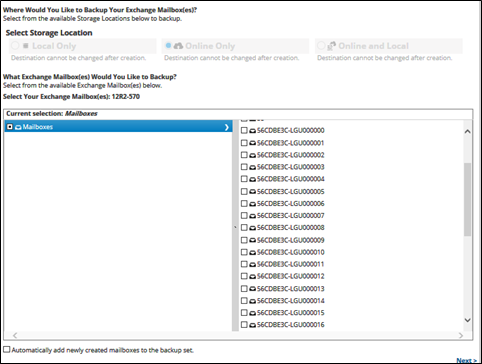
Click the Backup Name to provide a new name for the backup set or accept the default. See Changing Backup Set Names.
At the Select Storage Location section, click one of the following radio button options.
Note: This procedure applies to all options. See Backup Options for more information.
Local Only (Local Vault must be enabled, and a local subscription is required. Data is not backed up to the cloud.)
Online Only (An enabled Local Vault disables this option.)
Online and Local (Local Vault must be enabled.)The Online and Local option is used as an example for this procedure, as shown below.

At the Current Selection pane, select the mailboxes to be backed up.
Clicking the arrow at the right of the items displays more mailboxes.
Your selection is displayed in the right pane.Click the remove icon
 to remove any selections or clear the item check box.
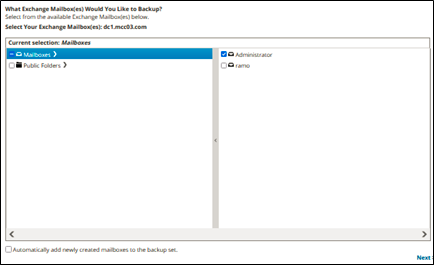
Optionally select the Automatically back up newly created mailboxes check box at the bottom of the page, and then click Next.
The Schedule page is displayed.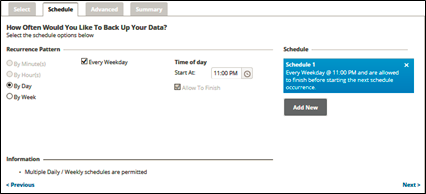
Accept or edit the default schedule. See Adding a New Daily or Weekly Schedule for more information.
Notes:
Multiple daily/weekly schedules are permitted (if they do not overlap).
The Allow to Finish check box is always selected and grayed out.
After setting the schedule, click Next.
The Advanced page is displayed.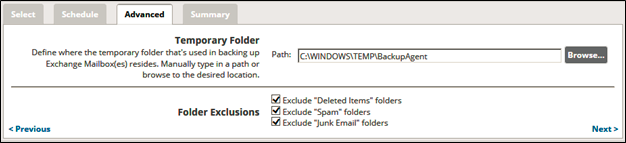
At the Temporary Folder field, accept the default, type a new path, or click the Browse button to locate the temporary folder that is used in backing up. See Browsing to a Folder.
At the Folder Exclusions section, optionally select the check boxes of folders to exclude, and then click Next.
The Summary page is displayed.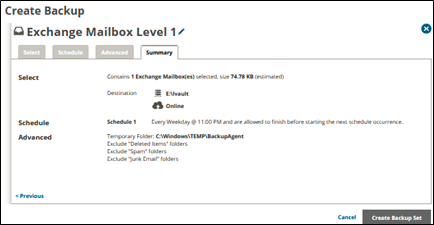
Note: If the directory you selected does not have enough free space, the following pop up is displayed.

To change the directory, click the Change button. To continue with the backup, click Continue.
At the Summary page, verify your backup selections, and then click Create Backup Set.
If you did not change the default backup set name, a confirmation pop-up is displayed after clicking the Create Backup Set button, as shown in the example below.

This feature allows you to create a unique name for the backup set. If you already changed the default backup set name, the pop-up is not displayed. See Changing Backup Set Names.
Optionally, change the backup set name, press Enter, and then click Confirm.
The Backup Selections page is displayed with the latest backup set.To manually run the backup, see Manual Backups.