

When it comes to restoring SQL databases, you have the option to restore just the (.bak) files or restore directly back into a running SQL instance.
Ensure that you have twice the size of the database(s) available for restore. Half of the space is for temporary files
To restore a SQL Server, perform the following steps.
- Navigate to the Computer page. See Navigating to the Computer Page for instructions.
The Computer page is displayed.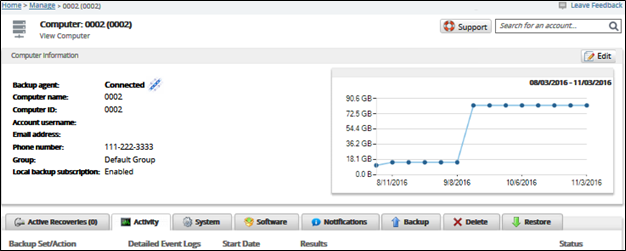
- Click the Restore tab.
The Restore Selections page is displayed.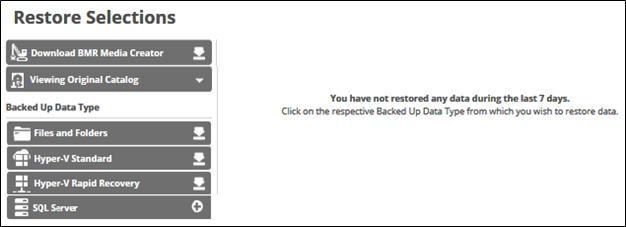
- Click SQL Server.
The Select page is displayed.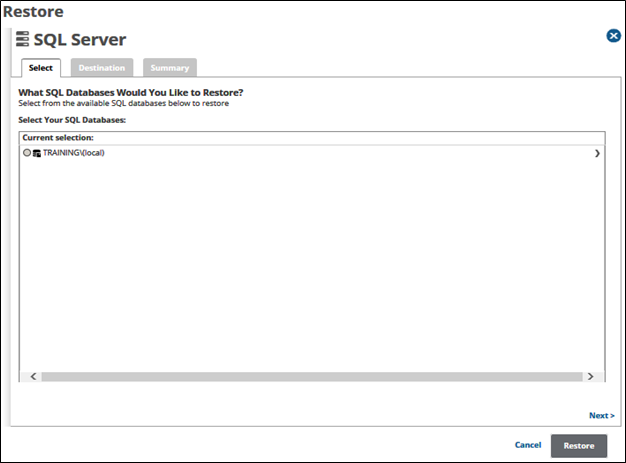
- In the Current Selection pane, click the radio button of the backup set you would like to restore.
The selection is displayed in the right pane.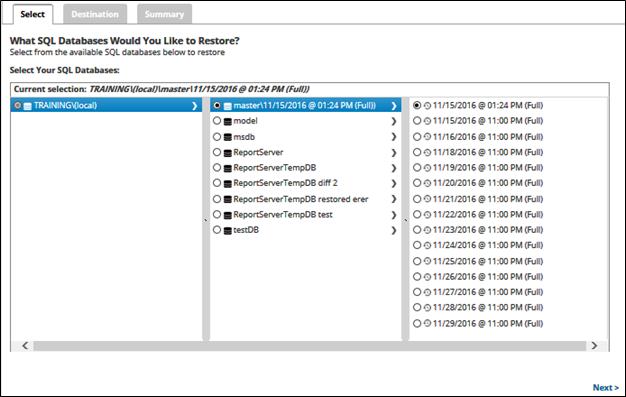
Clicking the arrow at the right of the items displays more databases. - Click Next.
The Destination page is displayed.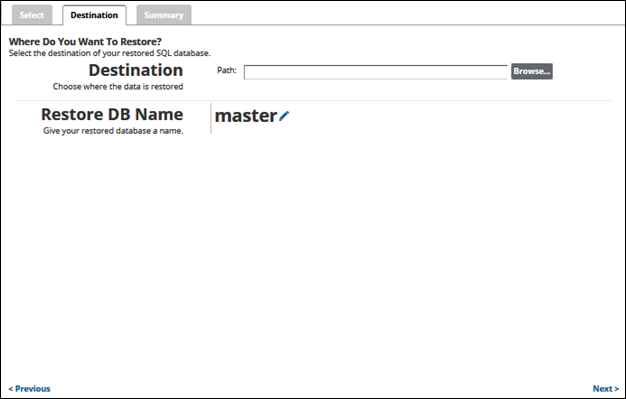
- At the Path field, type or browse to the destination of the restore. See Browsing to a Folder.
- Click the restore name to provide a new name for the restore database or accept the default. See Changing Backup Set Names.
- Click Next.
The Summary page is displayed.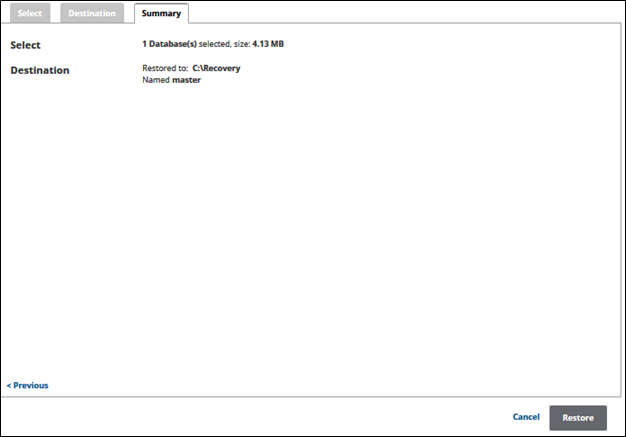
- Verify your selections, and then click the Restore
The confirmation pop-up is displayed.
- Click Yes.
The Restore Selections page is displayed with the status.