

Use the steps in this article to configure outbound automatic replies that do not have an Envelope-From address or have an Envelope-From domain not in the Barracuda Email Security Service (such as onmicrosoft.com) . This ensures that relayed mail and mail without an Envelope-From is sent directly to the internet bypassing the Barracuda Email Security Service.
Step 1. Create the Connector
Note that the following steps use the new Exchange admin center user interface.
- Log into the Office 365 admin center.
- In the left pane, click Mail flow, and click Connectors.
- Click the Add a connector button, and use the wizard to create a new connector.
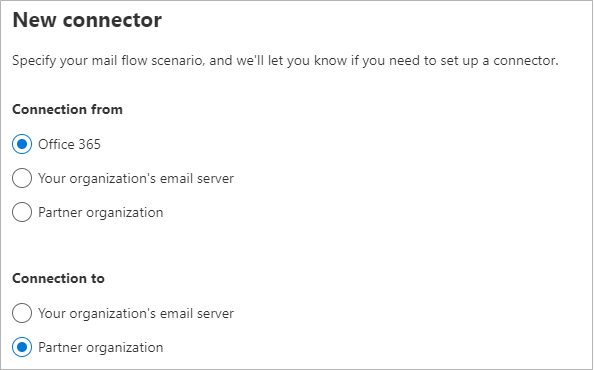
- For Connection from, select Office 365. For Connection to, select Partner organization.
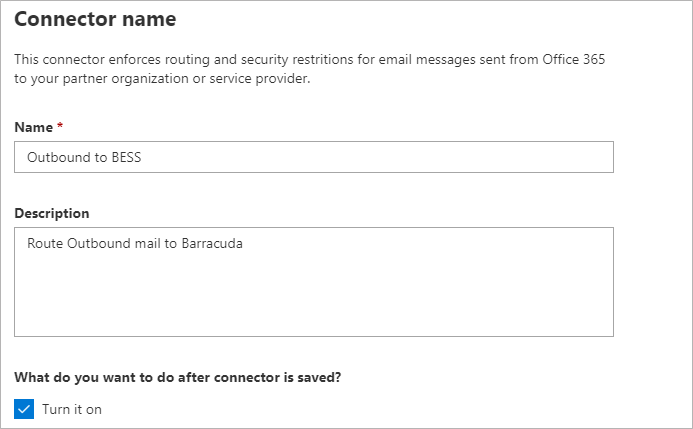
- Enter a Name and (optional) Description to identify the connector:
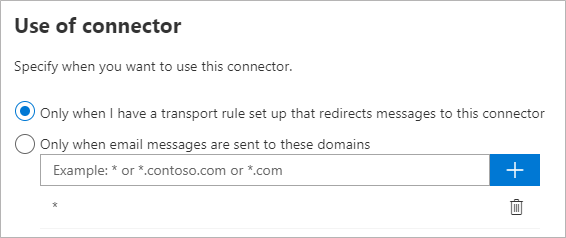
- Click Next. Select Only when I have a transport rule set up that redirects messages to this connector:
- Click Next. Select Route email through these smart host, and click the + symbol.
- Go to the Barracuda Email Security Service, and click the Domains tab. Copy your outbound hostname from the MX records, and enter it in the add smart host page:
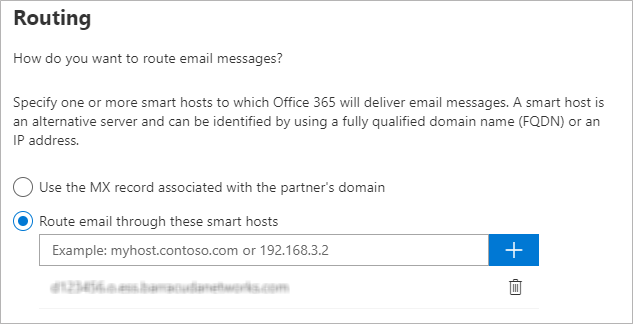
- Go to the Barracuda Email Security Service, and click the Domains tab. Copy your outbound hostname from the MX records, and enter it in the add smart host page:
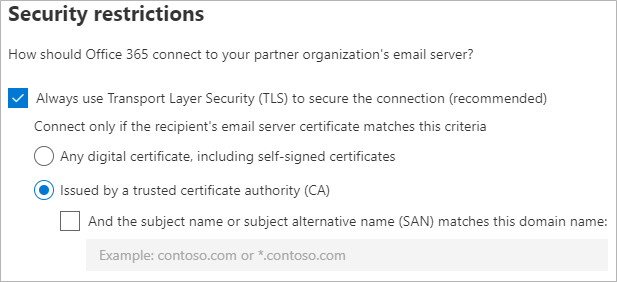
- Click Next. Use the default settings for the Security restrictions: Always use Transport Layer Security (TLS) to secure the connection (recommended) > Issues by Trusted certificate authority (CA):
- Click Next. In the confirmation page, verify your settings and click Next. Office 365 runs a test to verify your settings.
- When the verification page displays, enter a test email address, and click Validate. Once the verification is complete, your mail flow settings are added.
Step 2. Create Transport Rule
- Log into the Office 365 admin center, and go to Admin centers > Exchange.
- In the left pane, click mail flow, and click rules.
- Click the + symbol, and click Create new rule.
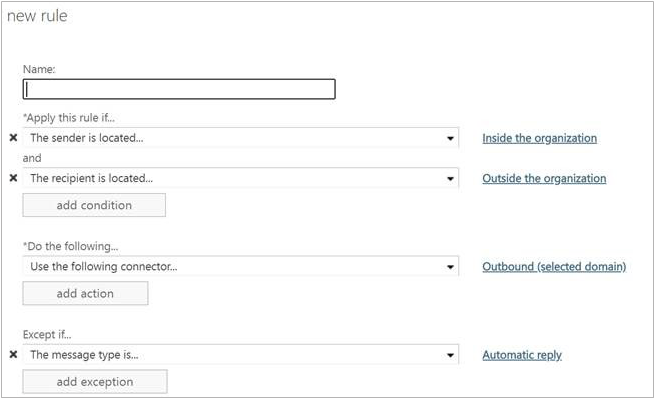
- In the new rule page, enter a Name to represent the rule.
- Click more options towards the bottom of the page.
- From the Apply this rule drop-down menu, select The sender is located > is external/internal > Inside the organization.
- Click Add Condition. From the drop-down menu, select The recipient is located > is external/internal > Outside the organization.
- From the Do the following drop-down menu, select Redirect the message to > the following connector, and select the connector you defined above in Step 1. Create the Connector.
Click Ok.
Click Add Exception. From the drop-down menu, select The message properties > include the message type > Automatic reply .

Click Save.
Step 3. Disable Existing Barracuda Send Connector
Log into the Office 365 admin center.
In the left pane, click Mail flow, and click Connectors.
Select the send connector you created during Step 2 - Configure Office 365 for Inbound and Outbound Mail , Step 7. Configure Outbound Mail section.
Disable the send connector.
Your system will now use the new send connector you created in Step 1 above.