

Barracuda Data Inspector automatically scans your OneDrive for Business and SharePoint data for both sensitive information and malicious files. New issues are automatically identified without the need to configure scanners or schedules, and customizable email alerts keep you fully informed so you can respond quickly.
Activate Data Inspector
To sign up for a free scan from the Barracuda Networks website:
- Navigate to https://www.barracuda.com/products/data-inspector.
- Click Free Scan, complete the form with your information, and click Submit Request.
- An email will be sent to the email address you provided. Click on the link in that message to be redirected to the Data Inspector login page.
- Click Sign Up with Your Office 365 Account For Your Free Scan (or to Sign In if you already have a Barracuda Data Inspector account).
- If you are not already signed into your Microsoft 365 account, enter your administrator account login information, and click Sign in. If you are already signed in, this step does not appear.
- You will then be brought to the Data Inspector Setup Wizard.
Setup Wizard
- Go to https://login.barracudanetworks.com and log in with your Barracuda Cloud Control credentials.
- Click on Data Inspector using the product menu.
- If this is the first time you have signed into Data Inspector, you are redirected to the setup wizard.
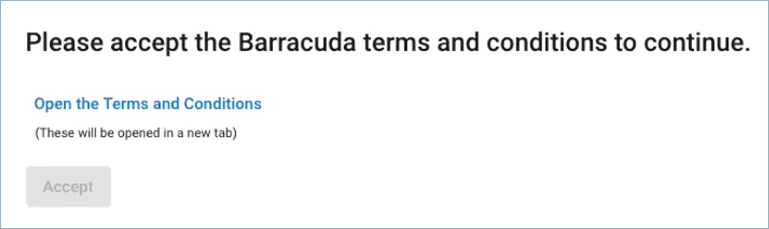
- Click Open the Terms and Conditions to open a new tab. After reviewing the information, close the tab and click Accept in the wizard. Note: the Accept button will not become active until you review the Terms and Conditions.
- Review the welcome information and click Next.

- Enable Barracuda Data Inspector to collect your name and email address to better provide product support and keep you aware of product news and announcements. This is optional. You can click on the Trust Center link to learn about how we protect your information.
You can update your consent later from Settings > Data.
Click Next.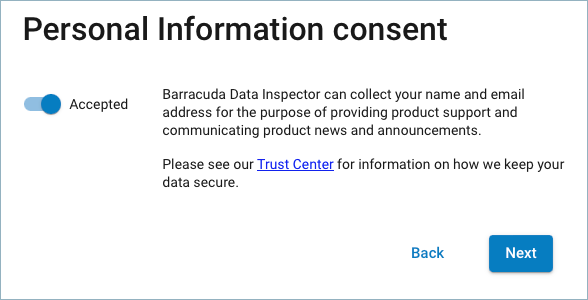
- If asked to select a data storage region, choose from the dropdown list of available geographic locations.
Click Next.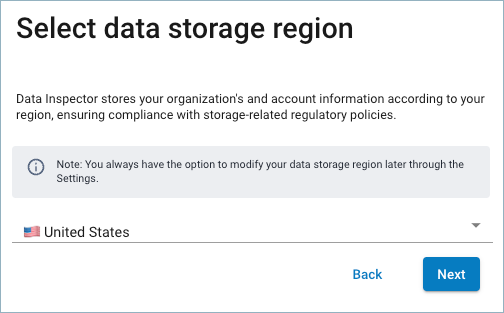
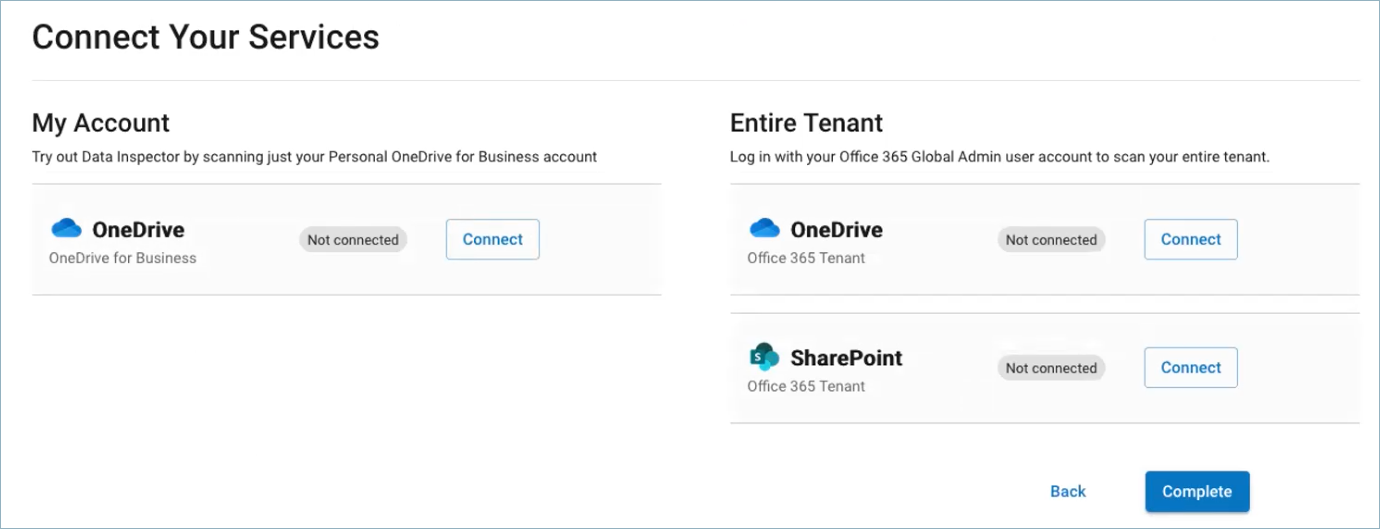
- Select the OneDrive or SharePoint data source you want to connect to Data Inspector. You can scan an entire Microsoft 365 tenant or an individual OneDrive account. Note that selecting an entire tenant will require Microsoft 365 global administrator privileges.
- A new pop-up window prompts you to enter your Microsoft 365 administrator account login information.
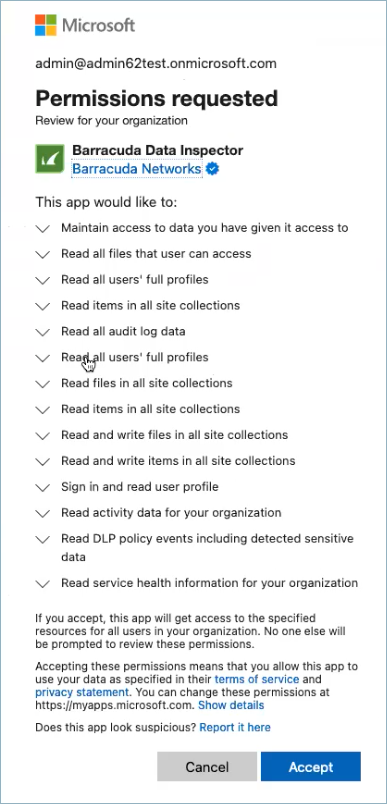
- Review the permissions requested by Microsoft. Then click Accept to authorize Data Inspector to access your details.
- You are redirected back to the wizard. Click Complete to start the scan.
As Data Inspector scans your files, the Detections page will begin to populate with information about the sensitive data or malicious files.