

Outbound SSL Inspection allows the firewall to inspect TLS traffic when clients behind the firewall access SSL-encrypted services on the Internet. Depending on the settings in the TLS Inspection policy used, various TLS errors are handled directly on the firewall, without allowing the user to override this decision. For example, it is possible to block users from accepting self-signed certificates.

Before You Begin
- Create a TLS Inspection policy for outbound TLS Inspection. For more information, see How to Configure a TLS Inspection Policy for Outbound TLS Inspection.
Step 1. Upload the SSL Certificate and Key to the Certificate Store
External Certificates
Upload the certificate and optionally key to the certificate store.
Go to the Certificate Store. On a standalone firewall, the certificate store is in the Advanced Configuration, on the Control Center in the Global Settings, Range Settings or Cluster Settings.
- Click Lock.
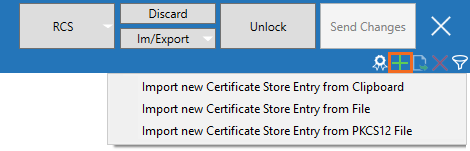
- In the upper-right corner, click + and select Import new Certificate Store Entry from File or Import new Certificate Store Entry from PKCS12.
- Select the certificate file and click Open.
- (optional) Enter the Password and click OK.
- Enter a Name and click OK.
- (optional) If needed right-click the certificate and select Assign Key to Certificate Store Entry.
- Select the certificate key file and click Open.
- Enter a Name and click OK.
- Click Send Changes and Activate.
Generate Self-Signed Certificates on the Firewall
- Go to the Certificate store. On a standalone firewall, the certificate store is in the Advanced Configuration, on the Control Center in the Global Settings, Range Settings, or Cluster Settings.
- Click Lock.
- Right-click in the table and select Create Self Signed Certificate or click the respective icon at the top right of the window (
 ).
). - Select Create Self Signed Certificate. The Create Self Signed Certificate window opens.
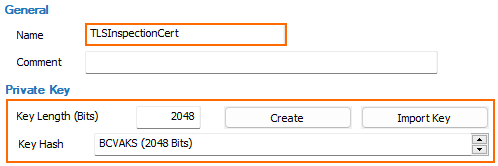
- Enter a Name for the certificate.
- (optional) Enter the Key Length.
- Click Create to create a key,
- Select the key to import, and click Open.
- In the Subject - Issuer section, will in the required certificate information.
- Click OK.
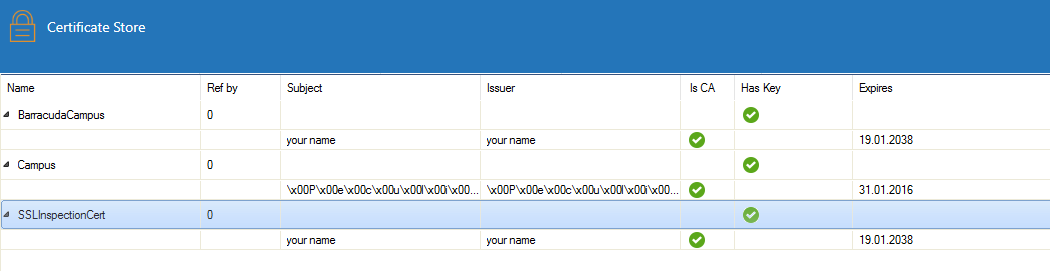
The certificate used for outbound SSL Inspection is now listed in the certificate store.
Step 2. Enable SSL Inspection
Make sure that SSL is enabled in the Security Policy Settings.
- Go to CONFIGURATION > Configuration Tree > Box > Assigned Services > Firewall > Security Policy.
- Click Lock.
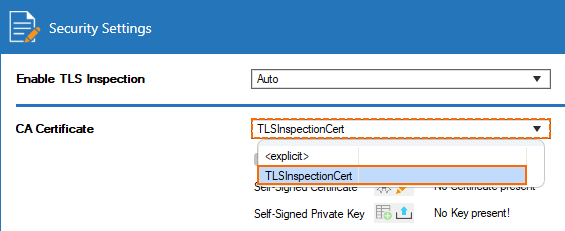
Expand the Enable SSL Inspection drop-down list and enable SSL Inspection.
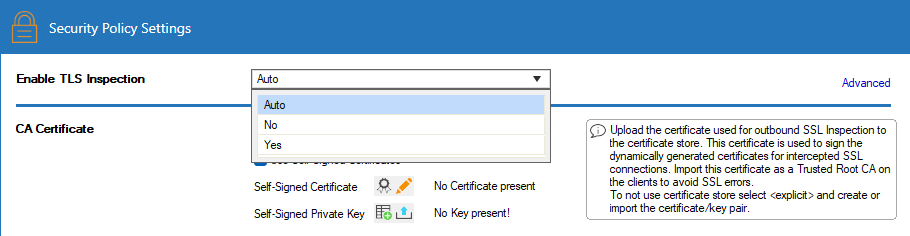
- Select the CA Certificate uploaded to the certificate store in Step 1 from the drop-down list.
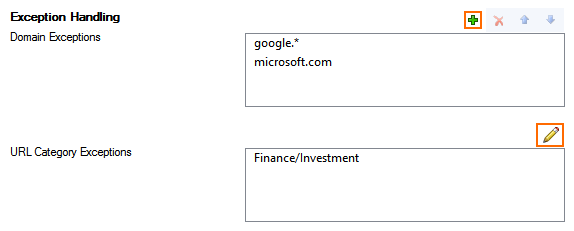
- Configure TLS Inspection Exception Handling. (This setting is only available when using the application ruleset instead of firewall policy profiles. For information on how to configure policies, see Policy Profiles and How to Create TLS Inspection Policies.
- Domain Exceptions – Enter the domain names that are exempt from TLS Inspection. Subdomains are automatically included. Using * wildcards is allowed.
- URL Category Exceptions – Select URL Filter categories excluded from TLS Inspection.
- Click Send Changes and Activate.
Step 3. Create an Access Rule for Outbound TLS Inspection
Enable TLS Inspection on the access rule handling outbound traffic.
- Go to CONFIGURATION > Configuration Tree > Box > Assigned Services > Firewall > Forwarding Rules.
- Click Lock
- Either click the plus icon (+) in the top right of the ruleset or right-click the ruleset and select New > Rule.
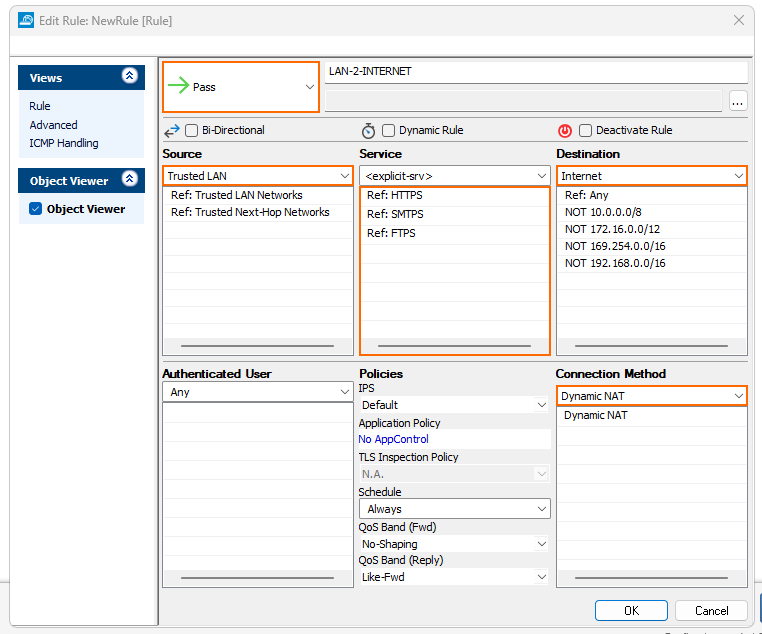
- Select Pass as the action.
- Enter a Name for the rule.
- Specify the following settings that must be matched by the traffic to be handled by the access rule:
- Source – Select the internal network.
Destination – Select Internet.
Service – Select the services. E.g., HTTPS, FTPS, SMTPS,...
Connection Method – Select Dynamic NAT.
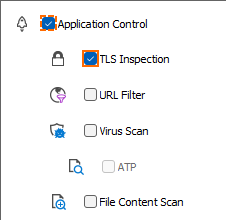
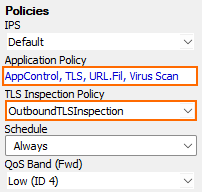
Click the Application Policy link and select:
- Application Control – Required.
- SSL Inspection – Required.
- Virus Scan – Optional.
- ATP – Optional.
- File Content Scan – Optional.
- Safe Search – Optional.
- Google Accounts – Optional.
- Application Control – Required.
- From the SSL Inspection Policy drop-down list, select a TLS Inspection policy for outbound TLS inspection. For more information, see How to Create a TLS Inspection Policy for Inbound TLS Inspection.
- Click OK.
- Click Send Changes and Activate.
Outbound TLS connections are now inspected by the firewall.
Monitoring and Troubleshooting
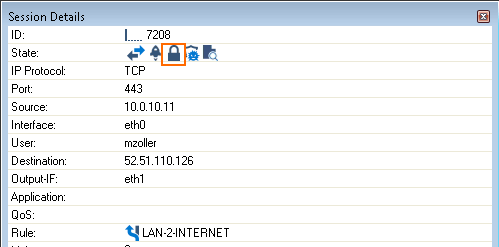
SSL Inspection error messages are written in the Firewall/SSL.log file. On the FIREWALL > Live page, the State column shows the padlock ( ) icon for TLS-inspected connections.
Next Steps
Outbound TLS Inspection can be combined with the following features: