

The root password is used for the superuser root. The user root can log into the basic subsystems and OS. Unless set during deployment, the default root password is ngf1r3wall. The root password must be changed immediately after the first login. Do not use the root user for daily configuration tasks; instead, use a firewall admin account.
Password Requirements
Passwords can consist of small and capital characters, numbers, and non-alphanumeric symbols, except white spaces. Barracuda Firewall Admin rates the password strength according to the entered characters. A password strength of strong or best is recommended for the root password.
The complexity of the password depends on the usage of a mixture of the allowed characters, numbers, and non-alphanumeric symbols. These types of characters are weighted differently, and the occurrence of each character or symbol from a certain category in the password contributes individually to the strength of the final password. While typing, the strength of the password is permanently recalculated. The result is indicated in the user interface with 4 colored rectangles, where each stands for a certain strength:
| Password Strength | User Interface Symbol |
|---|---|
| Weak |  |
| Medium |  |
| Strong |  |
| Best |  |
The expiration interval of the password and a theoretical lockout threshold depends on the corporate compliance of rules for renewing the password and is subject to administrational measures to be taken as required. If necessary, the firewall can be configured to ask the user for entering a new password during the next login.
Change the Root Password
- Go to CONFIGURATION > Configuration Tree > Box > Administrative Settings.
- In the left menu, click System Access.
- Click Lock.
In the Root Password section, enter the password for the root user.
- Click Send Changes and Activate.
Enforce a Password Change
- Go to CONFIGURATION > Configuration Tree > Box > Administrative Settings.
- In the left menu, click System Access.
- In the left menu, click Switch to Advanced for Configuration Mode.
- Click Lock.
In the Root Password section, select the check box for Enforce password change so that the password must be changed during the next login.
- Click Send Changes and Activate.
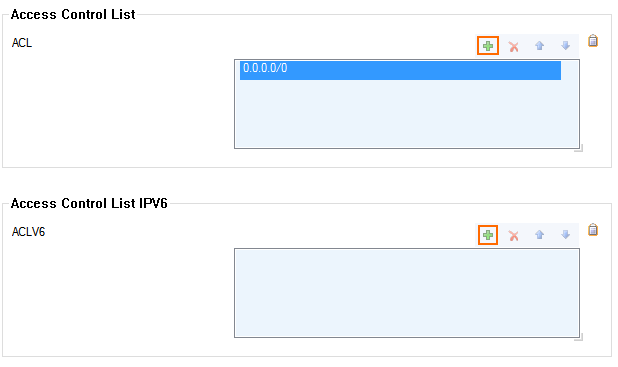
Management Access Control Lists
The management ACL specifies which IP addresses can access the system. Use the management access control list to allow-list networks that are allowed to connect via Barracuda Firewall Admin to the CloudGen Firewall or Control Center. Only these allow-listed networks are allowed access to the IPv4 or IPv6 management IPs on TCP ports 22 (secure shell) and 800-820. Access from all other addresses to these port/addresses is denied.
By default, access is allowed from an arbitrary address. Changing the ACL does not terminate active admin sessions. To enforce ACL changes, manually terminate active sessions on the FIREWALL > Sessions page.
Configure Management Access Control Lists
If you configure only IPv6 networks, verify that an IPv6 management IP address is available. For more information, see How to Add an IPv6 Management IP Address.
- Go to CONFIGURATION > Configuration Tree > Box > Administrative Settings.
- In the left menu, click System Access.
- Click Lock.
- In the Access Control Lists section, click + and add IPv4 networks and/or IP addresses to the ACL for IPv4 list.
- Click + and add IPv6 networks and/or IP addresses to the ACL for IPv6 list.
- Click Send Changes and Activate.