

Barracuda SecureEdge supports multiple Microsoft Azure Virtual WANs. Microsoft's Azure Virtual WAN technology allows fast, secure, and uninterrupted network availability to both your cloud-hosted or hybrid data center and your branch offices through Microsoft's global network. Follow the steps below to create a Virtual WAN with a hub in Microsoft Azure.
Before You Begin
- Create a Microsoft Azure account.
Step 1. Create a Microsoft Azure Virtual WAN
- Log into the Azure portal: https://portal.azure.com
- In the left menu, click Create a resource and search for Virtual WAN.
- Click Virtual WAN.
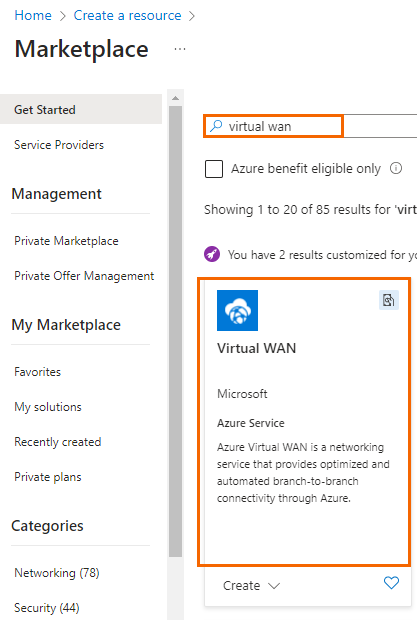
- In the next blade, click Create.
- In the Create WAN blade, specify values for the following:
Resource Group – Select an existing resource group from the drop-down menu, or create a new one.
- Resource group location – Select the region of the Virtual WAN, e.g., West Europe.
- Name – Enter a name for your Virtual WAN. The Virtual WAN will be displayed with this name in the SecureEdge user interface.
- Type – Select Standard.
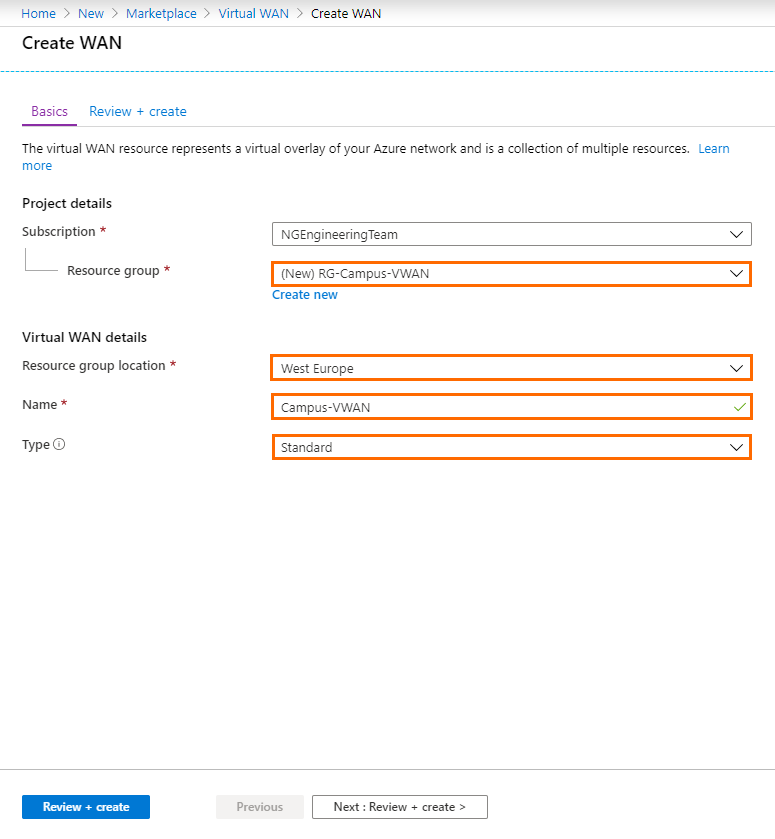
- Click Review + Create.
- Click Create to finish Virtual WAN creation.
Step 2. Create a Hub in Your Microsoft Azure Virtual WAN
Create a hub in each region where you want to use Barracuda SecureEdge.
- Log into the Azure portal: https://portal.azure.com
- In the left menu, click All services and search for Resource groups.
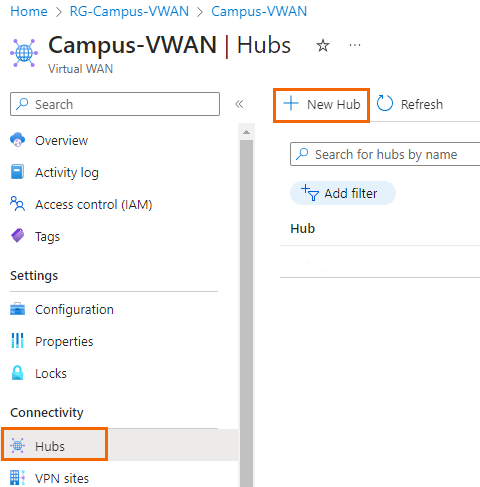
- Click on the resource group your vWAN is attached to. See Step 1.
- Click on your vWAN created in Step 1.
- On the left side, click Hubs.
- In the next blade, click + New Hub.
- The Create virtual hub blade opens. Specify values for the following:
- Region – Select a region from the drop-down list, e.g., West Europe.
- Name – Enter a name for the hub, e.g., doc-vwan-hub.
- Hub private address space – Enter the hub's address range in CIDR, e.g., 10.0.0.0/24 . Select a unique network that is dedicated for the hub only.
- Virtual hub capacity – Select the virtual hub capacity according to your requirements.
- Hub routing preference – Select the hub routing preference, e.g., ExpressRoute. Note that ExpressRoute is the default setting but can be changed depending on your requirements.
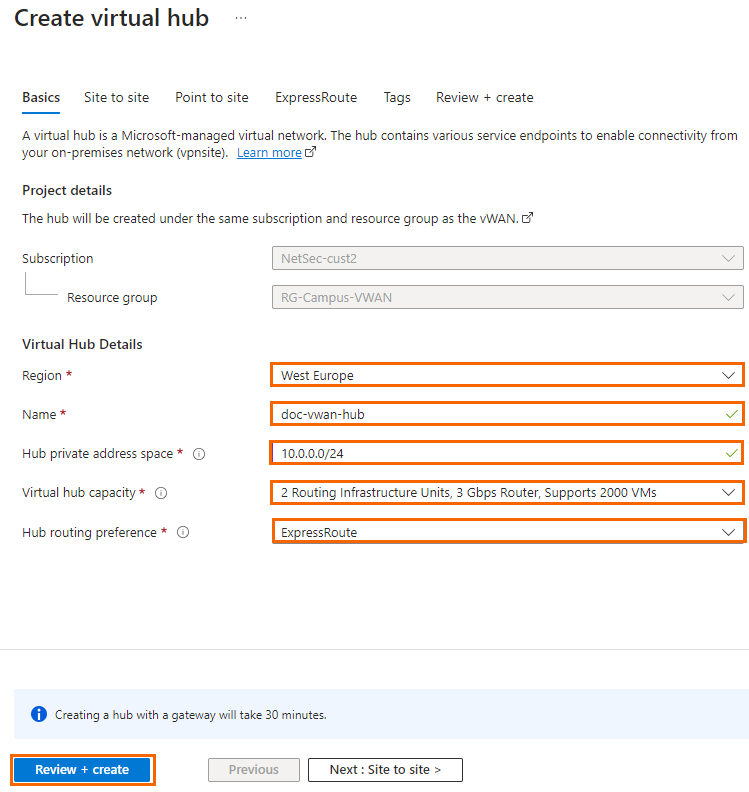
- Click Review + create.
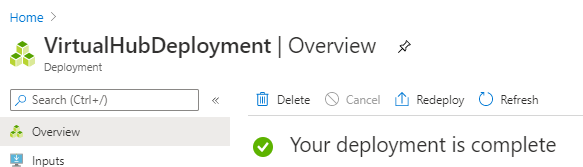
- Review your settings and click Create to start the creation of the hub.
- After the hub deployment succeeds, click All services in the left menu and search for Resource groups.
- Click on the resource group your vWAN is attached to. See Step 1.
- Click on your vWAN created in Step 1.
- On the left side, click Hubs.
- Click on the hub you just created.
- Wait until the routing status becomes green and Provisioned is displayed.

Next Steps
How to Create a SecureEdge for Virtual WAN Edge Service in Microsoft Azure