

The alternate method of backing up Windows systems—Windows systems the Barracuda Backup Agent for Windows cannot support—and Network Attached Storage (NAS) systems is network file-share backup via CIFS/SMB. Prior to configuring the file share backup, ensure that the system supports CIFS/SMB and that the system account Barracuda Backup will use has adequate permissions to access the shares, directories, and files it will be protecting.
Use the following steps to configure a file share backup for systems using CIFS/SMB:
- Log into Barracuda Backup and select the associated Barracuda Backup device in the left pane or in the devices table (for customers with multiple Barracuda Backup devices).
- Go to the Backup > Sources page, and click Add a Computer.
- Enter a computer description, and enter the IP address or fully qualified domain name in the Computer name field.
- From the Computer type drop-down menu, select Microsoft Windows.
- Select Enable File Share Backups; the Microsoft Windows Computer Information section displays:
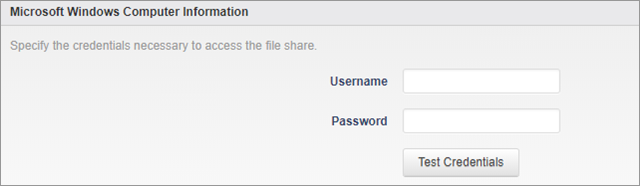
- Enter the Username and Password for the system account that will have access to back up data.
As a best practice, use a unique account for this integration point and grant it the least level of privileges required, coordinating with the system administrator. This account requires write privileges to the CIFS/SMB file share. For additional information, see Security for Integrating with Other Systems - Best Practices. - When the configuration is complete, click Save. The Add Data Source page displays. Use the steps in the Configure CIFS/SMB File Shares for Backup section below.
Configure CIFS/SMB File Shares for Backup
Once the system is configured for CIFS/SMB backup using the steps in the previous above, you can begin adding specific shares to back up. You can back up at the root level and back up all child directories, or connect to specific shares/directories one-by-one.
To configure CIFS/SMB file shares for backup:
- On the Add Data Source page, enter a Data Description for this source/share.
- From the Data Type drop-down menu, select File Share - CIFS.
- In the File Share Information section, enter the name of the share or directory to be backed up in the Share Name field, and click Test Share; if the connection is successful, a message displays the connection status, for example, Status: Successfully connected to computer. If the connection is not successful, verify that you can connect to the share with the configured username, access the system from Barracuda Backup, or that Barracuda Backup has the correct permissions to access the data.
If you have successfully added the share, click Save. You can continue adding shares in the future by clicking Add Data Source for this system on the Backup > Sources page, and repeating steps 1-3.