

This article refers to the Barracuda PST Enterprise version 5.1 or higher.
Use the Global Configuration tab in the web interface to customize Barracuda PST Enterprise. If you make any changes, click Save Changes:
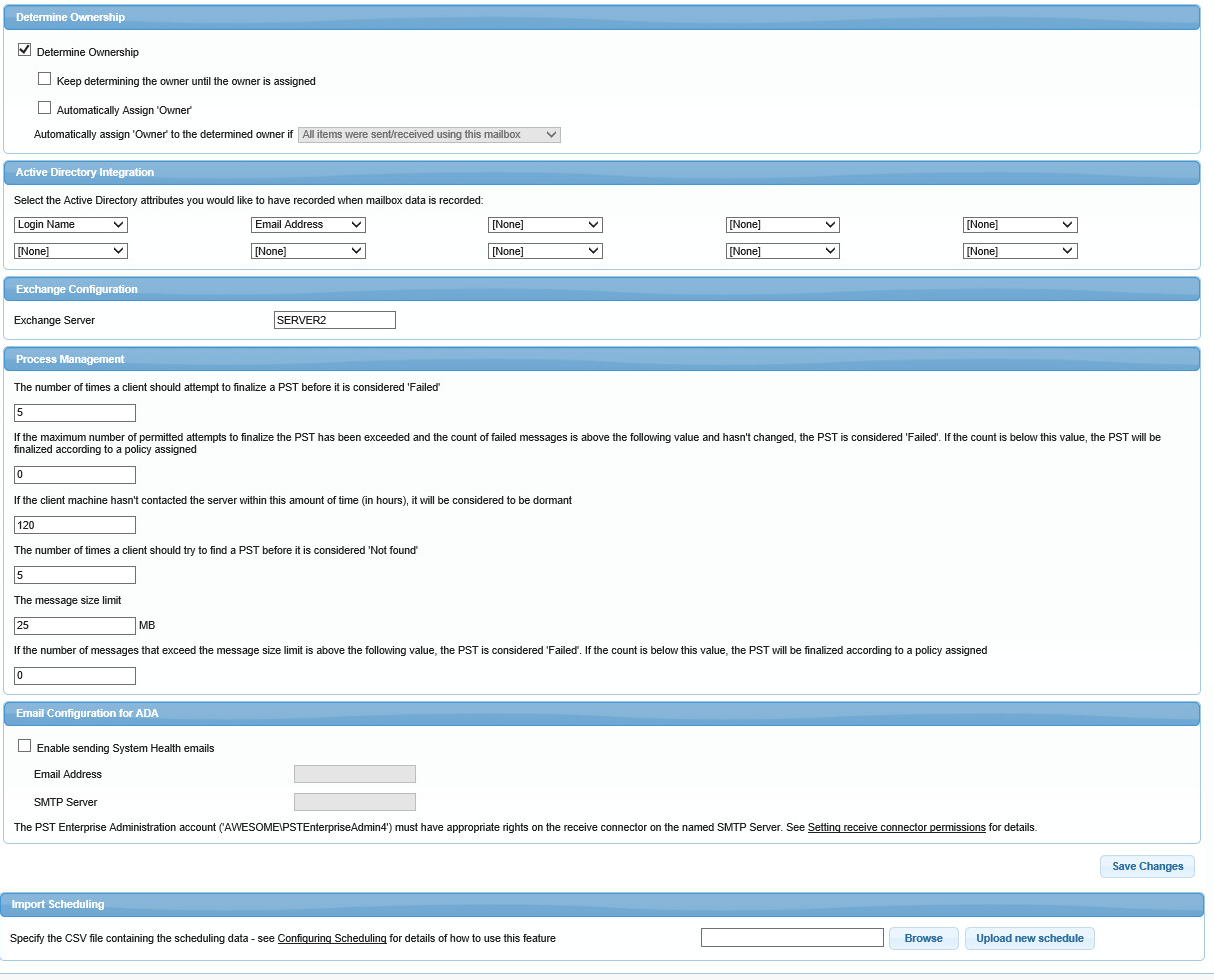
Determine Ownership
When the PST Enterprise Client discovers unattached PST files, the system attempts to determine the user who owns the data by examining the sender and recipients of the messages it contains. This behavior is controlled by the Determine Ownership option. If you turn Off this option, a PST Enterprise administrator must manually assign the owner for all PST files discovered in this manner. To allow PST Enterprise to automatically determine and assign the PST file ownership, set Automatically Assign 'Owner' to On, and select the desired criteria from the drop-down menu. If you enable Keep determining the owner until the owner is assigned, the ownership determination is performed every time the PST file is encountered until an owner is successfully assigned (either manually or automatically).
Active Directory Integration
Use this section to select up to 10 additional Active Directory (AD) attributes to filter PST files. Additional attributes display as additional columns in the Assigned PSTs tab in the web interface allowing you to group PST files accordingly. For example, add the AD attribute Department to group PST files by department. However, if you modify the attributes, a PST file does not display the rearranged columns until the next time the PST Enterprise Client examines the PST files and updates the data.
Exchange Configuration
When processing unattached PST files, Barracuda PST Enterprise must have the Exchange Server name in order to connect to the server when logging on to the owner's mailbox. By default, PST Enterprise selects an Exchange Server, however, if you want to use a different Exchange Server, enter the server name in the associated field.
Process Management
Use this section to modify how PST Enterprise manages PST files containing messages that cannot be processed as well as machines that the PST Enterprise Server cannot contact.
Email Configuration for ADA
Use this section to enable the sending of emails by the Deployment Analyzer, which runs consistency checks against your installation and reports any issues. If enabled, specify the email address to which reports are to be sent and the SMTP server to which to submit the mails. These are sent once a day. The PST Enterprise Administrator user (created during installation) needs appropriate rights on the receive connector on the named SMTP server (to set these permissions, see Email Configuration for ADA).
Import Scheduling
The PST Enterprise Client processes PST files based on the start and end date and time you enter in this section. A PST file is not processed if the current time is before the scheduled start time or after its end time. Set the schedule for a PST on the Assigned PSTs tab, and review the schedules in the PSTs table. If you prefer, you can bulk update the schedules by importing a .csv file.
Use the following steps to upload a .csv file to bulk update the schedules:
- Click the Assigned PSTs tab, and click Export to CSV at the top right of the screen.
- Save the .csv file, and then open the file in an editor, for example, Microsoft Excel.
Locate the columns SchedulingStart and SchedulingEnd to the right in the file. For each PST row, set these to the value 01/01/0001 00:00:00 to indicate no schedule is set, or enter a date and time in this same format (dd/mm/yyyy hh:mm:ss). The date/time should be entered in UTC.
- Click the Global Configuration tab, and click Upload new schedule to import the file back into PST Enterprise.
- The Machine and Filepath columns in the file are used to relate the updated schedule to the PST. If a PST file is not found in the file, no changes are made to its schedule.