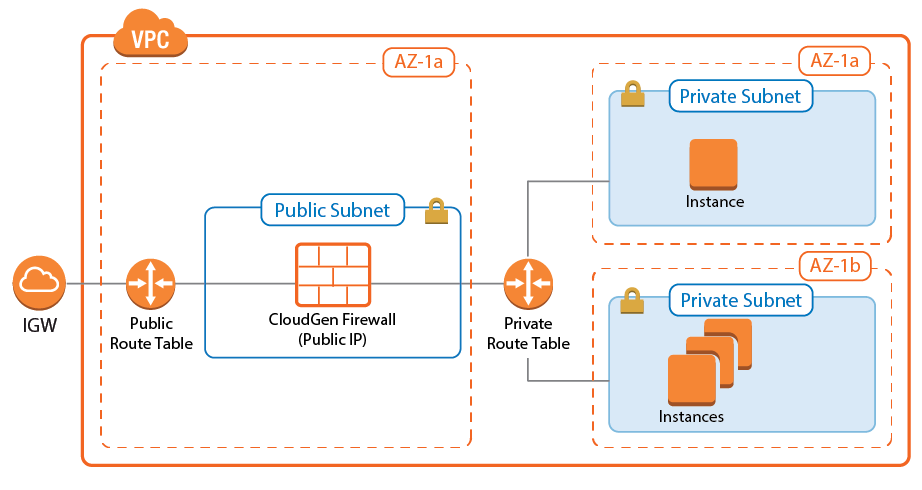
The Barracuda CloudGen Firewall secures and connects the services running in your AWS virtual private cloud (VPC). The firewall monitors and secures all traffic between subnets to and from the Internet. It also connects your cloud resources either to your on-premises networks with site-to-site VPN, or to your remote users with client-to-site VPN and SSL VPN. After the deployment, the Instance ID is the root password set to log in via Barracuda Firewall Admin. Logging in via SSH is only possible through the certificate file set during the last deployment step.
Step 1. Create an IAM Role for the Firewall
Create an IAM role for your firewall instance. Verify that all the required IAM policies are attached to the role.
For step-by-step instructions, see How to Create an IAM Role for a CloudGen Firewall in AWS.
Step 2. Select the AWS Data Center
- Log into the AWS console.
- In the upper right, click on the data center location, and select the data center you want to deploy to from the list.
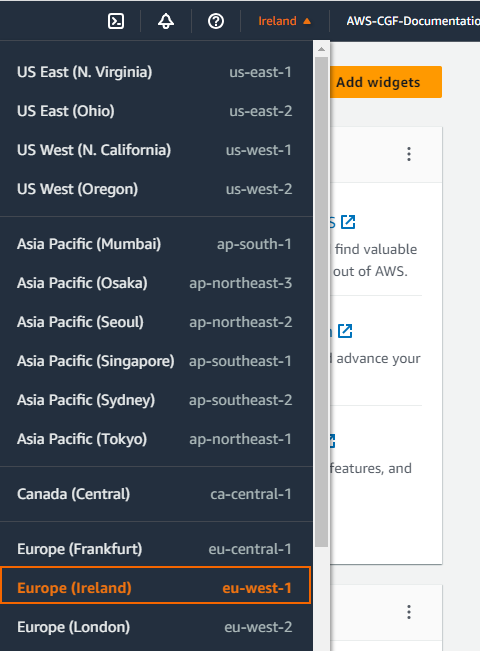
The selected data center location is now displayed in the AWS console.
Step 3. Create an Elastic IP
Create an elastic IP address. This is the public IP address that will be used for your firewall instance.
- Log into the AWS console.
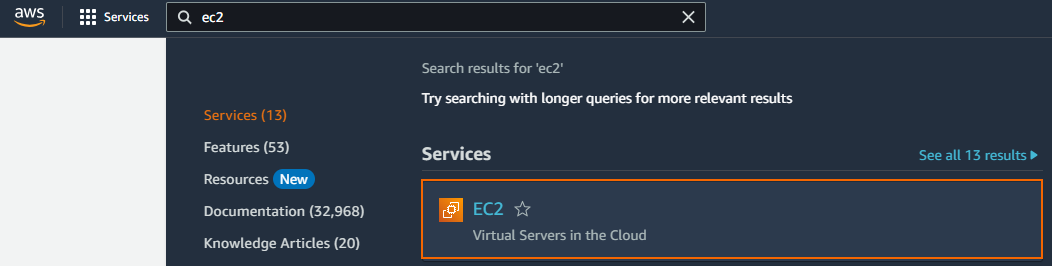
- Click Services and search for
EC2. - Select EC2.
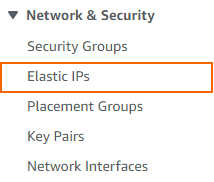
- The EC2 Resources window opens. In the Network & Security section of the left menu, select Elastic IPs.
- Click Allocate Elastic IP address.
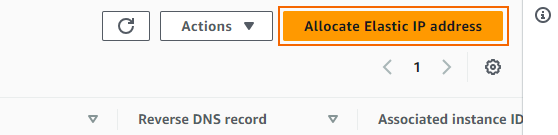
- On the Allocate Elastic IP address page, keep the default settings and click Allocate to allocate a new IP address.
A random unassigned elastic IP gets generated and displayed in the Elastic IP addresses table. Copy the Allocation ID for future use.
Step 4. Create VPC
Use the VPC wizard to create a VPC with one public and one private subnet. The firewall will be deployed in the public subnet. If needed, you can add additional subnets after the deployment.
- Log into the AWS console.
- Click Services and search for
VPC. - Select VPC.
- Click Create VPC.

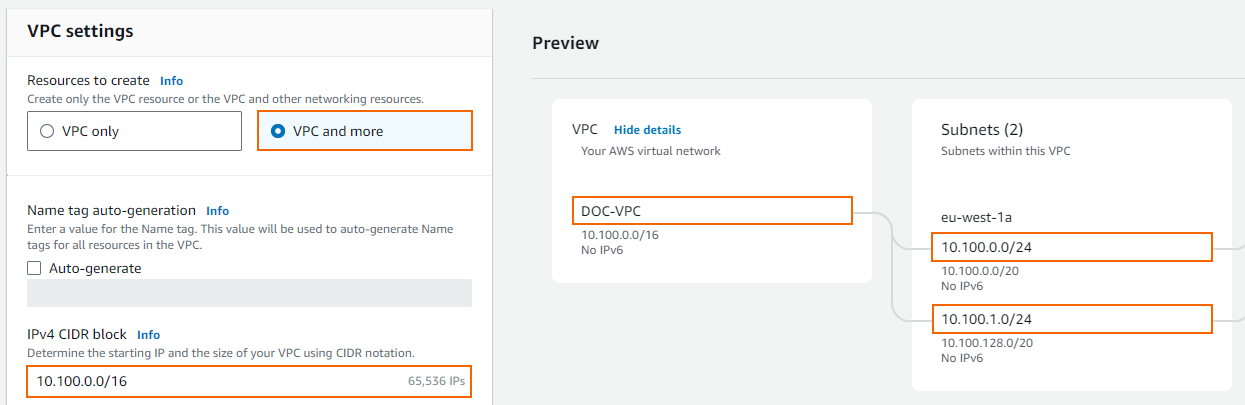
- The VPC configuration window opens. Select VPC and more and customize the following details:
- Auto-generate – (optional) Specify a name tag to be added to all resources. Otherwise, disable this checkbox.
- IPv4 CIDR block – Enter a /16 CIDR block that does not overlap with any of your other networks.
- Number of Availability Zones (AZ) – Select 1, and select which availability zone the VPC is created in.
- NAT gateways ($) – Select None.
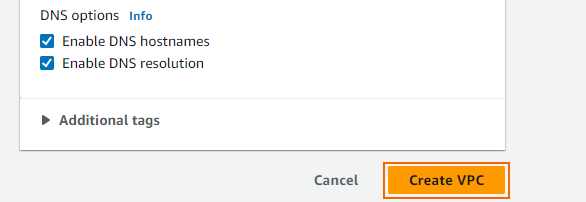
- (optional) Set Enable DNS hostnames to NO to only use IP addresses to access your VPC.
- In the Preview section:
- VPC Name – Enter a name for your VPC.
- Public subnet – Enter the /24 subnet used for the firewall instance.
- Private subnet – Enter the /24 subnet used for the instances protected by the firewall.
You can add more subnets and functionalities later.
- Click Create VPC.
The VPC is now listed in the Your VPCs list.

Step 5. Check the NAT Gateway
Since the Barracuda CloudGen Firewall already includes NAT gateway functionality, make sure that no NAT gateway instance is pesent for your VPC. If a NAT gateway was automatically created during the VPC configuration, you must delete it.
Do do so, complete the following steps:
- Log into the AWS console.
- Click Services and select VPC.
- In the Virtual private cloud section of the left menu, click NAT gateways.
- (optional) Enter the VPC ID in the search bar.
- Right-click the NAT gateway created for your VPC and click Delete NAT gateway.
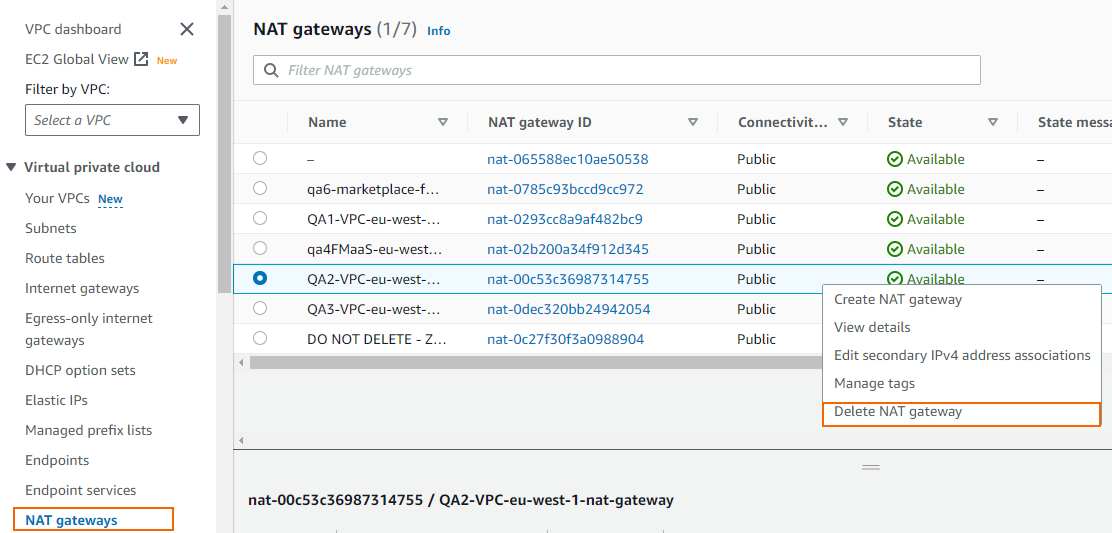
- Confirm the deletion.
The elastic IP address associated with the NAT gateway is released automatically and is now free to use for the firewall instance.
Step 6. Deploy the CloudGen Firewall Instance
You can deploy the CloudGen Firewall instance in two different ways from the AWS Marketplace: BYOL and hourly. The firewall instance is deployed into the public subnet and can be configured to use either a single network interface or one network interface per subnet. The number of network interfaces is limited by the instance size.
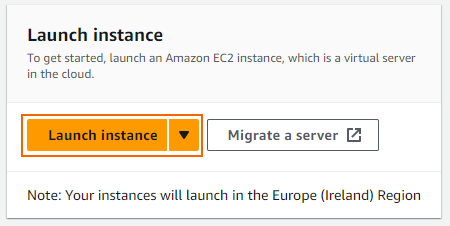
- Log into the AWS console.
- Click Services and select EC2.
- In the Create Instance section, click Launch Instance.
- Click Browse more AMIs, and search the AWS Marketplace for
Barracuda. - Click Select next to the image type you want to deploy: BYOL or PAYG.

- Select the Instance Type. If you are deploying a BYOL image, verify that the number of CPU cores of the instance matches your license.
- Click Continue.
- Configure the Instance Details:
- In the Name and tags field, enter a name for your instance. A tag consists of a key and an optional value (name). To tag your instance, click Add new tag and define values for it.
- Scroll down and select the Instance type.
Key pair (Login) – From the drop-down list, select an existing key pair name or click Create new key pair and create a key pair.
- Network settings – Expand this section and edit the configuration:
- Network / VPC – Select the VPC created in Step 2.
- Subnet – Select the public subnet.
- Auto-assign public IP – Select Disabled to use the subnet setting.
- Firewall (security groups) – Select and existing security group or create a new one.
- (optional) Click Add security group rule and add rules, e.g., for ICMP and HTTP
- For ICMP
- Type – Select All ICMP.
- Source type – Select Anywhere.
- For HTTP
- Type – Select HTTP.
- Source type – Select Anywhere.
- For ICMP
- Configure storage – (optional) Expand this section and change the volume type as needed.
- Advance details – Expand this section and edit the configuration:
- IAM instance profile – Select the IAM role created in Step 1.
- Configure advanced settings according to your requirements. For details, click Info next to a paramenter and refer to the help box on the right.
- Summary (HA only) > Number of instances – To deploy two instances to create an HA cluster, enter
2. For stand-alone deployments, deploy one instance.
- Click Review commands and check your entries.
- Click Launch instance.
On the Launch Status page, locate and copy the Instance IDs. This is the default password used to log in via Barracuda Firewall Admin.

Step 7. Disable Source/Destination Check for the Network Interface
For the interface to be allowed to forward traffic with a destination IP address that is different from the IP addresses assigned to the network interfaces, you must disable the source/destination check.
- Log into the AWS console.
- Click Services and select EC2.
- In the Network & Security section of the left, click Network Interfaces.
- (optional) Filter the list using the Instance ID.
- Right-click on the network interface, and select Change source/dest. check. You can also do this by selecting the entry and expanding the Actions menu.
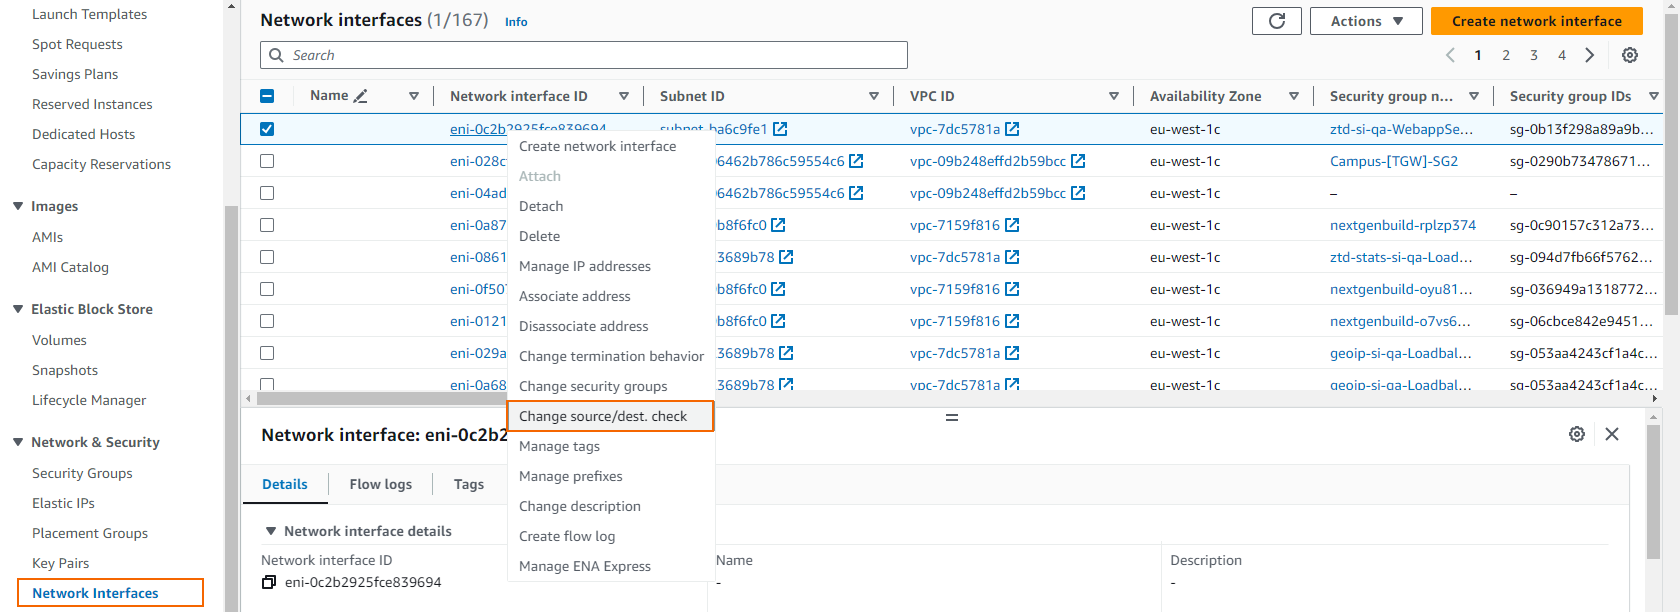
- Set the sounce/destination check to disabled.
- Click Save.
The source/destination check is now disabled for the network interface connected to the firewall instance.
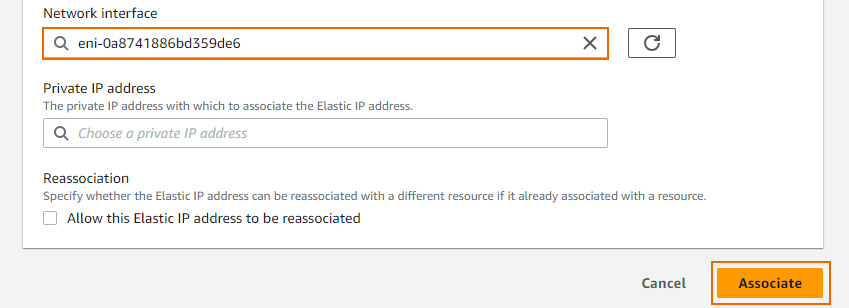
Step 8. Associate the Elastic IP with the Firewall
Use the Elastic IP (EIP) as the public IP address for the firewall network interface connected to the public subnet.
- Stay in the Network Interfaces window.
- (optional) Filter the list using the Instance ID.
- Locate the network interface connected to the public subnet, and copy the Network interface ID.

- In the Network & Security section of the left menu, click Elastic IPs.
- Select the EIP created in Step 2, expand the Actions list, and select Associate Elastic IP address.

- Select Network interface, select the the Network interface ID, and click Associate.
Traffic to the EIP is now automatically forwarded to the network interface attached to the public subnet of the VPC.
Step 9. Adjust the Routing Tables
Adjust the routing table for the private subnets to use the firewall instance as the default gateway. Instances will always use the first IP address of the subnet as the default gateway. The AWS cloud fabric then internally reroutes the traffic to the configured network interface or instance.The route table attached to the public subnet does not need to be changed.
- Log into the AWS console.
- Click Services and select VPC
- In the Virtual private cloud section of the left menu, click Route tables.
- (optional) Filter the list using the VPC ID.
- Select the route table that is not associated with the public subnet.
- In the lower half of the page, click on the Subnet associations tab.
- Click Edit subnet associations.
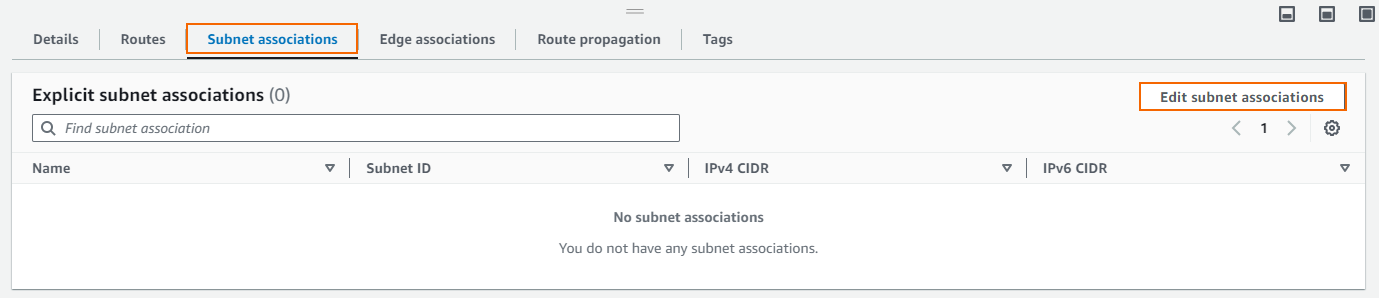
Select the private subnet and click Save associations.
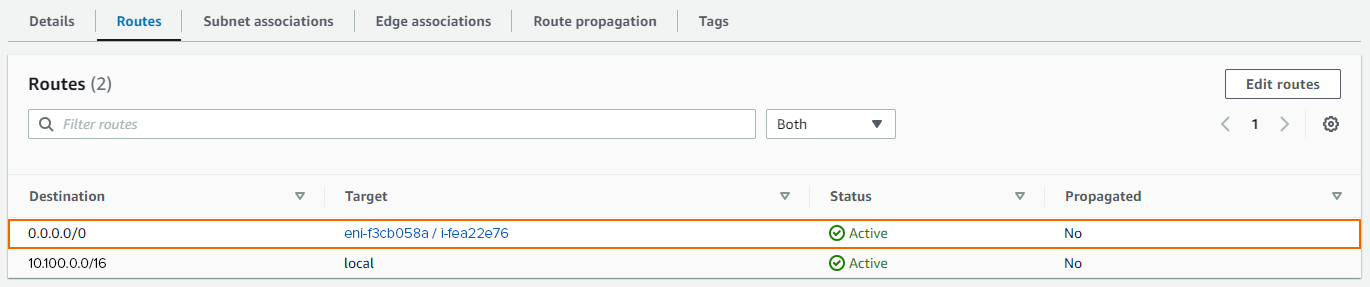
- Click the Routes tab.
- Click Edit routes.

- Depending on whether you are using single or multiple network interfaces:
- Single NIC – Enter the Instance ID of the firewall in the Target column of the route with the Destination 0.0.0.0/0.
- Multiple NICs – Enter the network interface ID of the network interface associated with this subnet in the Target column of the route with the Destination 0.0.0.0/0.
- Click Save changes:
You now have a default route with the Status Active and the target set to the correct firewall network interface.
Step 10. Create a Security Group
Create a security group for the private networks that allow all traffic from the security group assigned to the firewall.
- Log into the AWS console.
- Click Services and select VPC
- In the Security section of the left menu, click Security groups.
- Locate the security group created during the firewall deployment, and copy the Security group ID.

- Click Create security group.
- Security group name – Enter a name for the security group.
- Description – Enter a description for the security group.
- VPC – Select the VPC you created in Step 3 from the list.
- Click Create security group.
- In the lower half of the page, click on the Inbound rules tab.
- Click Edit inbound rules .
- Create a rule to allow traffic from the firewall security group:
- Type – Select All traffic.
- Protocol – Select All.
- Source – Select Custom and enter the group ID of the security group assigned to your firewall.
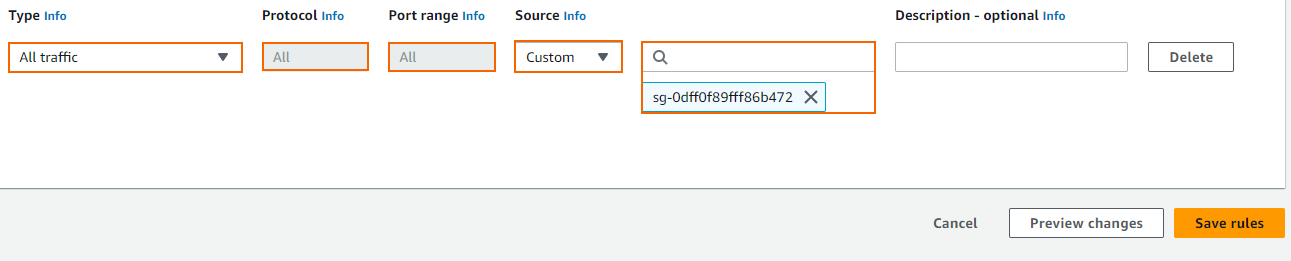
- Click Save rules.
When deploying Instances to one of the private subnets, use this security group. This will allow traffic to and from the firewall.
Step 11. (optional) Edit the Network ACLs
The Network ACLs created by the VPC wizard are configured by default to allow traffic through. If required, go Network ACLs to edit the network ACL assigned to your VPC.
Step 12. Log in via Barracuda Firewall Admin
Use Barracuda Firewall Admin to log into your firewall.
- Launch Barracuda Firewall Admin.
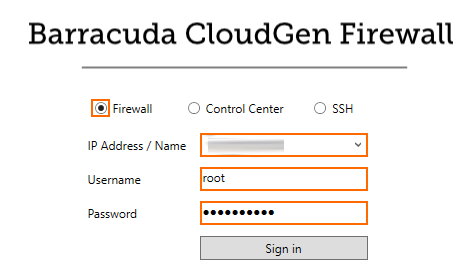
- Log into the firewall:
- Select Firewall.
- IP Address / Name – Enter the elastic IP.
- Username – Enter
root. - Password – Enter the Instance ID of the firewall instance created in Step 6.
- Click Sign in.
- Renew your password.
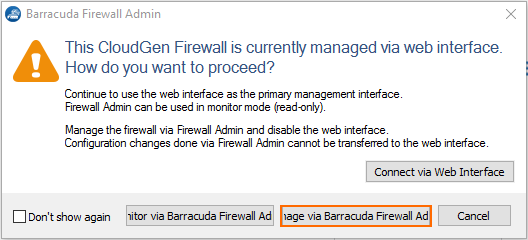
- The window for selecting how to manage the firewall is displayed.
- Click Manage via Barracuda Firewall Admin.
Next Steps
- (BYOL only) License and activate the firewall. For more information, see How to Activate and License a Stand-Alone Virtual or Public Cloud Firewall or Control Center.
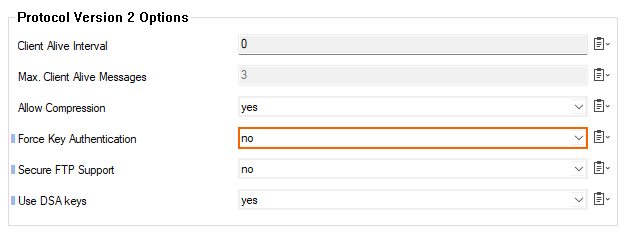
- (optional) Re-enable SSH logins via password by setting Force Key Authentication to No in the Advanced View of the CONFIGURATION > Configuration Tree > Box > Advanced Configuration > SSH > Advanced Setup page.