

The Barracuda SecureEdge Manager allows you to create access control lists (ACLs) for your connected sites, using either predefined applications or a custom application. With access control lists, you can either allow or deny access based on source and destination.
Before You Begin
If you want to use the users or groups from user directories (such as Microsoft Entra ID, LDAP, Google Workspace, Okta, SCIM, and Barracuda Cloud Control) in network policies, you must first connect your SecureEdge Identity Management in order to synchronize users and groups. For more information, see Identity Management.
If you want to select users or groups from user directories such as BCC-linked Microsoft Entra ID or the BCC-linked LDAP directory in network policies, you must first connect your directory with Barracuda Cloud Control in order to synchronize users and groups. For more information, see LDAP Active Directory and Microsoft Entra ID and How to Connect Microsoft Entra ID with Barracuda Cloud Control.
Create a Site ACL
Go to https://se.barracudanetworks.com and log in with your existing Barracuda Cloud Control account.
In the left menu, click the Tenants/Workspaces icon and select the workspace containing your site.
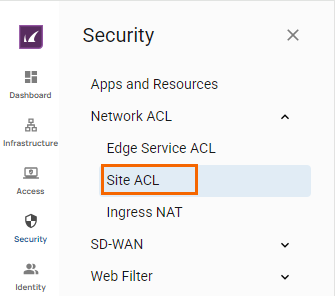
Go to Security.
Expand the Network ACL menu on the left and select Site ACL.
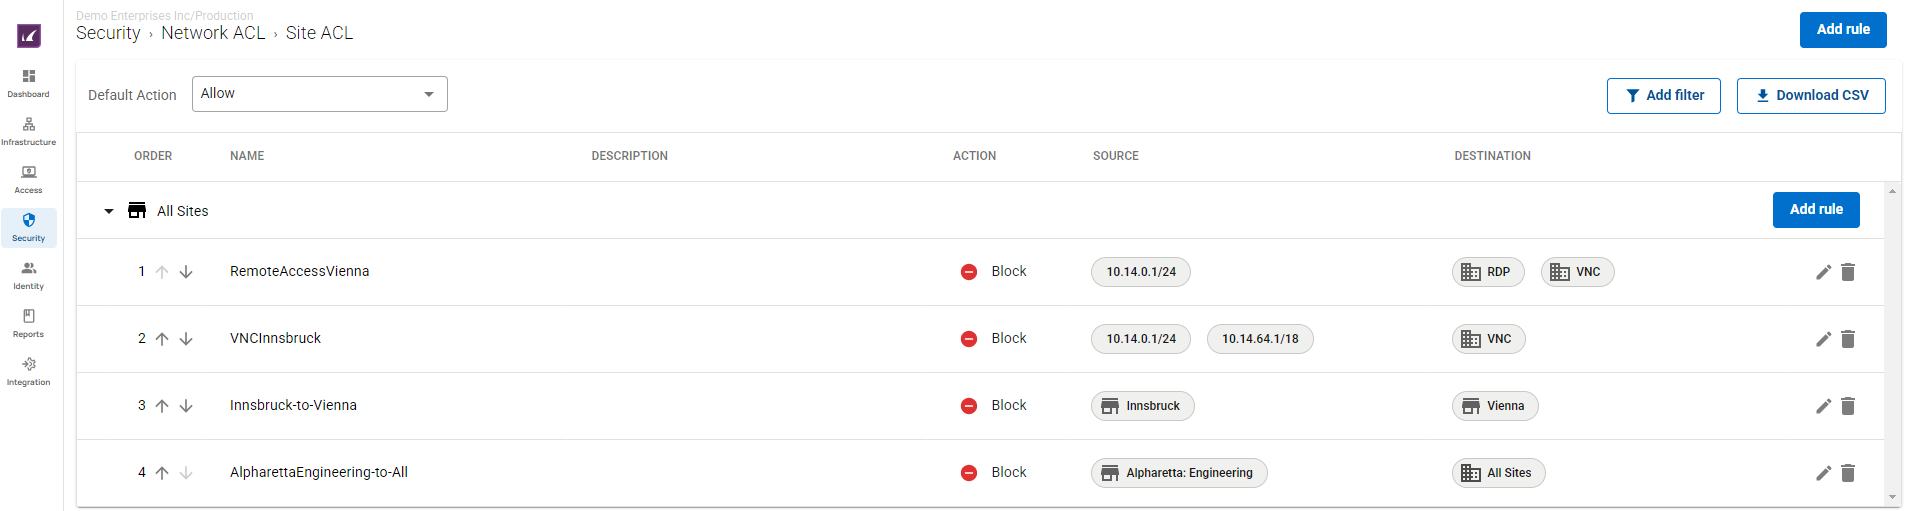
The Site ACL window opens. To create a new rule, click Add Rule.

The Add New Rule window opens. Specify values for the following:
Scope – Select the scope of this rule from the drop-down menu. You can select either All Sites or a specific Site.
Name – Enter a unique name for a rule.
Description – Enter a brief description.
Action – Select the action from the drop-down menu. You can choose between Allow and Block.
ICMP – Select the ICMP value from the drop-down menu. You can choose between Allow and Block.
If you select Action = Allow, you can choose an ICMP value of either Allow or Block.
If you select Action = Block, the ICMP field is disabled and set to Block.
In the SOURCE CRITERIA section, specify the following:
Type – Select a source type. You can choose between Connectors, IP/Network, Private Edge Service, Site, and User/Group.
If you select Connectors, you must add one or more connectors from the drop-down menu, or type to search.
If you select Private Edge Service, the All Private Edge Services option is enabled by default. However, you can add a specific Private Edge Service after disabling All Private Edge Services.
If you select Site, the All Sites option is enabled by default. However, you can add a specific Site after disabling All Sites.
If you select User/Group, you must add one or more users/groups from the drop-down menu, or type to search.
If you select IP/Network, specify values for the following:
IP/Network – Enter the IP address or network, and click +.
In the DESTINATION CRITERIA section, specify the following:
Type – Select a destination type. You can choose between Application, IP/Network, Site, Private Edge Service, and Connectors.
If you select Connectors, you must add one or more connectors from the drop-down menu, or type to search.
If you select Private Edge Service, the All Private Edge Services option is enabled by default. However, you can add a specific Private Edge Service after disabling All Private Edge Services.
If you select Site, the All Sites option is enabled by default. However, you can add a specific Site after disabling All Sites.
If you select IP/Network, specify values for the following:
IP/Network – Enter the IP address or network, and click +.
If you select Application, you must add one or more applications from the drop-down menu, or type to search.
Application – Select an application from the drop-down menu, or type to search.
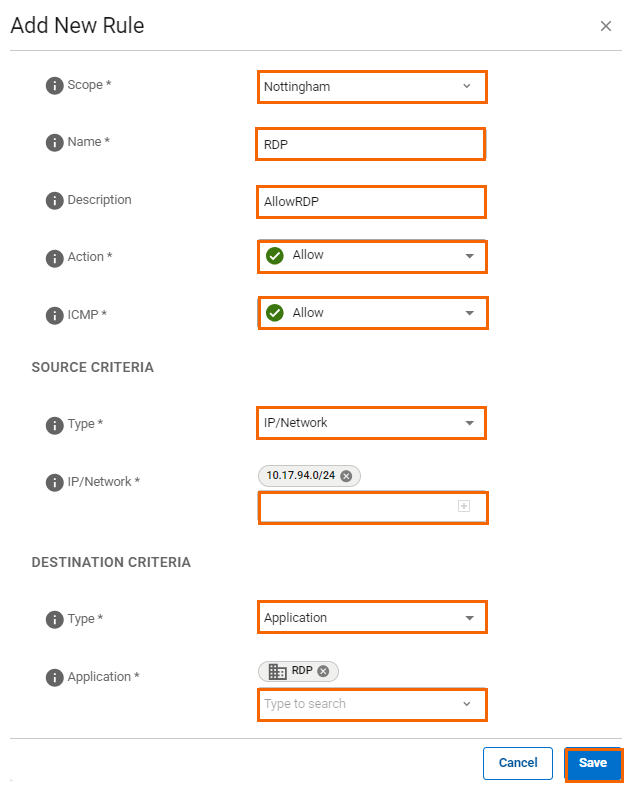
Click Save.
After the configuration is complete, you can either allow or deny access based on source and destination. For example, when the Action and ICMP fields are set to Allow, you can send a ping from the source to the destination. If no Site ACL rule matches, the Default Action will be applied.
Select the Default Action
You can configure the site ACL to either allow or block traffic by default.
Go to https://se.barracudanetworks.com and log in with your existing Barracuda Cloud Control account.
In the left menu, click the Tenants/Workspaces icon and select the workspace containing your site.
Go to Security.
Expand the Network ACL menu on the left and select Site ACL.
The Site ACL page opens. Select the Default Action.

Edit an Existing Site ACL
In the left menu, click the Security.
Expand the Network ACL menu on the left and select Site ACL.
The Site ACL window opens. Click on the pencil icon next to the rule you want to edit.

The Edit Rule window opens. Edit the value you are interested in.
Click Save.
Remove an Existing Site ACL
In the left menu, click the Security.
Expand the Network ACL menu on the left and select Site ACL.
The Site ACL window opens. Click on the trash can icon next to the rule you want to remove.
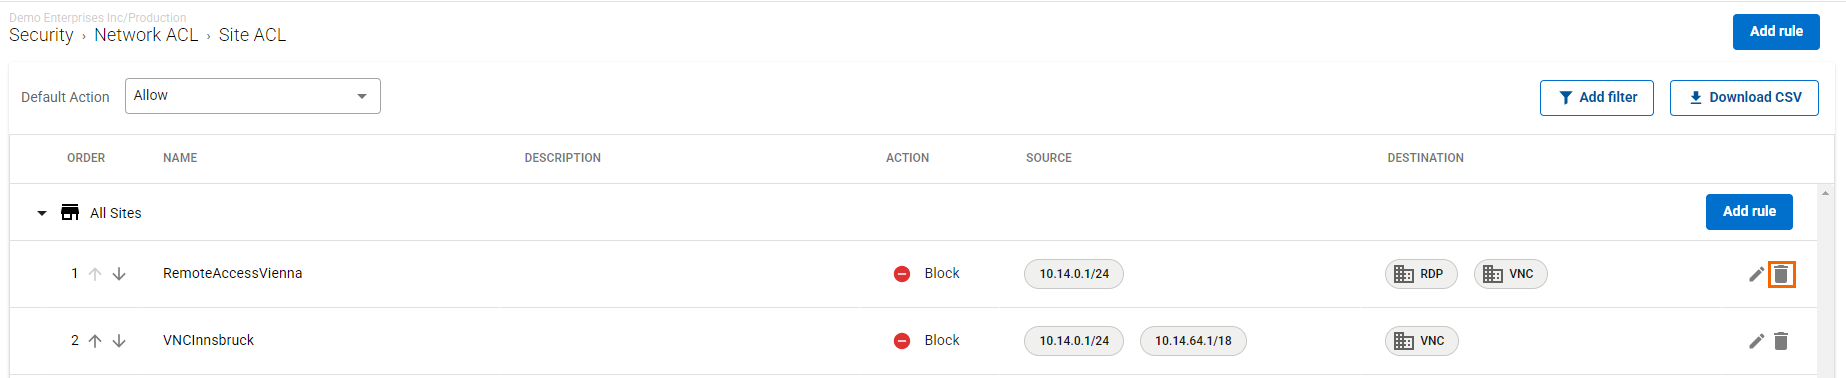
The Delete Rule window opens.
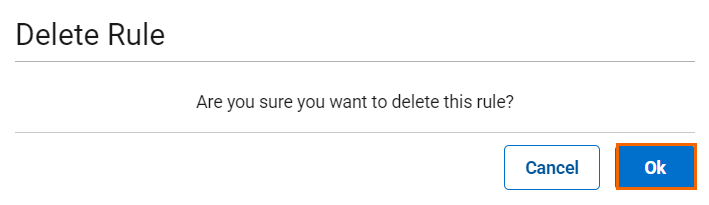
Click OK to confirm.
Further Information
For more information on Edge Service ACL, see How to Create an Edge Service ACL.