

WAN connections can be configured either during deployment or later through the Sites tab. For more information on configuring during deployment, see How to Create a T/VT Site Configuration in Barracuda SecureEdge. The Barracuda SecureEdge Manager allows you to create a PPPoE WAN interface on sites and private Edge Services during initial deployment via their respective wizards. In addition, you can add a PPPoE WAN interface to any existing site or private Edge Service with a free port.
Add WAN Configuration
- Go to https://se.barracudanetworks.com and log in with your existing Barracuda Cloud Control account.
- In the left menu, click the Tenants/Workspaces icon and select the workspace containing your site.
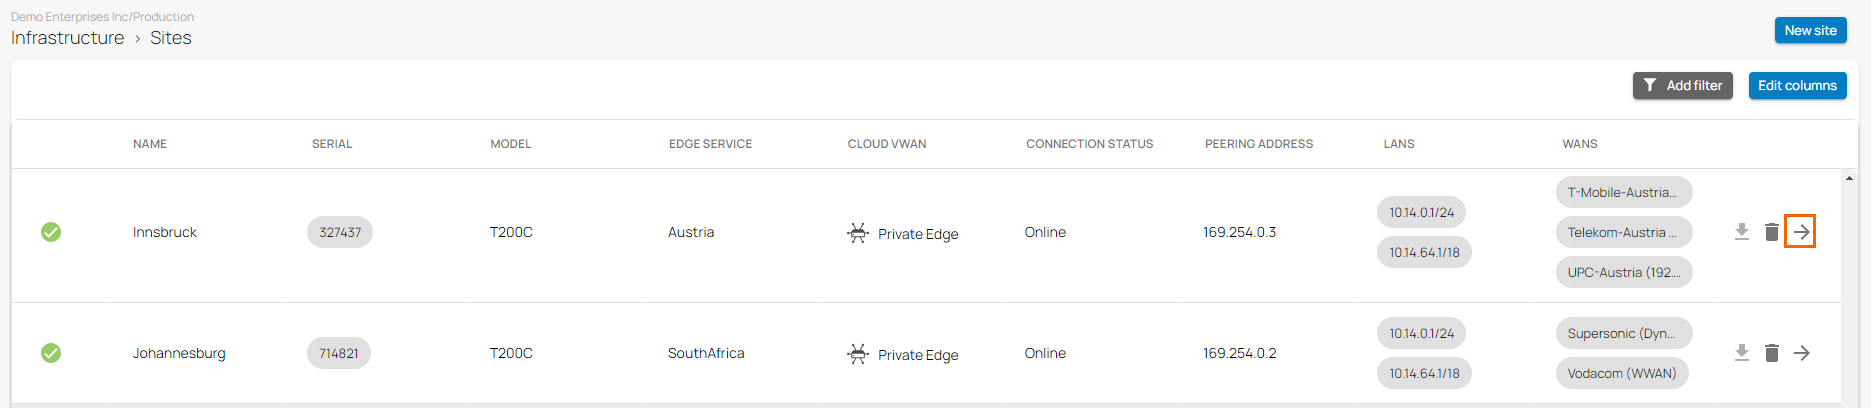
- Go to Infrastructure > Sites. The Sites page opens.
- Select the site you want to edit. You can either search for the name or serial, or use filters to tailor the list of displayed sites. You can also simply scroll through the list. Click on the arrow icon next to the site you want to configure.
- In the Site menu, go to Settings > WAN and click Add WAN interface.

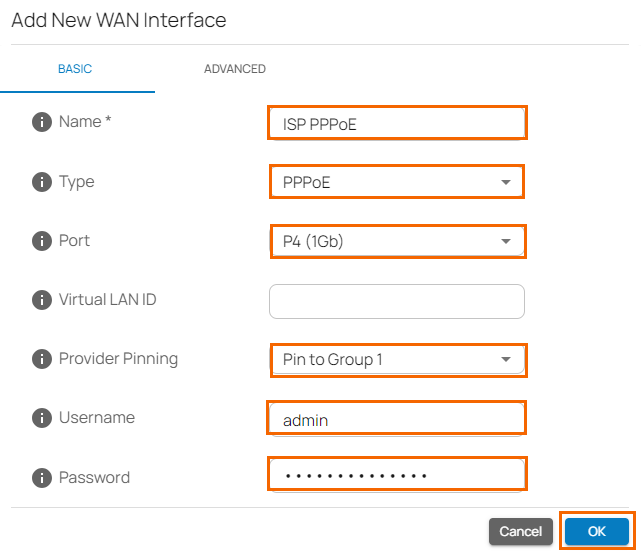
- The Add New WAN Interface window opens. Specify values for the following:
- In the BASIC tab, specify values for the following:
- Name – Enter a unique name for your uplink.
Type – Select PPPoE from the drop-down list.
- Port – Select the port where your uplink is connected to. The default for DHCP connections is p4, except model T93 Revision A where DHCP is located on p2. Note: Port 1 is reserved for high availability.
- Virtual LAN ID (Optional) – If required, enter the Virtual LAN ID this interface is connected to.
- Provider Pinning – Select a provider classification from the drop-down list.
- Username – Enter the username.
- Password – Enter the password.
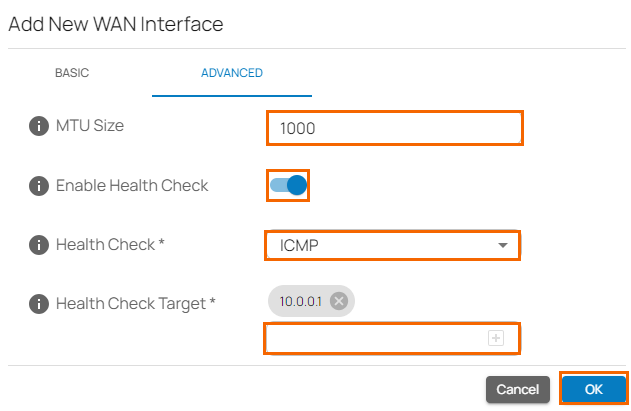
- In the ADVANCED tab, specify values for the following:
- MTU Size – Enter a valid number up to
1492. By default, MTU Size is 1452. - Enable Health Check – Click to enable/disable. By default, Health Check is disabled.
- When Health Check is enabled, specify values for the following:
- Health Check – Select the Health Check mode you wish to use from the drop-down list. You can choose between ICMP, LCP, and LCP Strict.
- If you select Health Check = ICMP, specify values for the following:
Health Check Target – Enter a valid IP address, and to add more IPs, click +. You can add a collection of IP addresses such as IPv4, public, and private.
- If you select Health Check = LCP or LCP Strict, the Health Check Target field is disabled.
- If you select Health Check = ICMP, specify values for the following:
- Health Check – Select the Health Check mode you wish to use from the drop-down list. You can choose between ICMP, LCP, and LCP Strict.
- When Health Check is disabled, the Health Check field is disabled.
- When Health Check is enabled, specify values for the following:
- MTU Size – Enter a valid number up to
- In the BASIC tab, specify values for the following:
- Click OK.
- Click Save.
After configuration is complete, you can see a new PPPoE entry in the corresponding site of the WAN table.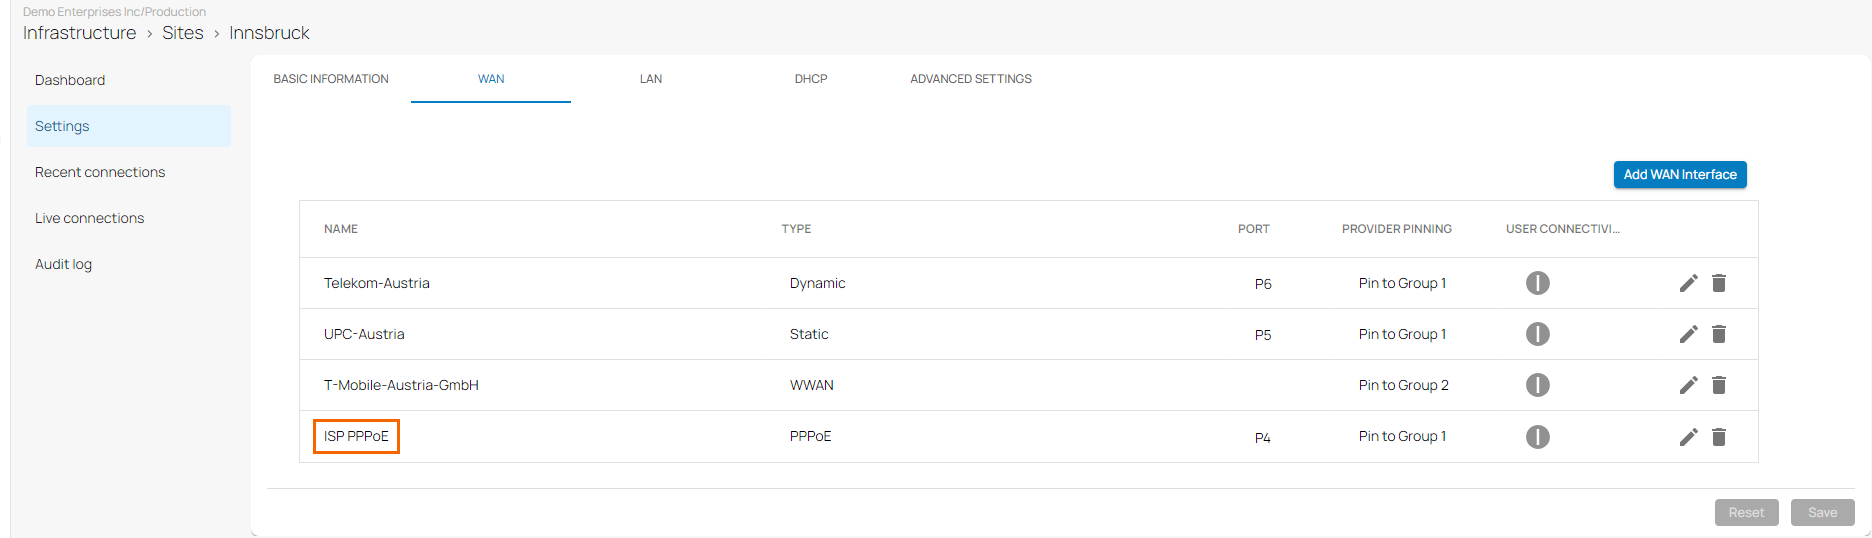
Edit an Existing WAN Configuration
You can change a PPPoE WAN interface to a non-PPPoE WAN interface or vice versa.
- Go to https://se.barracudanetworks.com and log in with your existing Barracuda Cloud Control account.
- In the left menu, click the Tenants/Workspaces icon and select the workspace containing your site.
- Go to Infrastructure > Sites. The Sites page opens.
- Select the site you want to edit. Click on the arrow icon next to the site you want to edit.
- In the site menu, go to Settings > WAN and click on the pencil icon next to the WAN interface you want to edit.
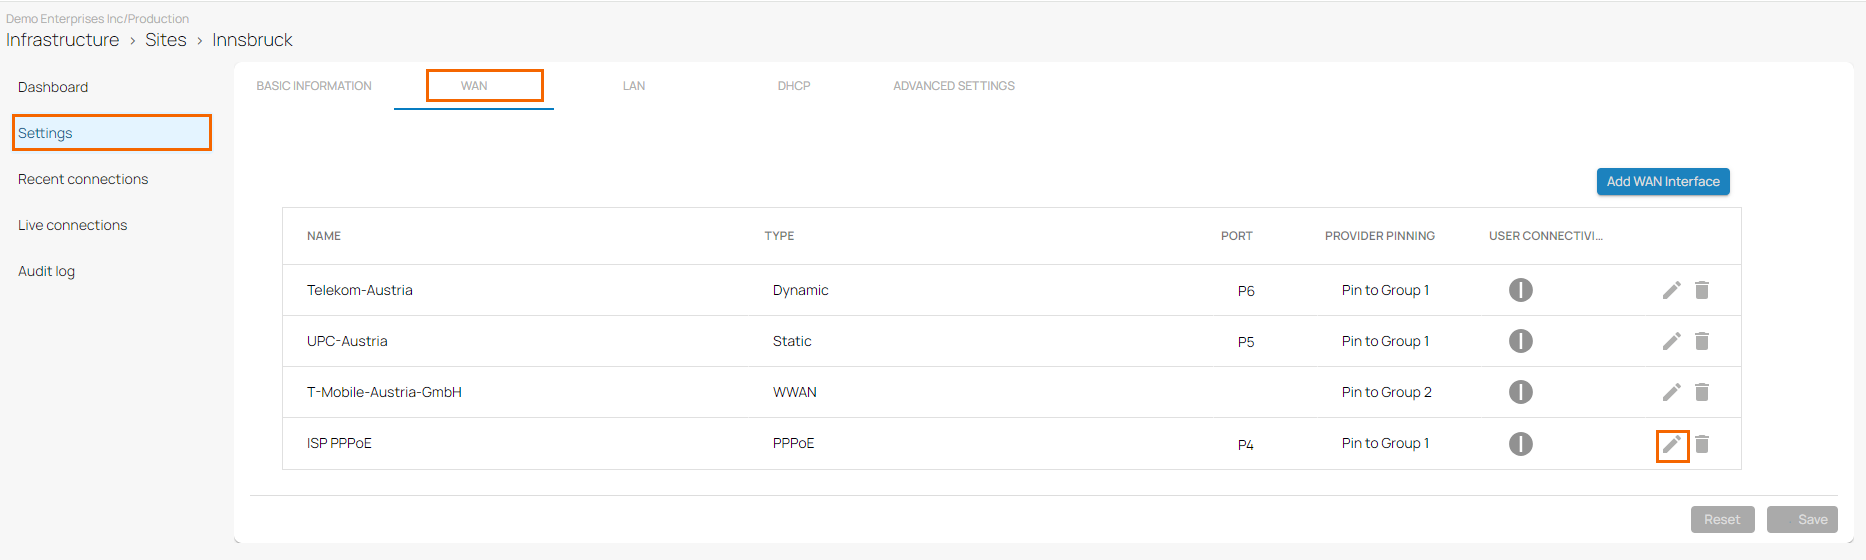
- The Edit WAN Interface window opens. Edit the value you are interested in.
- Click OK.
- Click Save.