

To run the Recovery Media, perform the following steps.
- Boot the recovery machine from the disk or flash drive to start the recovery application.
The Start Recovery Wizard screen is displayed.
- Click Start Recovery Wizard.
The log in screen is displayed.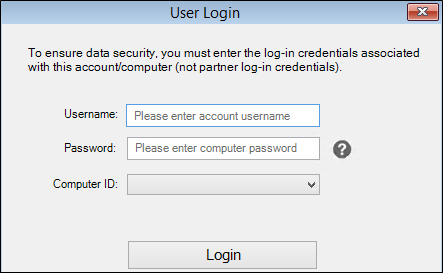
Type your credentials, select the Computer ID, and then click the Login button.
The Select Backup Set Type screen is displayed.
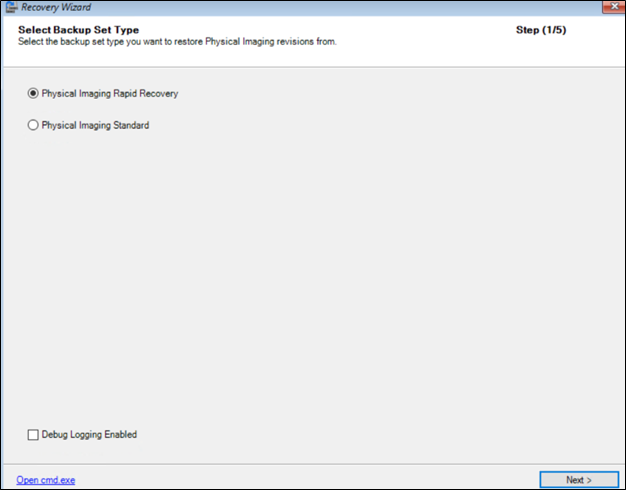
Select the Physical Imaging Standard radio button, and then click Next.
The Select Backup Restore Source page is displayed.
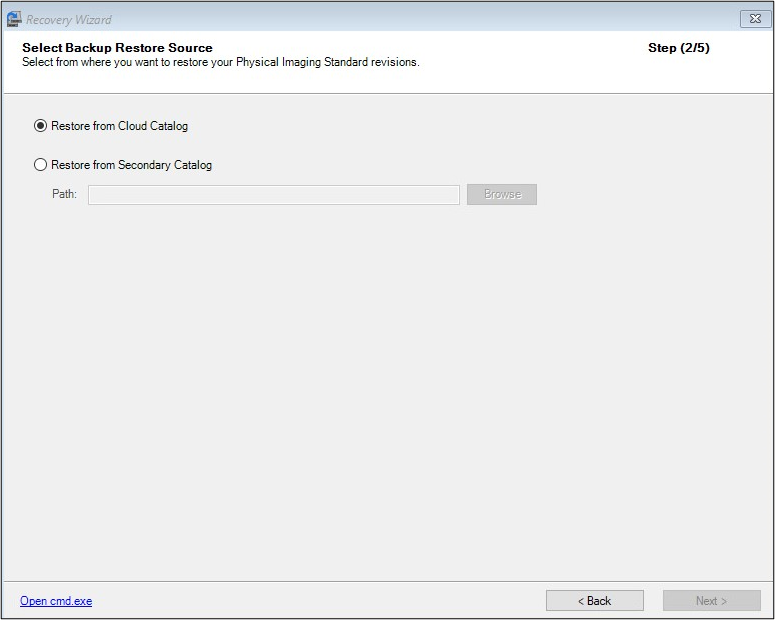
Select the catalog from which to restore your Physical Standard Restore revisions and then click Next .
IF…
THEN…
there is not at least 500 MB of space available for the restore, the following error message is displayed.
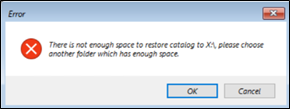
a. Click OK.
The Restore Catalog page is displayed.
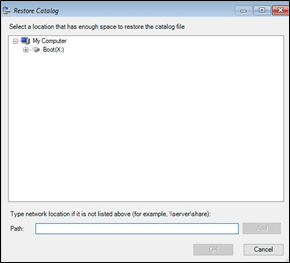
b. Select a location or type a path to a network share with at least 500 MB space to restore the catalog file and then click Add.
a restore catalog file already exists, the following message is displayed.
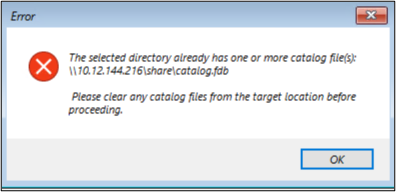
a. Click OK.
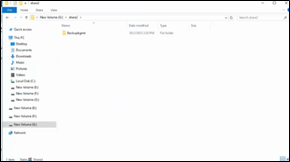
b. Delete the existing catalog or provide a new share for the recovery catalog, as show below.
The Select Recovery Volumes screen is displayed.
Select the volumes and the revisions to be restored.
The selections are displayed in the right pane.Click the Next button.
The Map Recovery Volumes to Target Disks screen is displayed.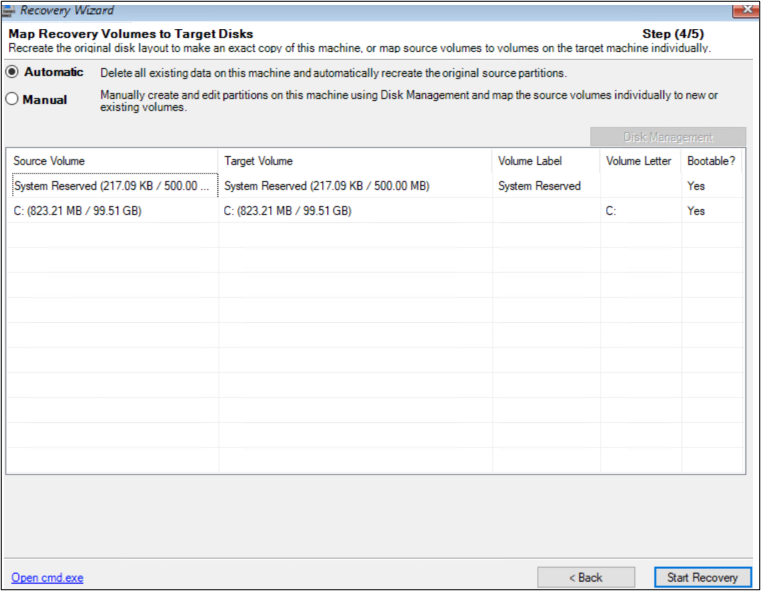
- To automatically restore all selected volumes to the target machine’s disk, select the Automatic radio button.
- To manually create volumes on the target machine, select the Manual radio button.
The manual fields are displayed.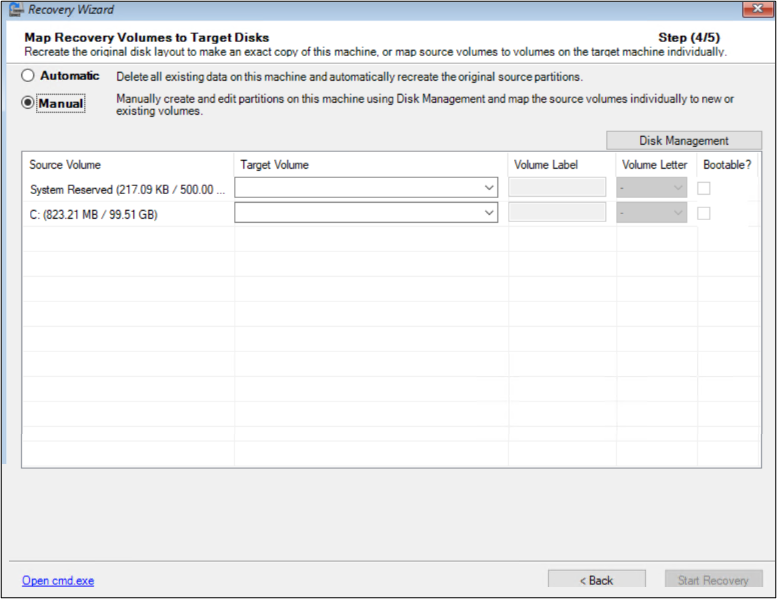
For manual restore, click the Disk Management button and then, select which source volume to restore to which target volume.
- Click the Start Recovery button to begin the restore.
The Recovery Progress and Logs screen is displayed.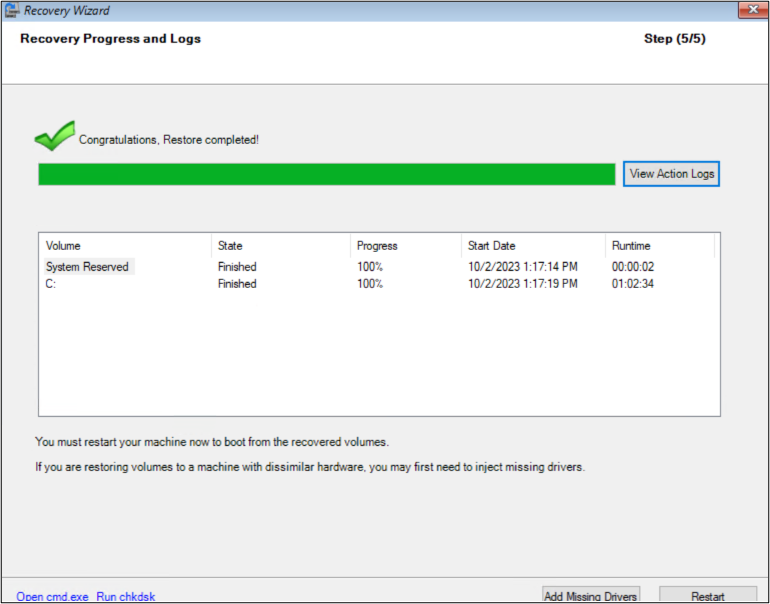
- Click the View Action Logs button to observe progress.
After the restore is completed without errors, chkdsk runs automatically.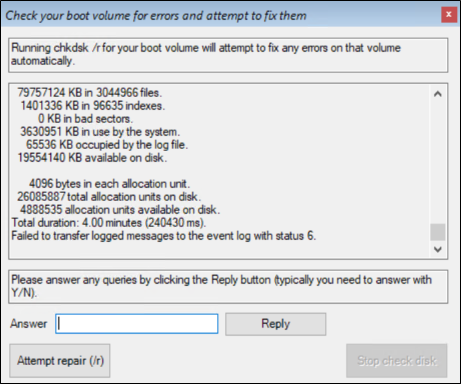
- Check your boot volume for errors and attempt to fix them, and then click Exit.
- If you are restoring volumes to a machine with dissimilar hardware, add missing drivers by rebooting the machine or clicking the Add Missing Drivers button.
- Click the Restart button to boot from the recovered volumes.