

Barracuda SecureEdge allows you to create an inline bridge configuration on an existing stand-alone site by bridging a WAN with a LAN. WAN connections can be configured either during initial deployment via the setup wizard or later through the Sites tab. For more information on configuring during deployment, see How to Create a T/VT Site Configuration in Barracuda SecureEdge. Inline bridges are available only for stand-alone sites (HA and non-HA).
Create an Inline Bridge
- Go to https://se.barracudanetworks.com and log in with your existing Barracuda Cloud Control account.
- In the left menu, click the Tenants/Workspaces icon and select the workspace containing your existing stand-alone site.
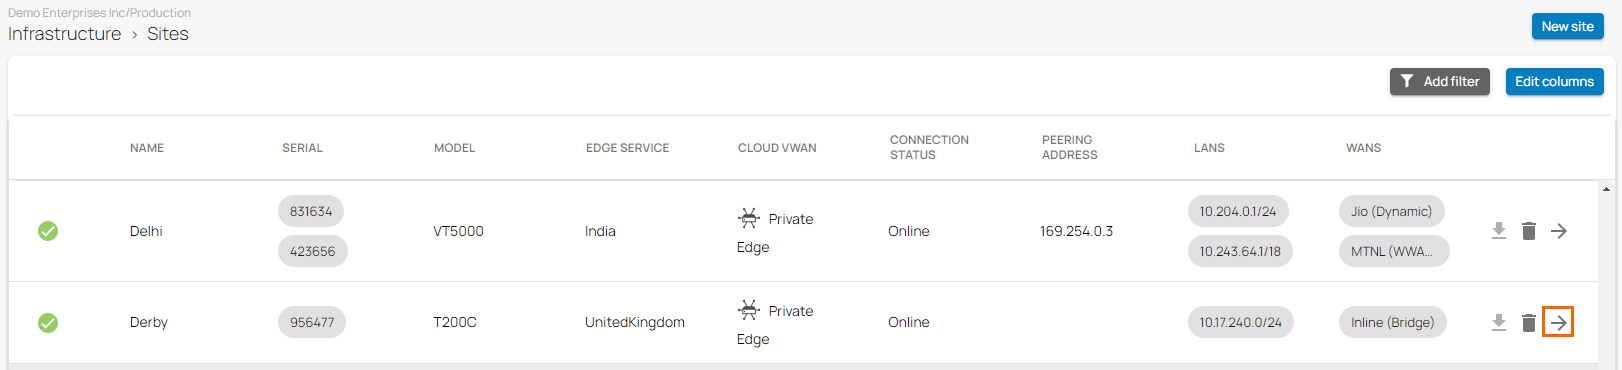
- Go to Infrastructure > Sites. The Sites page opens.
- Select the site you want to edit. You can either search for the name or serial, or use filters to tailor the list of displayed sites. You can also simply scroll through the list. Click on the arrow icon next to the site you want to configure.
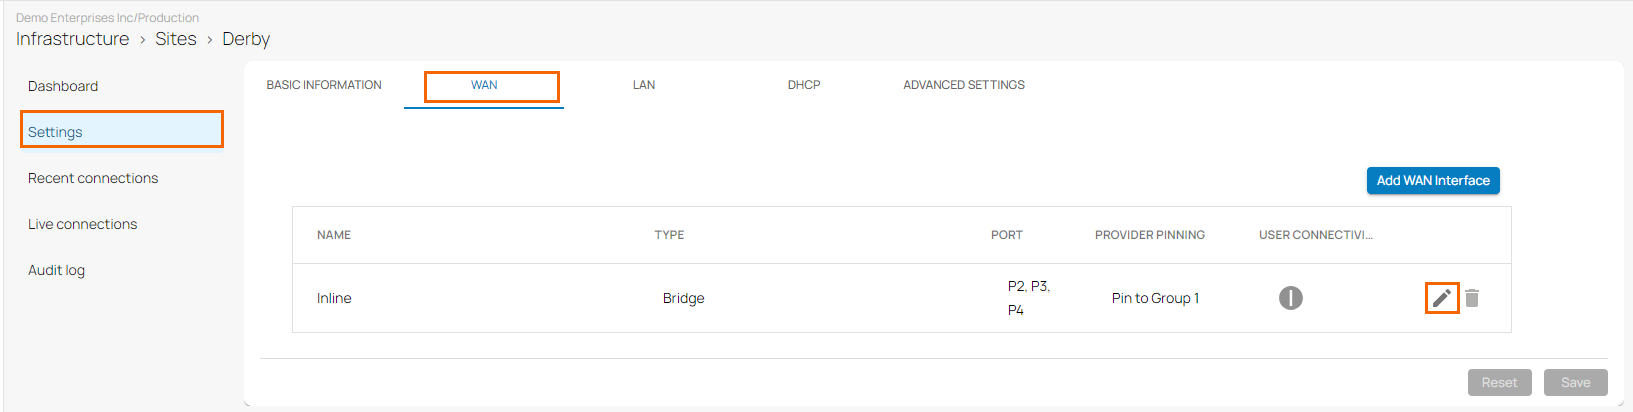
- In the site menu, go to Settings > WAN and click Add WAN Interface.

- The Add NEW WAN Interface window opens. Specify values for the following:
- Name – Enter a unique name for the WAN link
- Type – Select Bridge from the drop-down list.
- WAN Port – Select the WAN port from the drop-down list. Note: Port 1 is reserved for High Availability.
- IP Address – Enter the network IP address assigned to the port.
- Netmask – Enter the CIDR netmask suffix.
- Gateway – Enter the gateway IP address.
- LAN Ports – Enter the LAN ports this interface is connected to.
- Provider Pinning – Select a provider classification from the drop-down list.
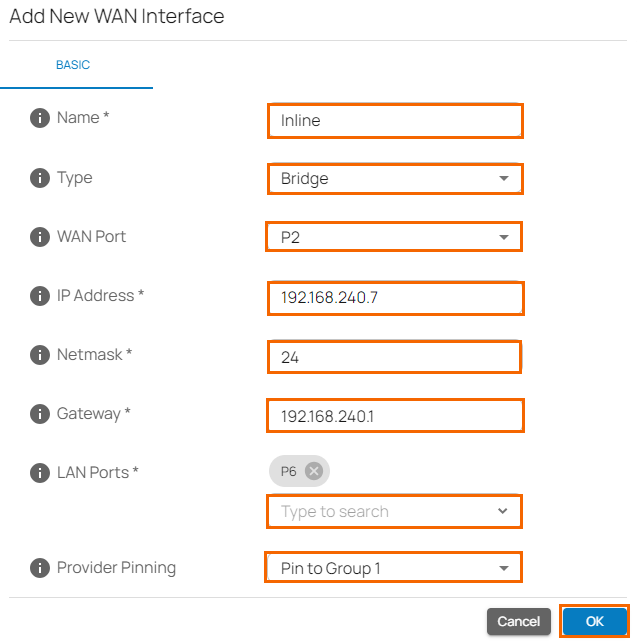
- Click OK.
- Click Save.
After the configuration is saved, you can see that network details for the inline bridge will appear in the WANS column of the Sites page. To allow network traffic to pass between the bridged interfaces, you must define a Policy Profiles rule set for every bridged interface group. An inline bridge is created across ports P2 (WAN) and P6 (LAN), and that the network traffic flows between your client(s) and the internet. These bridges can now be used in the same way as LANs are used in security policies.

Edit an Inline Bridge
- Go to https://se.barracudanetworks.com and log in with your existing Barracuda Cloud Control account.
- In the left menu, click the Tenants/Workspaces icon and select the workspace containing your existing stand-alone site.
- Go to Infrastructure > Sites. The Sites page opens.
- Select the site you want to edit. Click on the arrow icon next to the stand-alone site you want to configure.
- In the site menu, go to Settings > WAN and click on the pencil icon next to the selected bridge.
- The Edit WAN Interface window opens. Edit the value you are interested in.
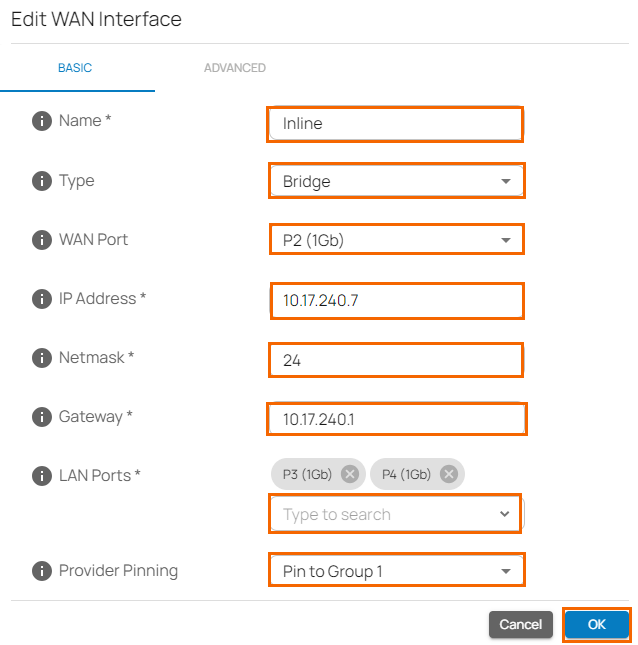
- Click OK
- Click Save.