Barracuda SecureEdge offers integration with Teridion. Teridion Connect provides numerous PoPs (Points of Presence) across the globe, including China, to allow access to their network backbone. Barracuda SecureEdge can connect to the TCR (Teridion Cloud Router) deployed in one of the PoPs by using IPsec to leverage their backbone to improve connectivity. In addition, BGP can be used as a dynamic routing protocol to learn and propagate networks. For more information, visit the Teridion website.
Before You Begin
- Deploy and set up your Teridion infrastructure. For assistance on the Teridion setup, please contact Teridion.
Step 1. Collect Site Information
Log into your Teridion portal and collect the following information:
- From the Site Configuration page, collect the information on the PoE IP from the site you need to connect to.
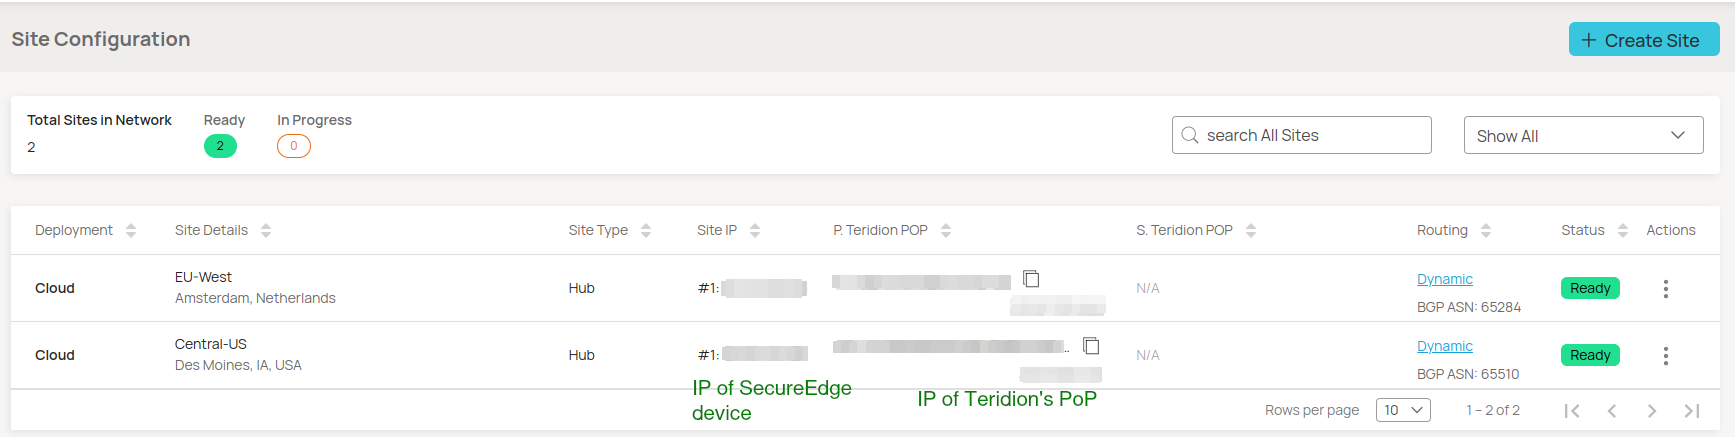
- Site Details
- Site Details
- Tunnel type
- High Availability (Optional)
- Gateways
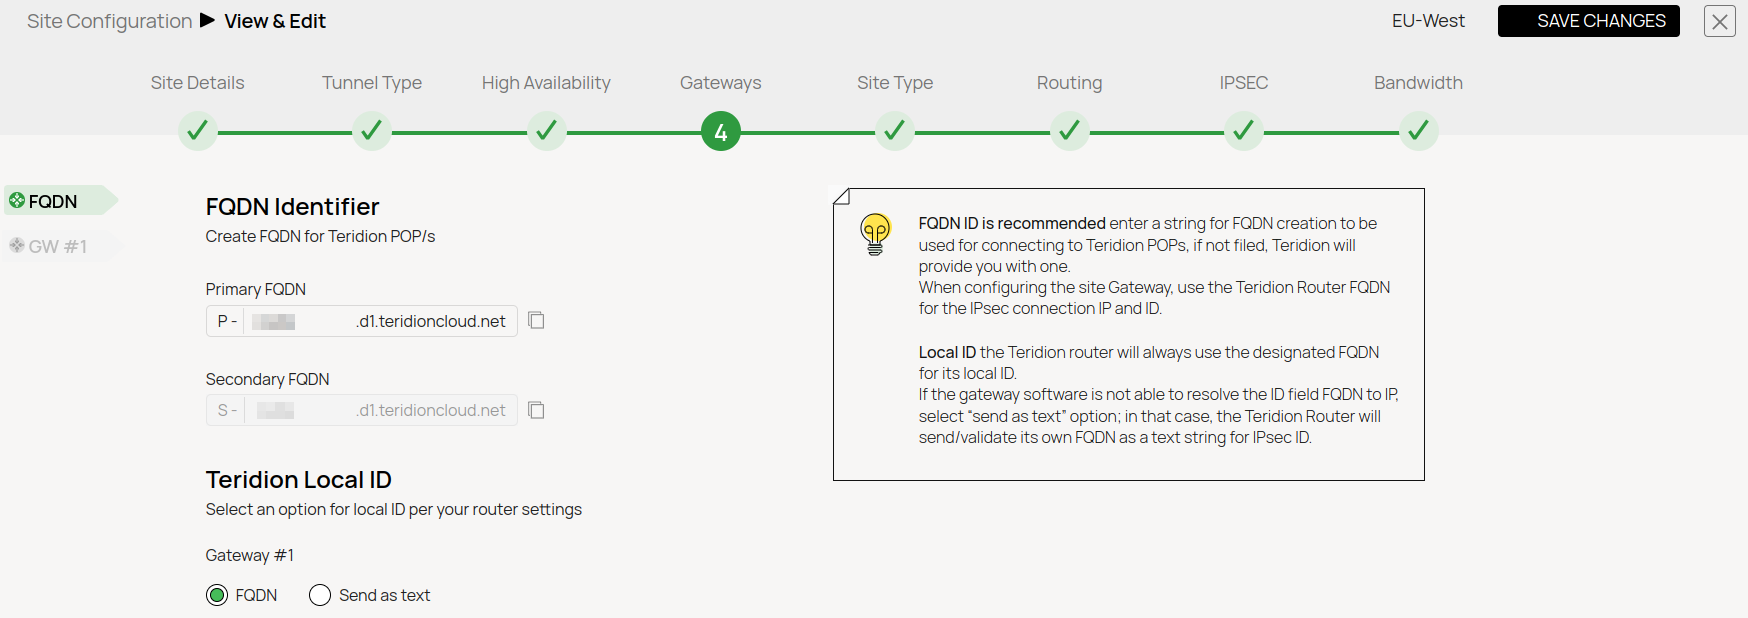
- FQDN
- Gateways IPs

- FQDN
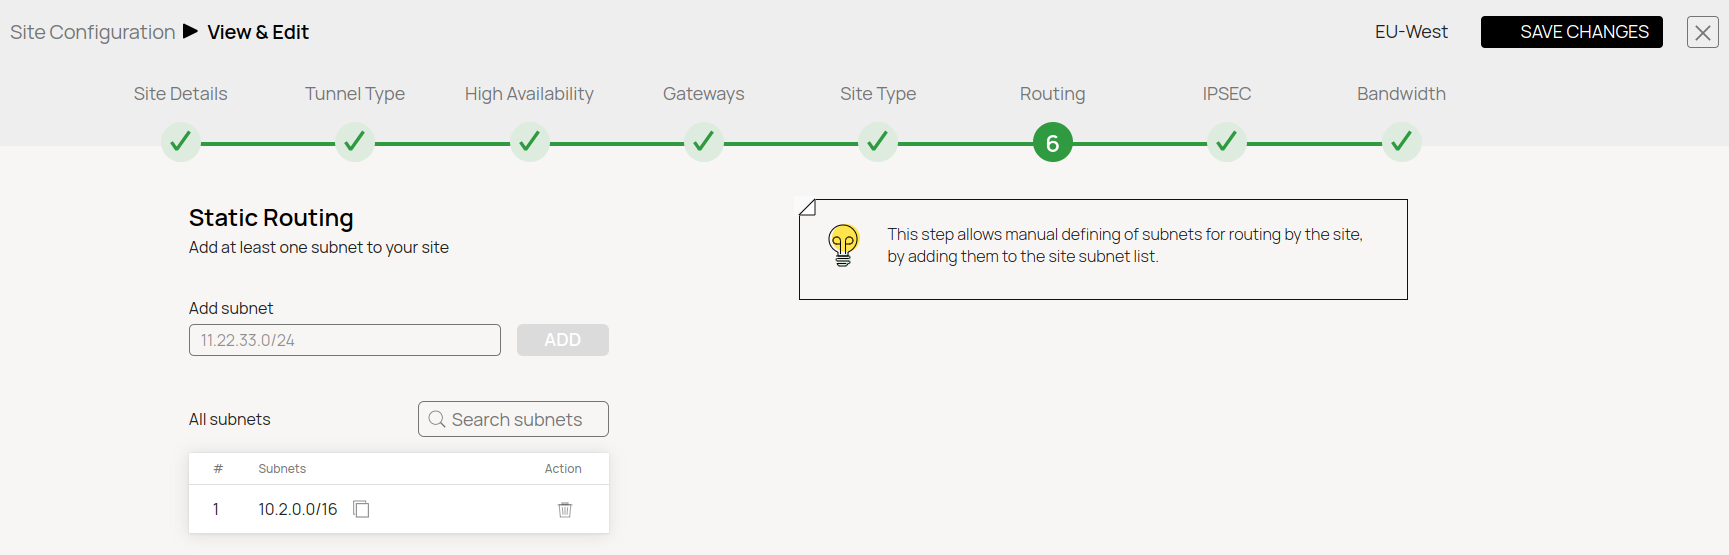
- Static Routing
- IPsec IKEv2 Settings
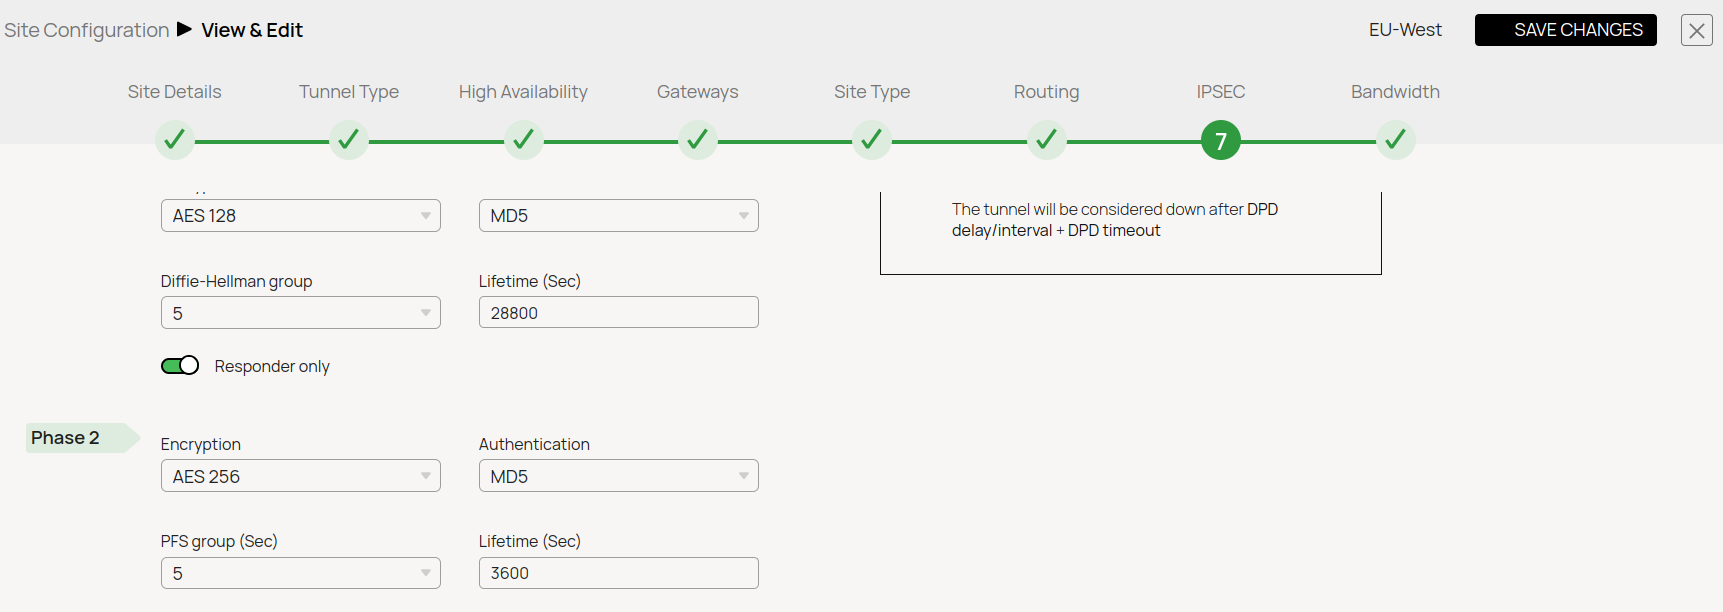
- IPsec Phase 1

- IPsec Phase 2
- IPsec Phase 1
In this example, we have collected the following settings:
- PoE (IP Teridion Router): 52.252.228.31
- SiteID (Firewall Internal IP): 10.2.0.4
- Gateway #1 IP (Firewall Public IP): 23.99.253.105
IKEv2 Authentication Settings
| Phase 1 | Phase 2 | ||
|---|---|---|---|
Encryption | AES128 | Encryption | AES256 |
Hash | MD5 | Hash | MD5 |
DH-Group | Group 5 | DH-Group | Group5 |
Proposal Handling | Strict | Proposal Handling | Strict |
Lifetime [s] | 28800 | Lifetime | 3600 |
Step 2. Configure IPsec IKEv2 Static Routing
On Barracuda SecureEdge, do the following:
Go to https://se.barracudanetworks.com and log in with your existing Barracuda Cloud Control account.
- In the left menu, click the Tenants/Workspaces icon and select the workspace you want to configure the IPsec IKEv2 tunnel for.
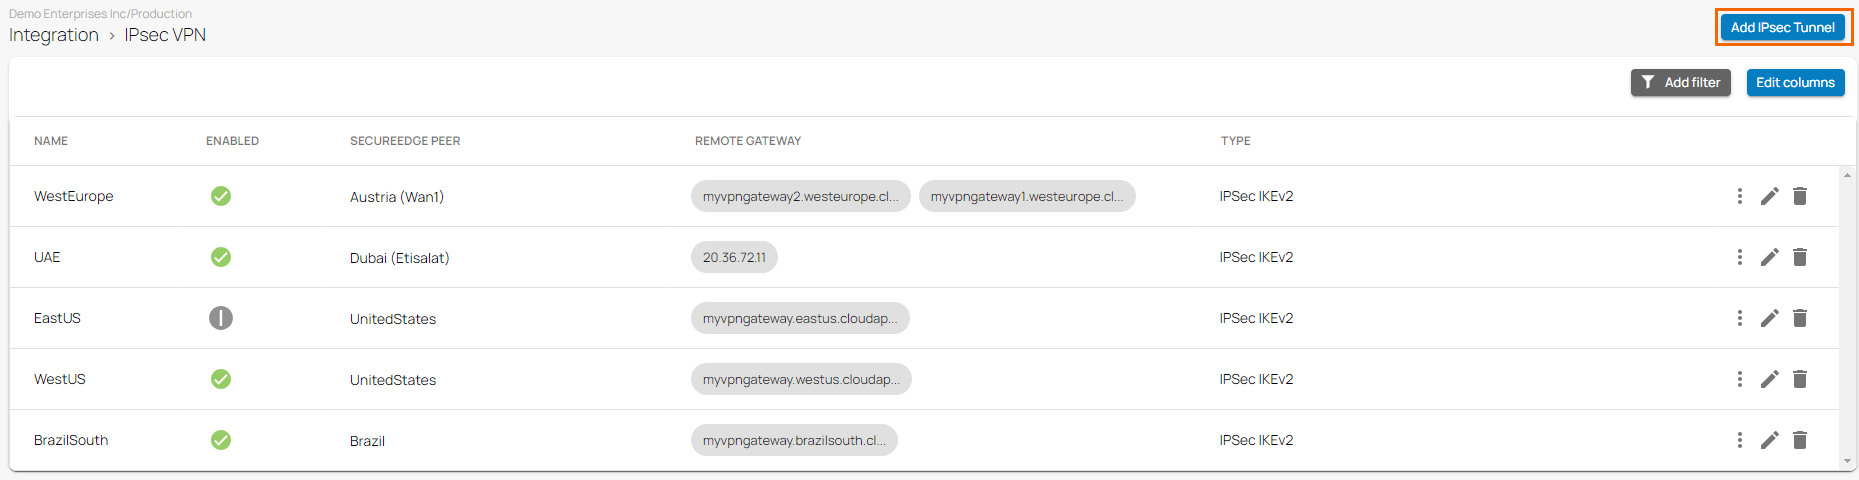
Go to Integration > IPsec VPN.
- The IPsec VPN page opens. To add tunnel, click Add IPsec Tunnel.
- The Create IPsec Tunnel window opens. In the General tab, specify values for the following:
- Enable – Click to enable.
- Initiates – Click to enable.
- Name – Enter a unique tunnel name.
- Description – Enter a brief description.
- Authentication – Select pre-shared key.
Shared Secret – Enter the shared secret to use a shared passphrase to authenticate.
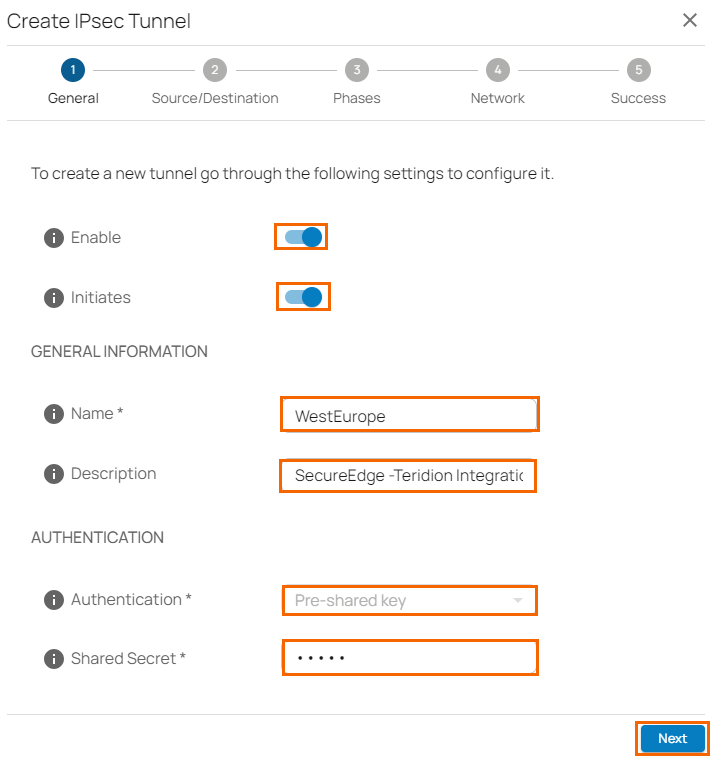
- Click Next.
- In the Source/Destination tab, specify values for the following:
- Enable BGP – Click to disable.
- Type – Select Site.
- Peer – Select the peer from the drop-down list.
- WAN Interface – Select the WAN interface from the drop-down list.
- Local ID – Enter the local ID. Enter your internal IP, e.g.,
10.2.0.4 - Network Address – Add the local networks and click +.
- Remote Gateway – Enter your PoE IP for TCR, e.g.,
52.252.228.31 - Remote ID – Enter your PoE IP for TCR, e.g.,
52.252.228.31 - Network Address – Add your remote networks that are reachable via Teridion and click +.
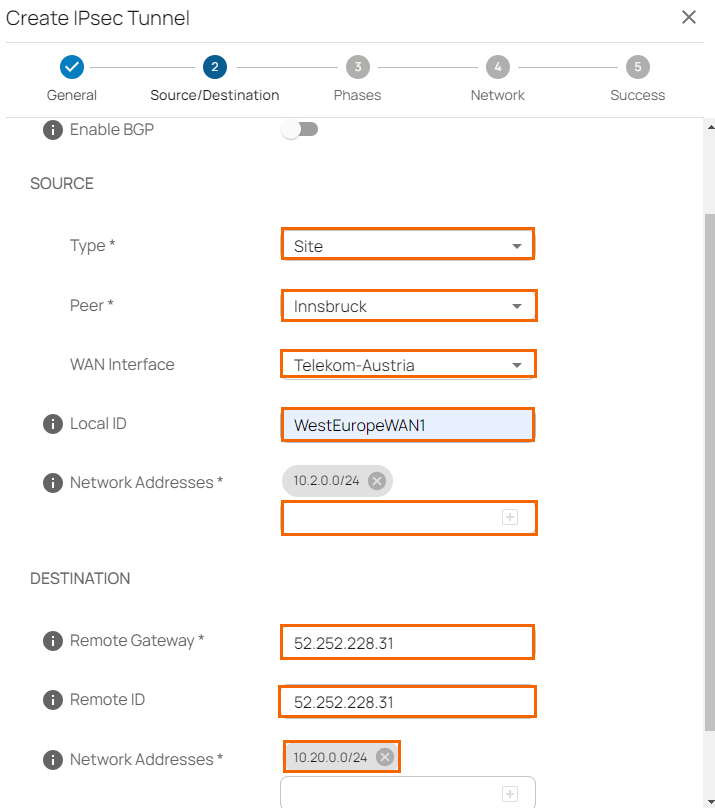
- Click Next.
- In the Phases tab, configure the following settings:
To configure PHASE 1 encryption settings matching your Teridion setup, specify values for the following:- Encryption – Select AES.
- Hash – Select MD5,
- DH-Group – Select Group 5.
- Proposal Handling – Select Strict.
- Lifetime – Enter
28800
- Encryption – Select AES-256
- Hash – MD5.
- DH-Group – Select Group 5.
- Proposal Handling – Select Strict.
- Life time – Enter
3600. - Traffic Volume Enabled – Click to disable.
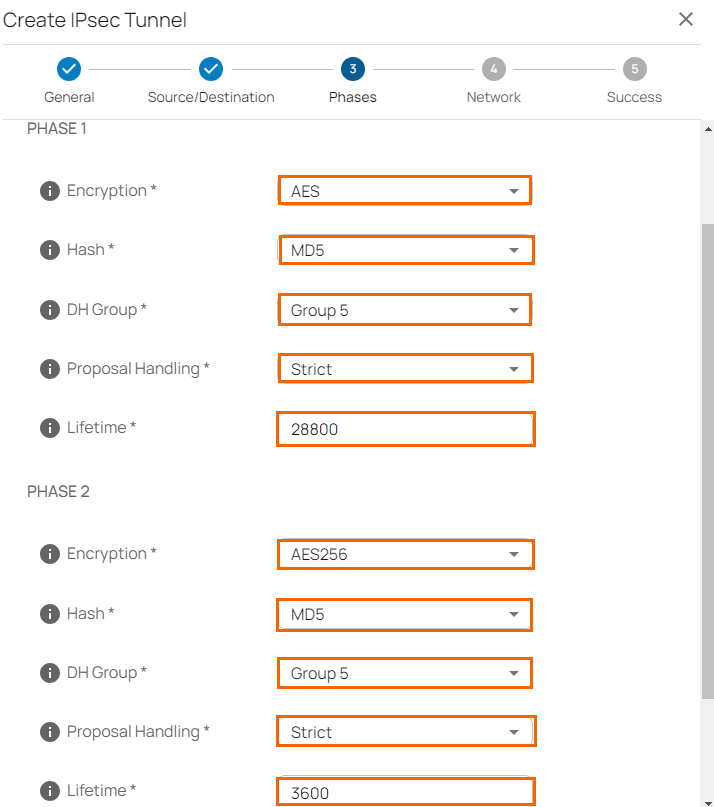
- Click Next.
- The Network blade opens. In the NETWORK SETTINGS section, specify values for the following:
- One VPN Tunnel Per Subnet Pair – Click to disable.
- Universal Traffic Selectors – Click to enable.
- Force UDP Encapsulation – Click to disable.
IKE Reauthentication – Click to enable.
- Action When Detected – Select the action from the drop-down list. You can choose between the following:
None – Disable DPD.
Clear – Connection with the dead peer is stopped, and routes removed.
Restart – Connection is restarted.
- Delay – Enter the number of seconds after which an empty INFORMATIONAL message is sent to check if the remote peer is still available. Note: DPD Delay is required when detected DPD action is set to anything other than None.
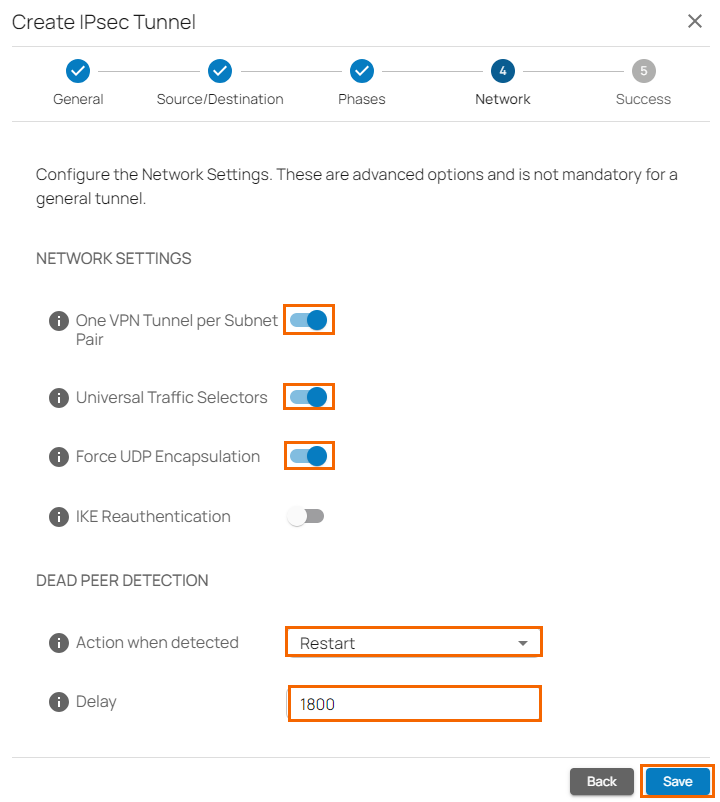
- Click Save.
- Verify that your IPsec tunnel configuration has been created successfully.
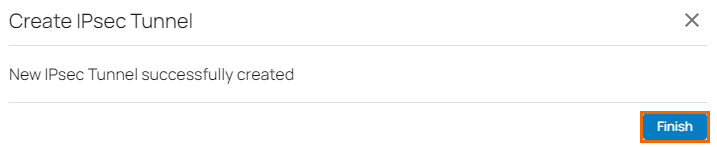
- Click Finish.
After the configuration is complete, you can see a new IPsec tunnel is shown on the IPsec VPN page, and the status of the field names (e.g., Enabled) can be verified.

(Optional) Restart the IPsec Tunnel
If you must restart the IPsec tunnel, proceed with the following steps:
- On the IPsec VPN page, click the icon of three vertical dots to restart the IPsec tunnel.
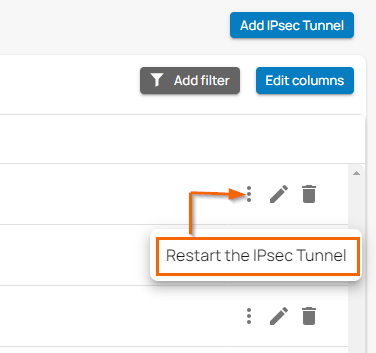
Click Restart the IPsec Tunnel.
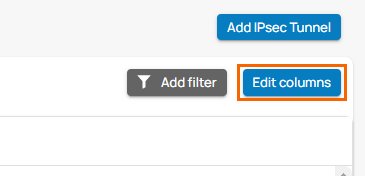
(Optional) Edit Visible Columns
- To get more detailed information on IPsec VPN, click Edit columns.
- The Edit Visible Columns page opens.
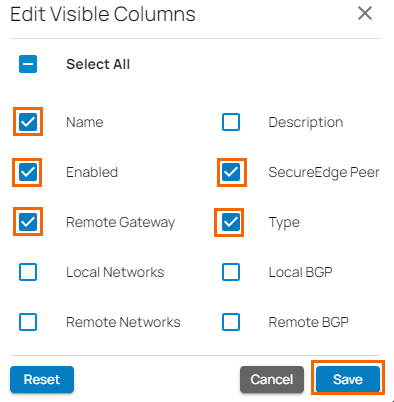
- Select the field names you wish to display the columns for, and click Save.
Edit an Existing IPsec VPN Tunnel
Go to https://se.barracudanetworks.com and log in with your existing Barracuda Cloud Control account.
- In the left menu, click the Tenants/Workspaces icon and select the workspace you want to edit the IPsec IKEv2 tunnel for.
Go to Integration > IPsec VPN.
- The IPsec VPN page opens. Click on the pencil icon next to the IPsec IKEv2 tunnel you want to edit.
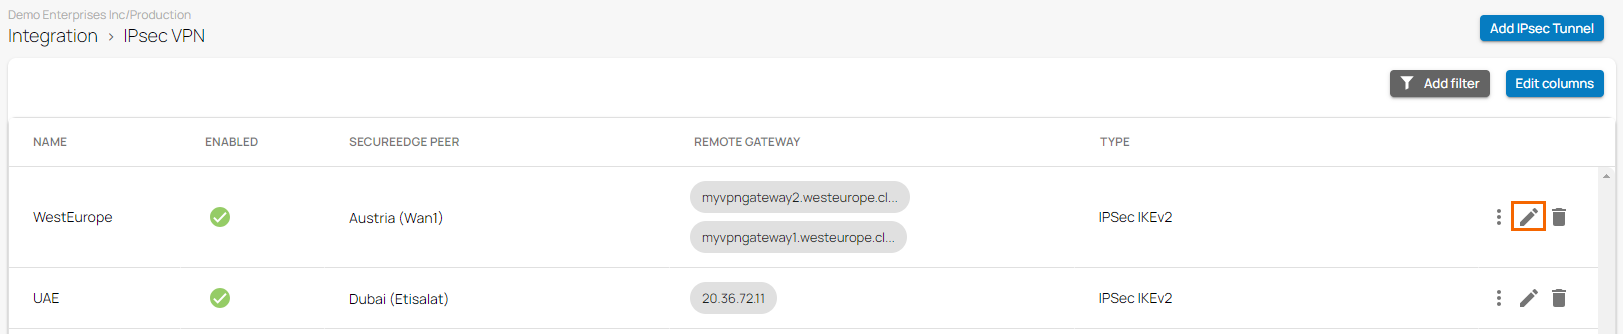
The Edit IPsec Tunnel window opens. Edit the value you are interested in.
- Click Save.
Remove an Existing IPsec VPN Tunnel
Go to https://se.barracudanetworks.com and log in with your existing Barracuda Cloud Control account.
- In the left menu, click the Tenants/Workspaces icon and select the workspace you want to remove the IPsec IKEv2 tunnel for.
Go to Integration > IPsec VPN.
- The IPsec VPN page opens. Click on the trashcan icon next to the IPsec IKEv2 tunnel you want to remove.

- The Delete IPsec Tunnel <Name of Tunnel> window opens.
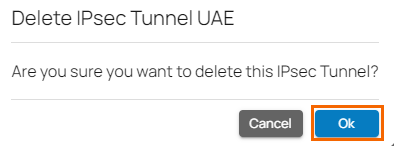
- Click Ok to confirm.
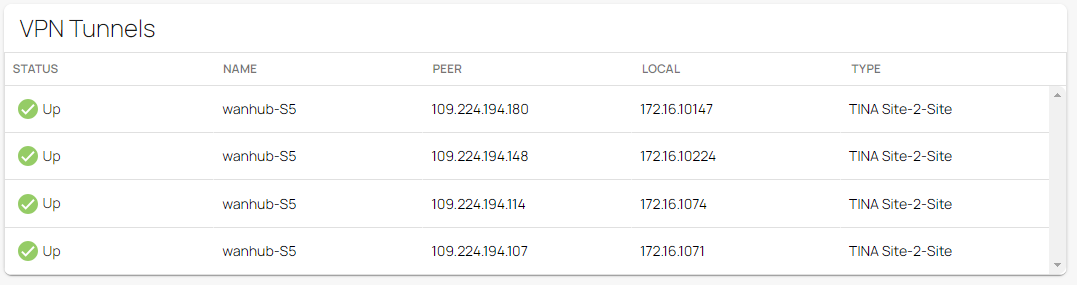
Monitoring a VPN Site-to-Site Tunnel
To verify that the VPN tunnel was initiated successfully and traffic is flowing, proceed with the following steps:
- Go to https://se.barracudanetworks.com and log in with your existing Barracuda Cloud Control account.
- In the left menu, click the Tenants/Workspaces icon and select the workspace containing your site.
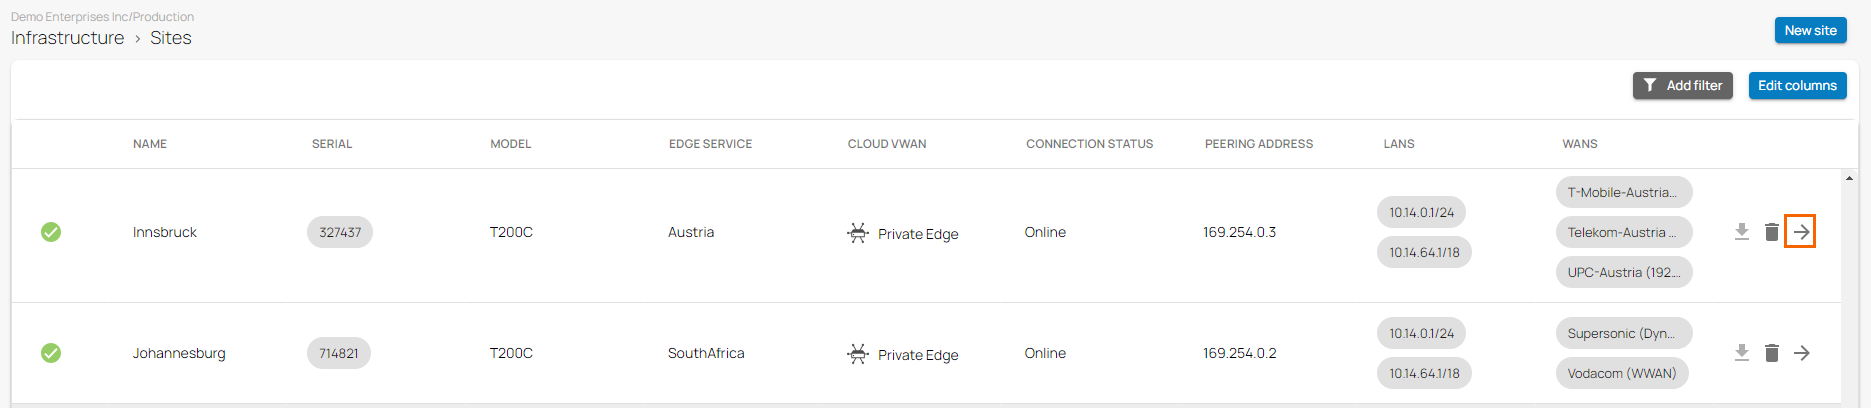
- Go to Infrastructure > Sites. The Sites page opens.
- Select the site you want to verify the status for. Click on the arrow icon next to the site.
- In the Site menu, the Dashboard page opens. You can see the status of all VPN tunnels for the corresponding sites.