

The documentation below outlines the requirements for the Barracuda XDR Automated Threat Response. All action items listed under the Customer Requirements must be completed and provided to the Barracuda XDR team to set up the integration. All required data will need to be uploaded to the Customer Security Dashboard in the SOAR Settings > Firewalls section. Please note that these instructions are only for customers using a Cisco Meraki Firewall.
To set up SOAR for Cisco Meraki Firewall, do the following:
- To enable API Access and generate an API Key from the Meraki Dashboard
- To send the Organization ID and the Network ID to the Barracuda XDR team
- To create a Network Group Policy Name
- To ensure the IP address can make inbound connections to the firewall
- To configure the Barracuda XDR Dashboard
To enable API Access and generate an API Key from the Meraki Dashboard
For access to the API, you must first enable the API for your organization.
- Log in to the Meraki dashboard: https://dashboard.meraki.com.
- Navigate to Organization > Settings.
- Ensure the API Access is set to Enable access to the Cisco Meraki Dashboard API.

- After enabling the API, navigate to the profile page by clicking on your account email address in the upper right. Then click My profile.
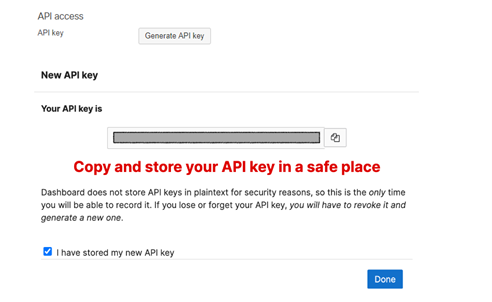
- Scroll down to API Access to generate the API key.
- Copy, then store the API key in a safe place. Click Done.
- Send this API Key to the Barracuda XDR team.
To send the Organization ID and the Network ID to the Barracuda XDR team
- From the Meraki dashboard, from the bottom of the page, copy the Organization ID.

- From the Meraki dashboard, copy the ID of the network.
For more information on finding the network ID, see the Meraki documentation. - Send both IDs to the Barracuda XDR team.
To create a Network Group Policy Name
Name the Network Group Policy “Barracuda_XDR_Blocked_IPs”. Give the Network Group Policy ID to the Barracuda XDR team. Barracuda XDR uses the Group Policy to automatically blocking IPs on the firewall.
- In the Meraki dashboard, navigate to Network-wide > Configure > Group policies.
- Click Add a group to create a new policy.
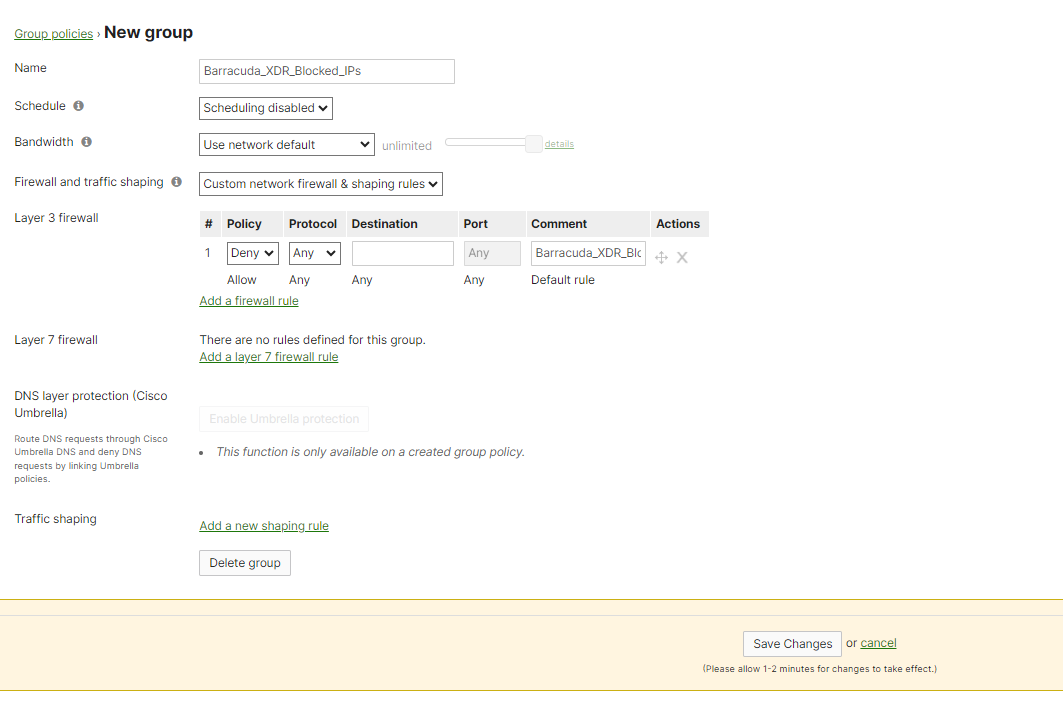
- Do the following:
- In Name, type
Barracuda_XDR_Blocked_IPs. - In Schedule, select Scheduling disabled.
- In Bandwidth, select Use network default.
- In Firewall and traffic shaping, select Custom network & shaping rules.
- In Name, type
- Click Save Changes.
- Copy the Group Policy ID from the URL at the top of the Group Policies page.

- Send the Network Group Policy Name and Network Group Policy ID to the Barracuda XDR team.
To ensure the IP address can make inbound connections to the firewall
- 44.209.49.222 is the static address of Barracuda XDR's SOAR platform Barracuda XDR authenticates from this IP to remediate threats. Ensure that 44.209.49.222 can make inbound connections to the firewall.
To configure the Barracuda XDR Dashboard
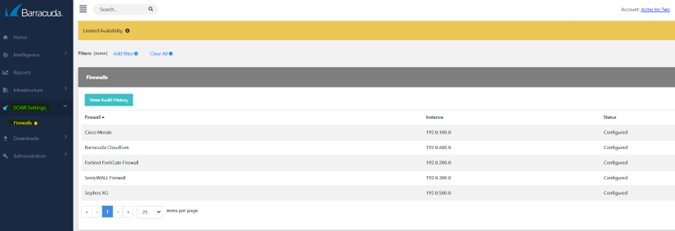
- In Barracuda XDR Dashboard, click SOAR Settings > Firewalls.
- Click Config.
- In the Edit Config dialog box, enter the following:
- API Access Port
- External IP
- Network ID
- Network Group Name
- Network Group ID
- Organization ID
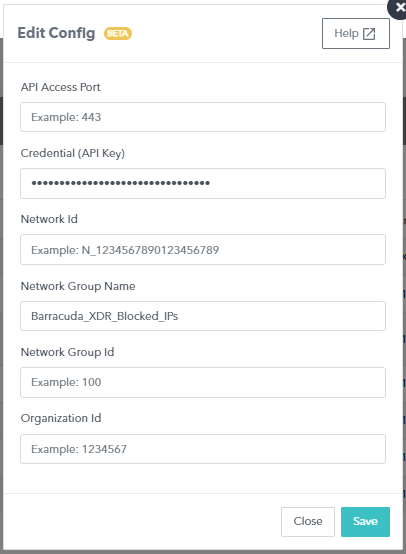
- Click Save.