To deploy the Barracuda WAF instance with IPv6 on Azure, perform the following steps:
Step 1. Create a New ARM Template
- Log into the Microsoft Azure Portal.
- Enter
Template specsin the Filter services text field and press Enter on your keyboard. - On the Template specs page:
- Select Import template if you have the ARM template saved on your local system. Import the (.json) file and click Import.
- Select Create template spec to create the template using the content of the JSON file. See the Barracuda WAF ARM Template for the content.

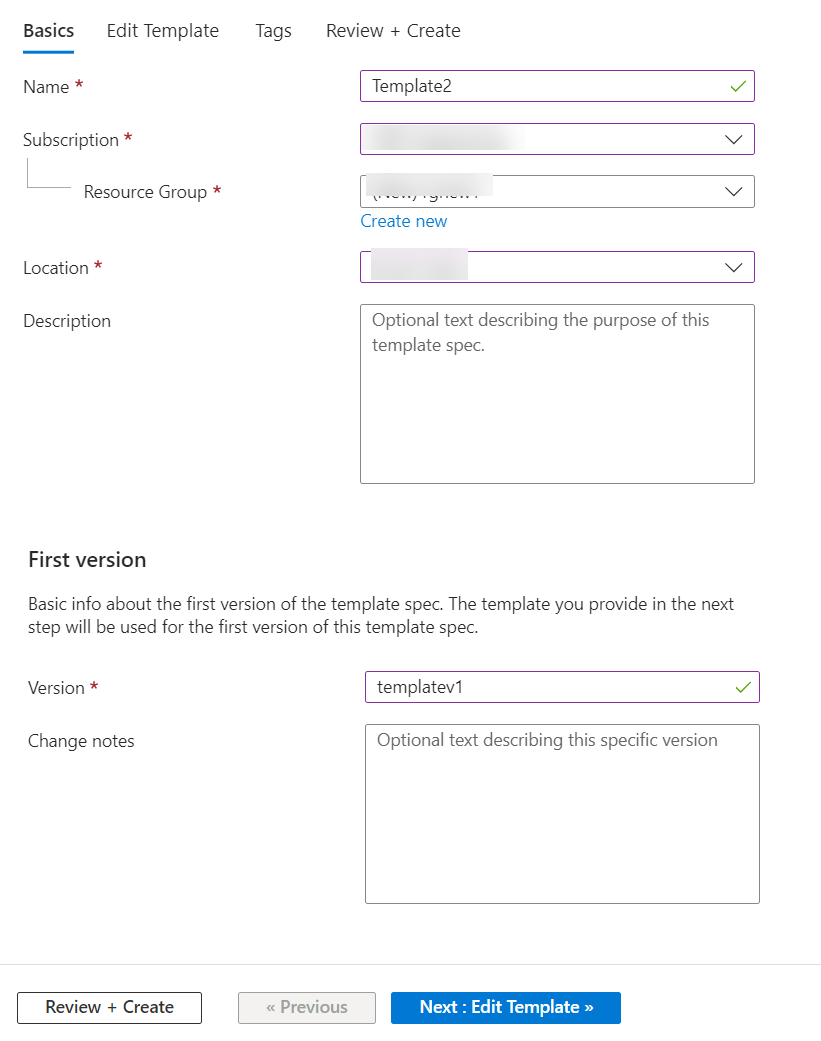
- In the Importing template/Create new template spec > Basics tab, specify values for the following:
- Name: Enter a name for the template.
- Subscription: Select the subscription you want.
- Resource group: Create a new resource group, or select a resource group from the existing Resource group list.
- Location: Select the location for the template.
- Version: Enter a name for the template version.
- Click Next: Edit Template >>.

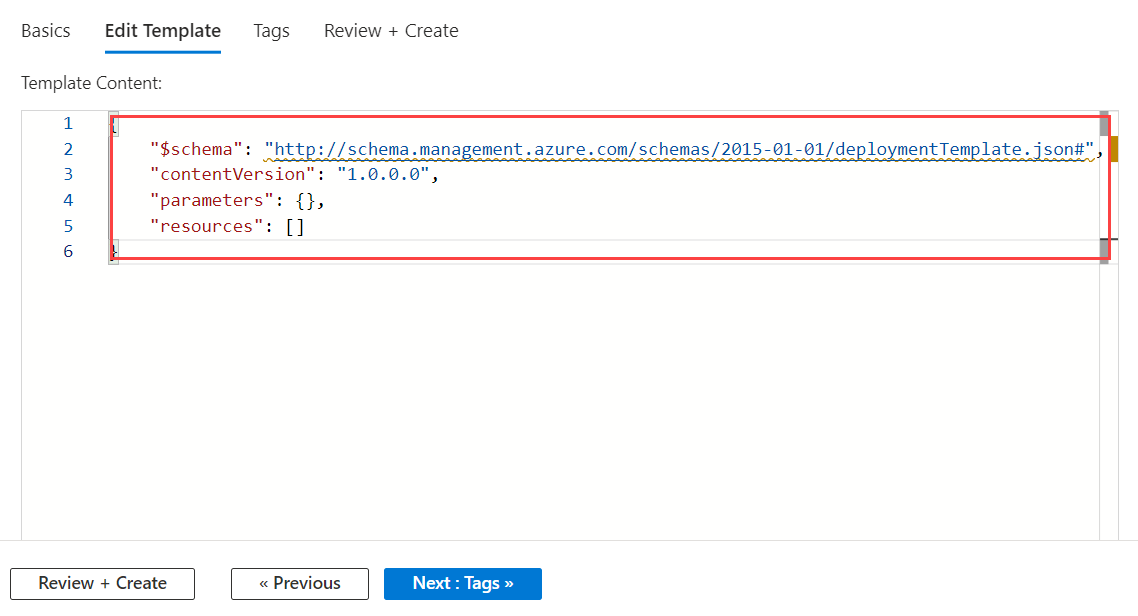
- In the Edit Template tab:
- Modify the template if required (in case you imported the template).
- Delete the template content, copy the Barracuda WAF IPv6 JSON Template, and paste the content.
- Click Next: Tags >>.

- In the Tags tab:
- Enter the tags (if required) and click Next: Review + Create >.
- Review the details and click Create.
- After the template is successfully created, it will be displayed on the Template specs page.
Step 2. Deploy a New Instance with the ARM Template
- On the Template specs page, click on the template you created in Step 1. Create a new template.
- On the selected template page, click Deploy.

- On the Deploy Template page, specify values for the following:
- Instance details:
- Region: Select the region where you want to deploy the virtual machine.
- Admin Password: Enter a password for authentication. This will be your password to access the Barracuda Web Application Firewall web interface.
- Location: Specify the location for the storage account. Note: Ensure that the location for the storage account and the resource group are same.
- Storage Account Name: Enter a name for the storage account.
- Storage Account Type: Enter the type of storage account.
- Storage Account New Or Existing: Specify whether the storage account chosen is new or existing.
- Storage Account Resource Group: Specify the resource group if the storage account is existing.
- Deployment Type: Select the type of deployment.
- Firmware: Select the firmware version.
- VM Name: Enter a name for the virtual machine.
- DNS Name For IP: Enter the DNS name for the IP address.
- Public IP SKU: Enter
Standardas the public IP SKU. - Public IP Allocation: Enter
Staticas the public IP allocation. - Public IPv6 Address Name: Enter the public name of the IPv6 address.
- Subnet Name Single Nic: Enter a name for the single NIC subnet.
- VM Size: Enter the VM size. See Supported Virtual Machine Size in the Microsoft Azure article.
- Specify values for other parameters as required, and click Review + create.
- Instance details:
- On the Review + create page, review the details and click Create.
After the instance is deployed with the template, the WAF starts up with IPv6 enabled. The instance is deployed with the IPv6 internal and IPv6 external IP addresses attached to it. This is a dual-stack deployment. All access to the Barracuda WAF instance is on the IPv4 IP address, and clustering is also performed on the IPv4 IP address. However, you can create services using the IPv6 IP address that is configured as the System IP.
