

The Barracuda SecureEdge Manager allows you to integrate the TTTech Industrial Nerve platform. To enhance your security offering and connectivity diversity, the Nerve platform can be integrated with the Barracuda SecureEdge SASE platform. Integration is done via the connector app.
Before You Begin
Download the latest Linux Connector from the Barracuda SecureEdge Manager, a SecureEdge management portal. Dockerize the binary. For an example, see the Barracuda GitHub account.
Create at least one Edge Service in your selected workspace/tenant. For more Information, see How to Create an Edge Service.
Configure the Connector IP Range setup in the SecureEdge Manager via Infrastructure > Settings > Connector. For more Information, see How to Configure the SecureEdge Connector.
Step 1. Create a Connector in Barracuda SecureEdge
Go to https://se.barracudanetworks.com and log in with your existing Barracuda Cloud Control account.
In the left menu, click the Tenants/Workspaces icon and select the workspace you want to configure the connector for.
Go to Infrastructure > Connectors.
The Connector page opens. In the top-right corner of the window, click Add.
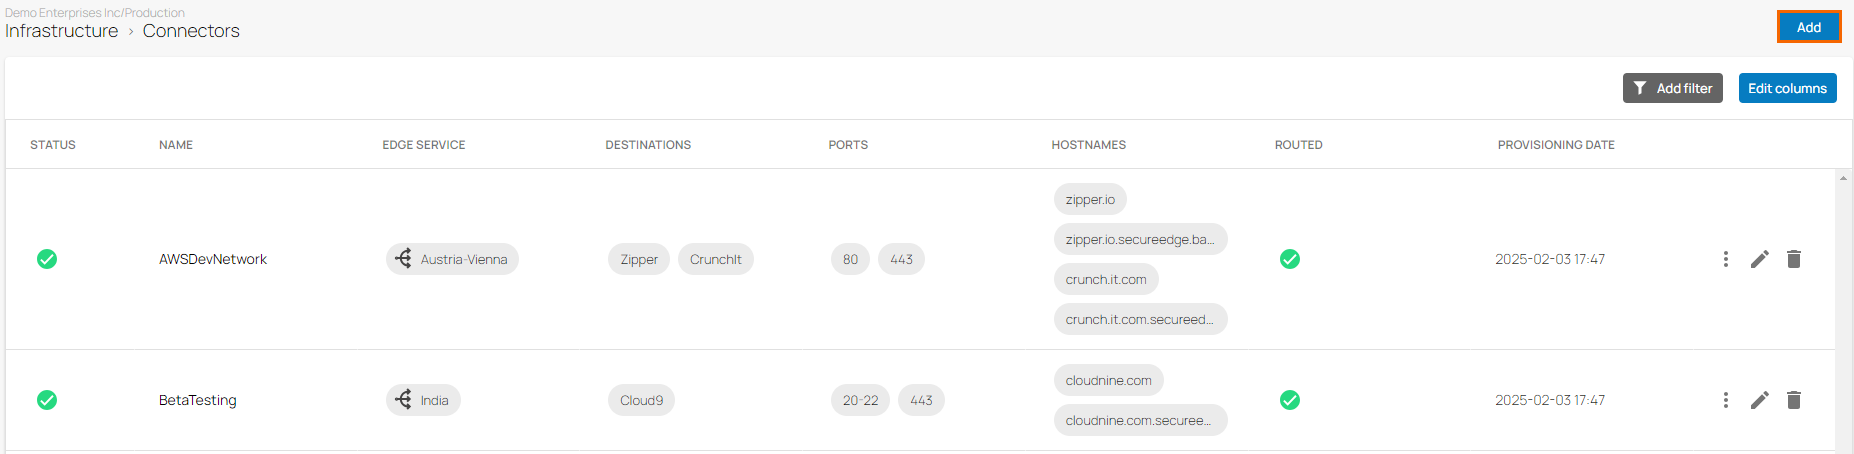
The Add Connector window opens. Specify values for the following:
Name – Enter a unique name for the connector.
Description (Optional) – Enter a brief description for the connector.
Edge Service – Select the Edge Service the connector should terminate to.
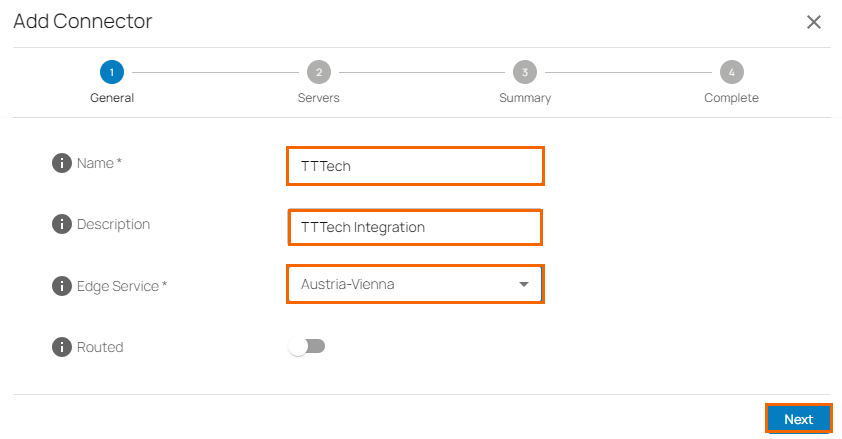
Click Next, and specify values for the following:
Servers – Enter the resource name. To add a server, click +. To remove a server, click on the trash can icon .
Hostname – Enter your unique hostname to reach the resource. Note that your selected Point of Entry (such as firewalls, edge services, and sites) will perform DNS resolution for this resource.
Internal IP – Enter the internal IP address for the resource.
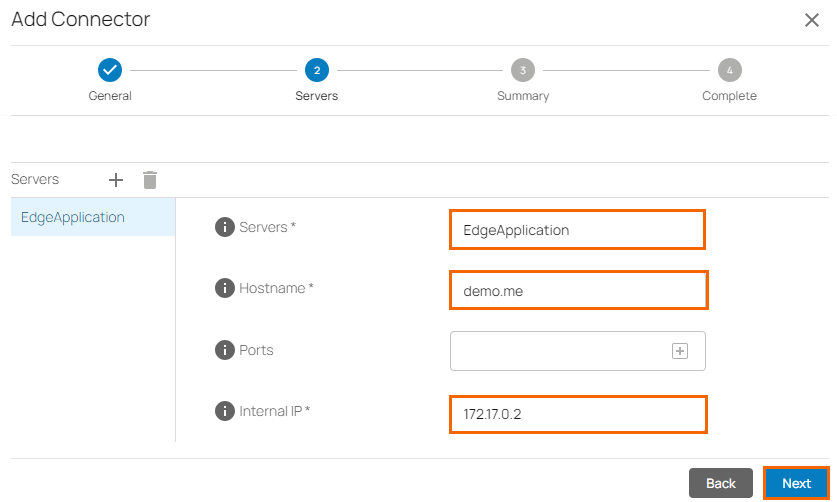
Click Next.
The Summary page opens. Review your settings in Summary for Connector TTTEch.
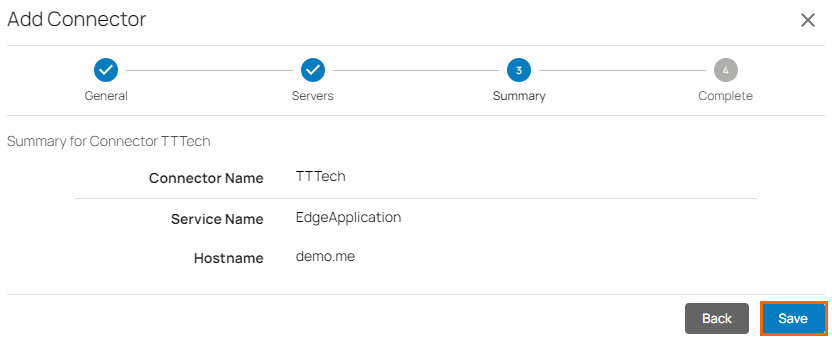
Click Save.
Verify the status of the connector and proceed with the following instructions:
Download the Linux client to Dockerize the client.
Copy the OTP token to a text file.
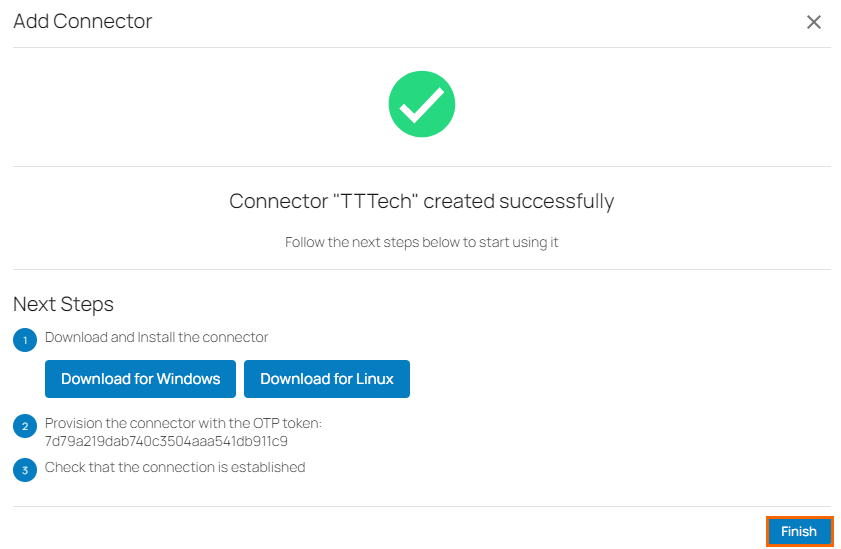
Click Finish.
Step 2. Configure and Deploy the Connector on the TTTech Industrial Nerve Platform
Log into your NERVE Platform.
In the left menu, go to Workloads.
Create a Docker Workload.

The Docker Workload window opens. Specify values for the following:
Name – Enter a unique name for the Docker workload.
Description (Optional) – Enter a brief description for the Docker workload.
Click + on Create Version.
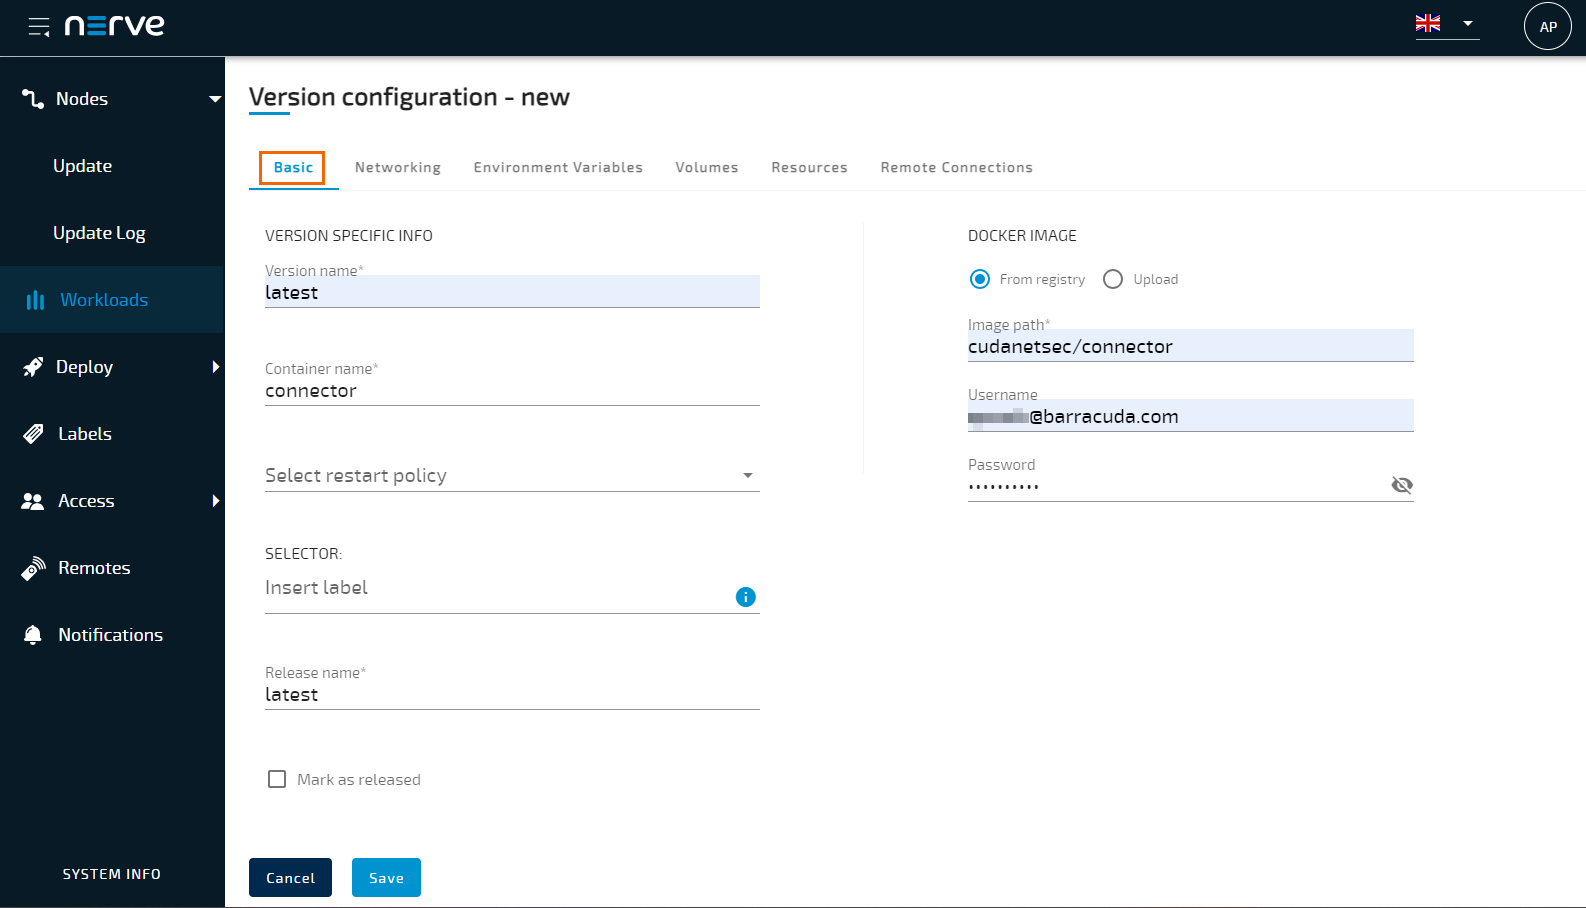
The Version configuration-new page opens. In the Basic tab, specify values for the following:
Version name – Enter a version name.
Container name – Enter a container name.
Image path – Enter the path for your Docker container registry hosting the connector that you created in Step 1.
Username – Enter a username if login is required.
Password - Enter the password. Note that if the repository is not public, you must log into the Docker registry.
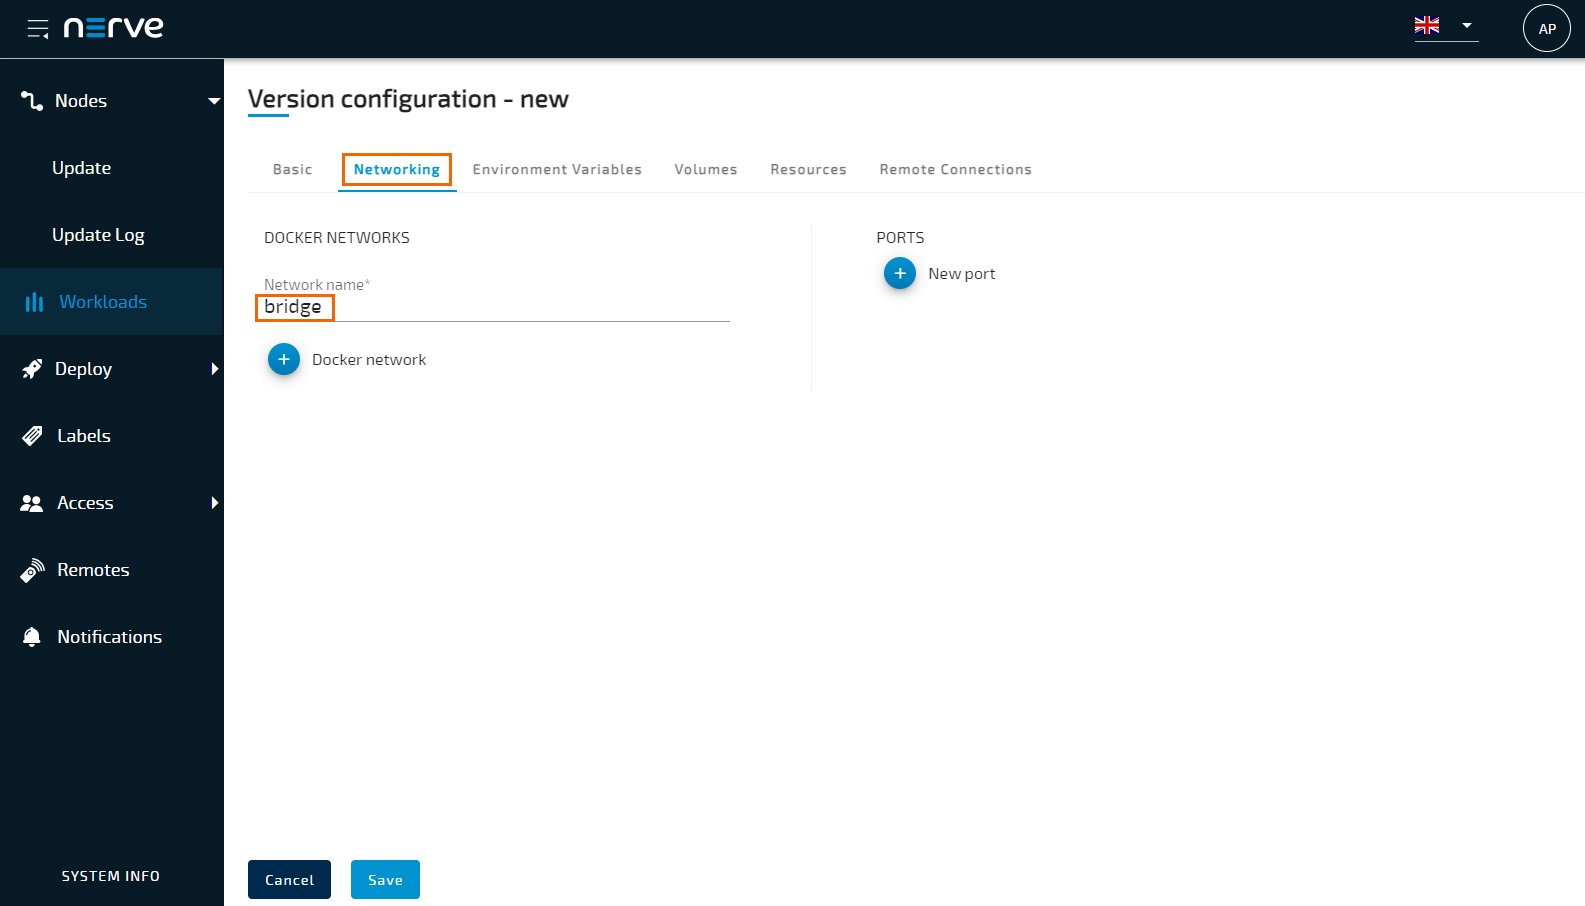
Click Networking. In the Networking tab, specify the values for the following:
Network name – Enter the name as
bridge/hostor another unique name.Ports – Set ports that need to be exposed to the Nerve host. If the connector is running on same Docker network, no ports need to be exposed to access the resource via the connector.
Click Environment Variables. The Environment Variables tab opens.
To add a new environment variable, click + New environment variable and specify values for the following:
TOKEN – Enter the OTP token retrieved in Step1.
HOST – Enter the host, e.g.,
cloudgenwan.barracudanetworks.com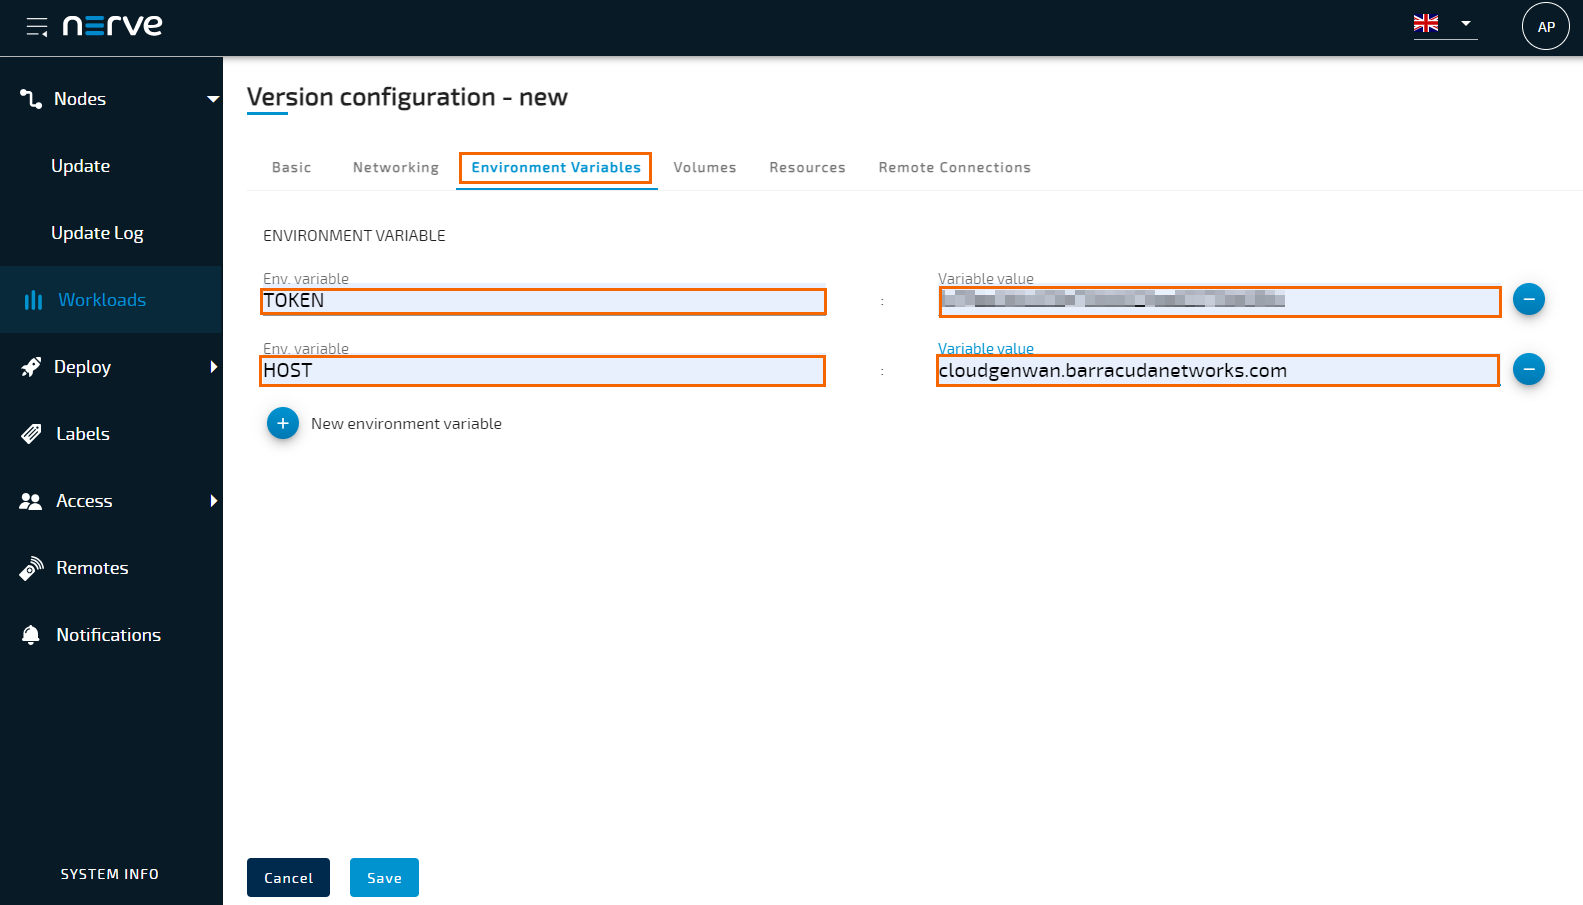
To ensure persistence, click Volumes. The Volumes tab opens.
To add new volume, click + New volume and specify values for the following:
Volume name for configuration – Create a volume for the config pointing to
/etc/barracuda.Volume name for Log (Optional) – Create a volume for the log pointing to
/opt/barracuda/connector/logs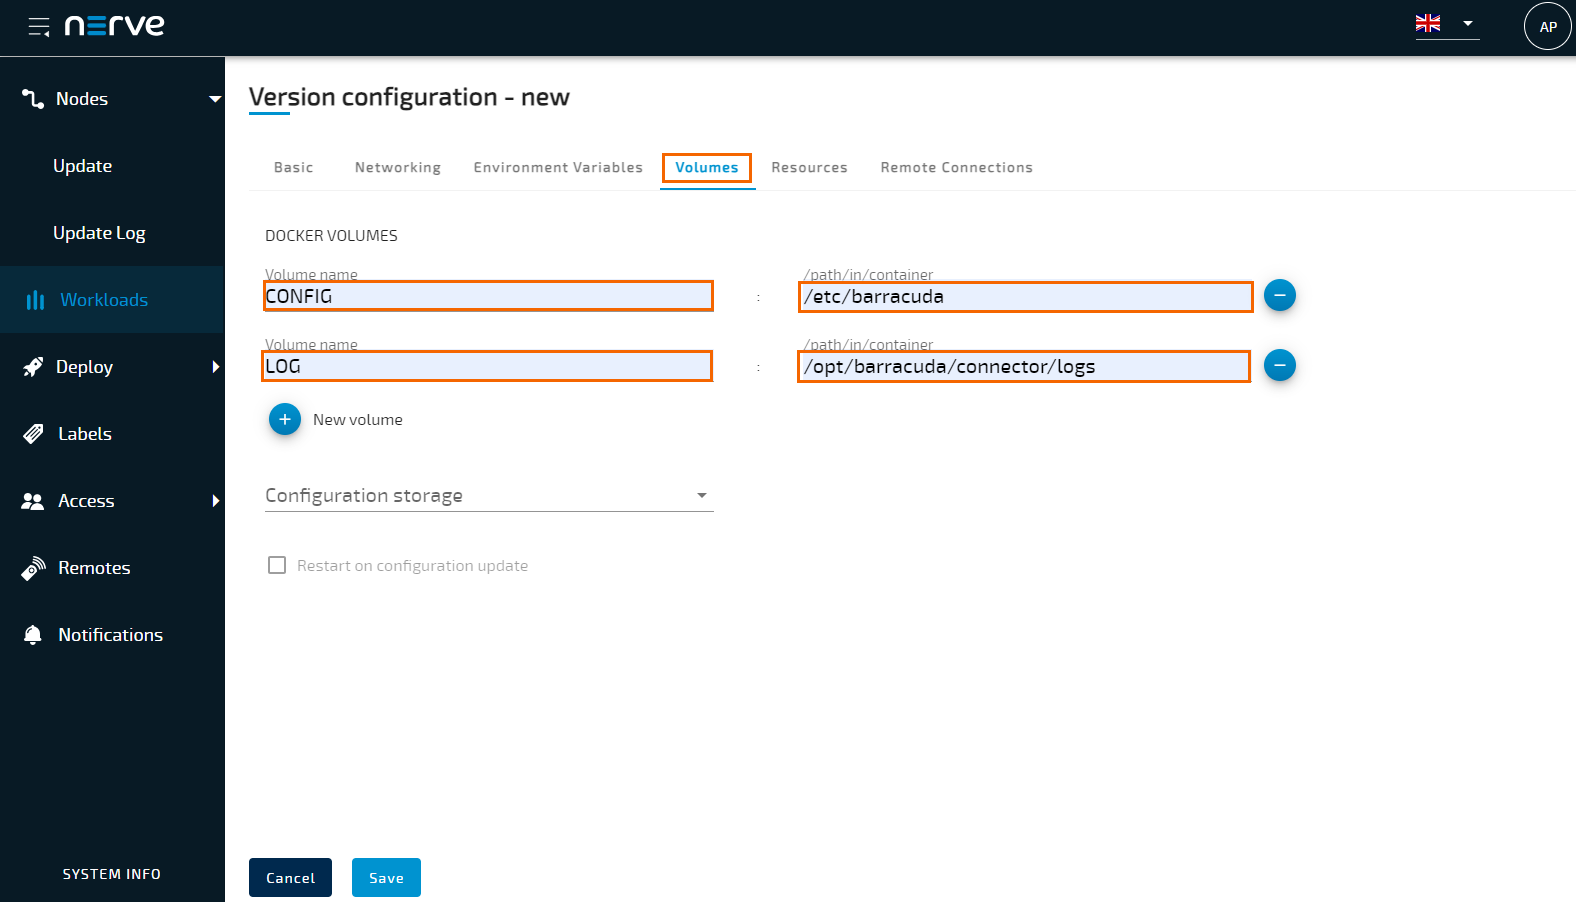
In the left menu, go to Deploy and select Docker as a workload. The Deployment - Workload page opens.
Select your previously configured workload and version.
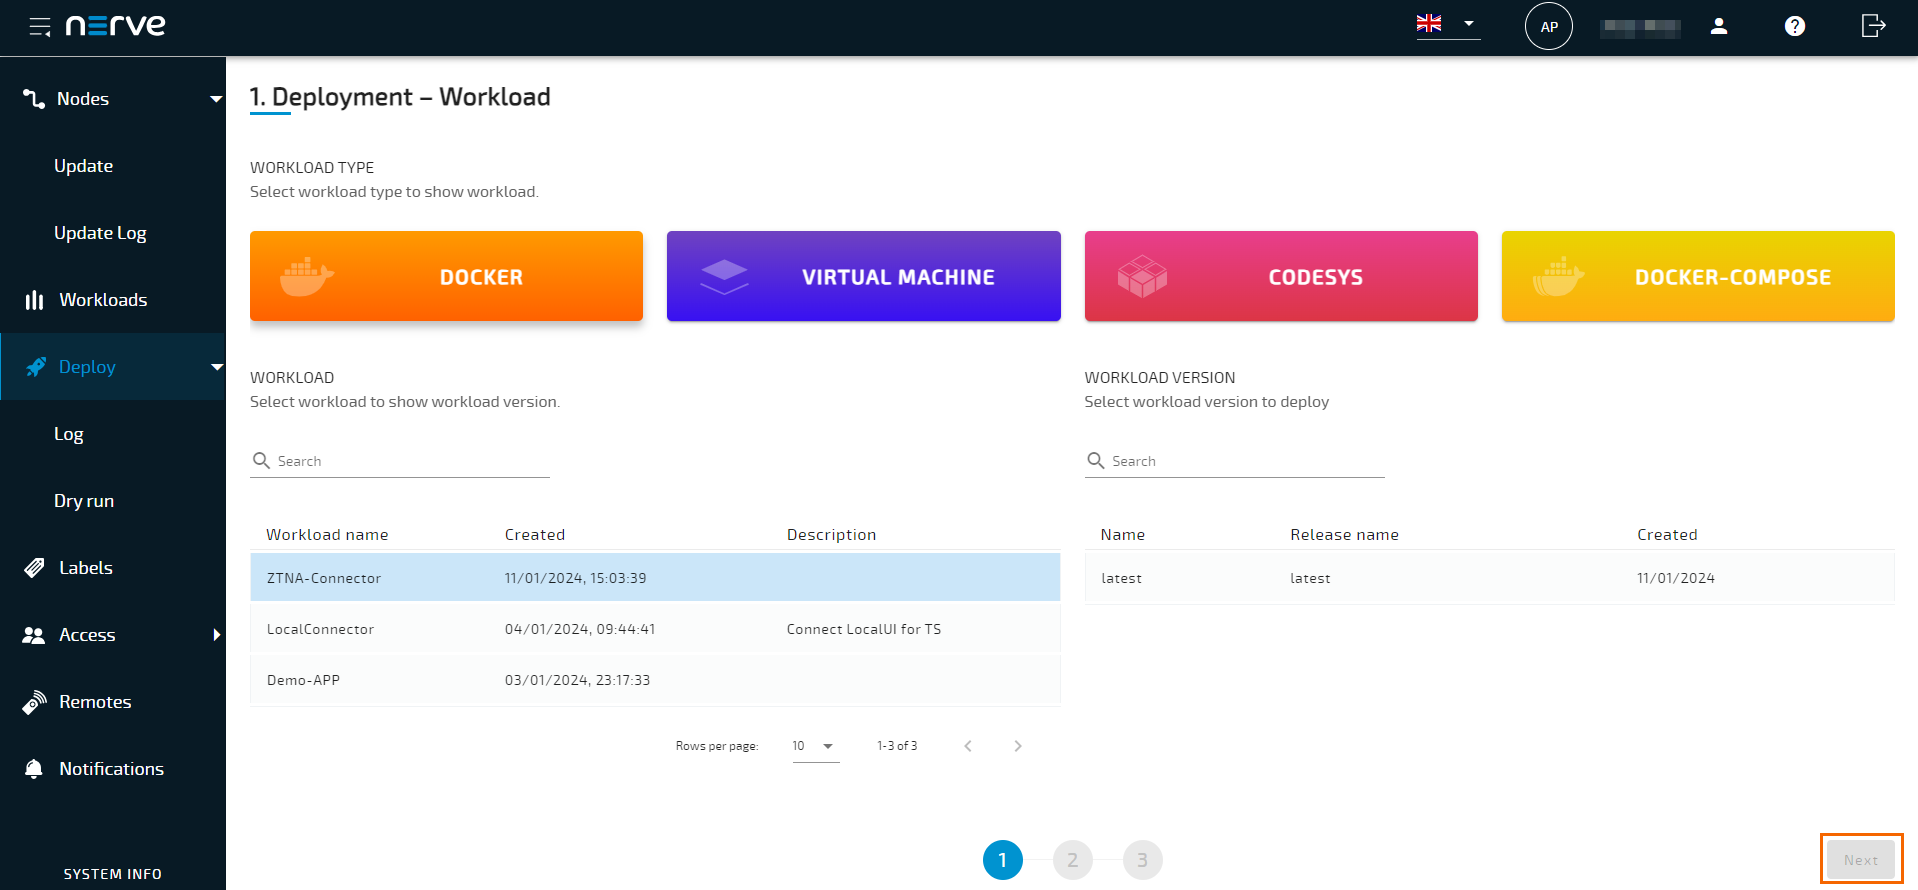
Click Next.
The Deployment - select target nodes page opens. Select Node to deploy.
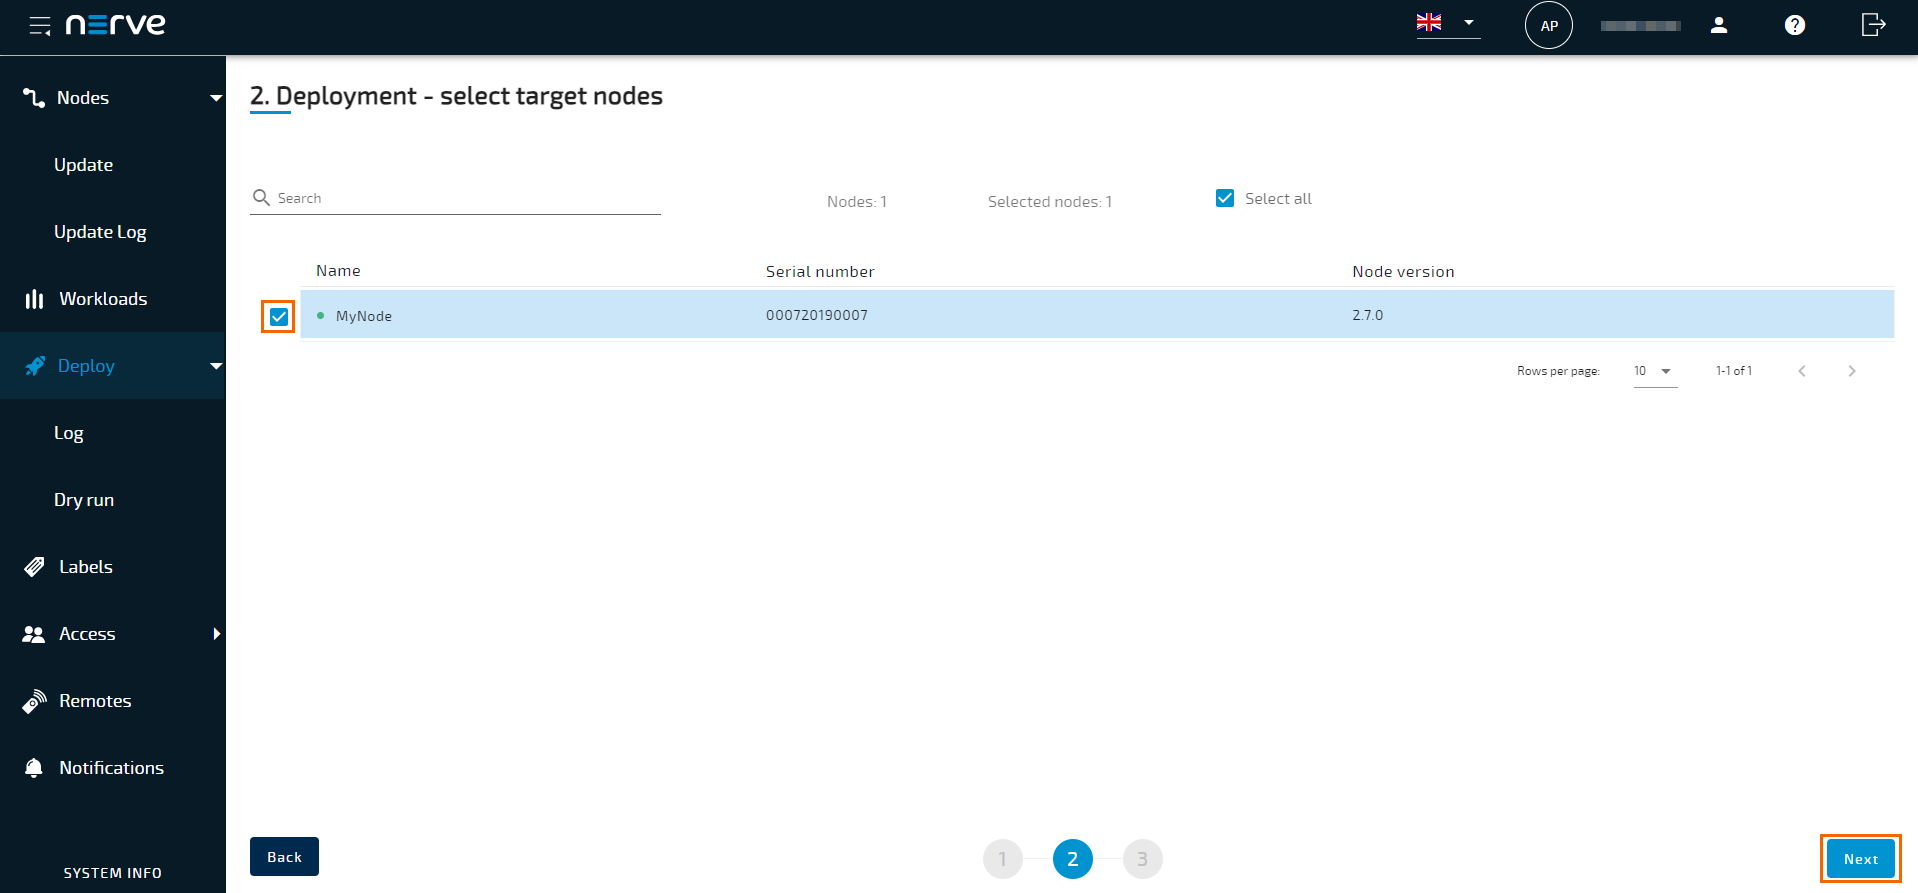
Click Next.
Click Deploy.
After the configuration is complete, a new connector will be enrolled on the Connectors page of the SecureEdge Manager. You can verify the status (green) of your deployed connector.
Make sure that you have configured a Zero Trust Access Policy to access the resources hosted behind the connector. The resources configured on the connector will be automatically propagated as a resource in the Zero Trust Access Policy dialog. The naming convention is <ConnectorName>-<resourcename>. For more information, see Zero Trust Access Policies.