Before proceeding with deploying the Barracuda Web Application Firewall (WAF) VMSS, do the following:
Step 1. Create a Resource Group
To create a resource group, perform the following steps:
- Log into the Microsoft Azure Portal.
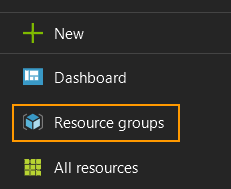
- Click Resource groups in the left panel.
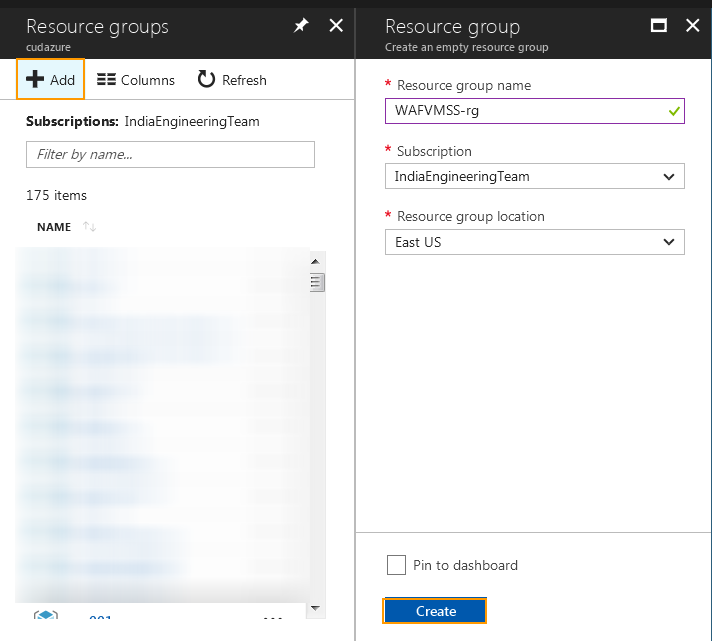
- In the Resource groups page, click Add and specify values for the following:
- Resource group name: Enter a name for the resource group.
- Subscription: Select the subscription in which you want to create the resource group.
- Resource group location: Select a location for the resource group.
- Click Create.
Step 2. Create a Storage Account
Perform the following steps to create a storage account:
- Log into the Microsoft Azure Portal.
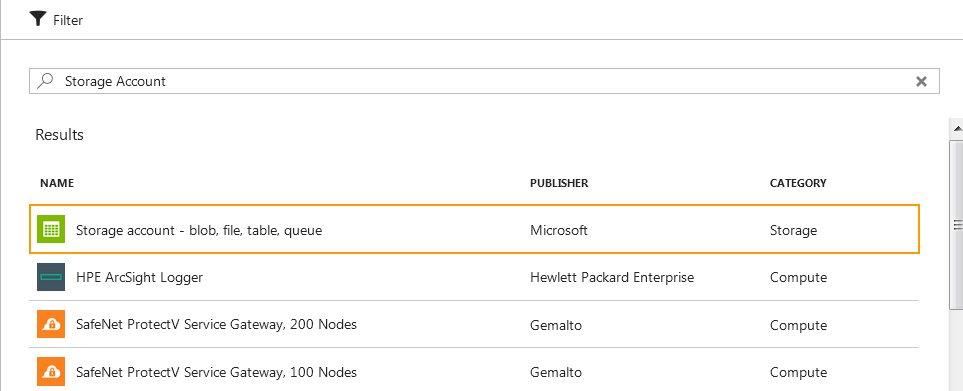
- Click New in the left panel, and type Storage Account in the Search field.
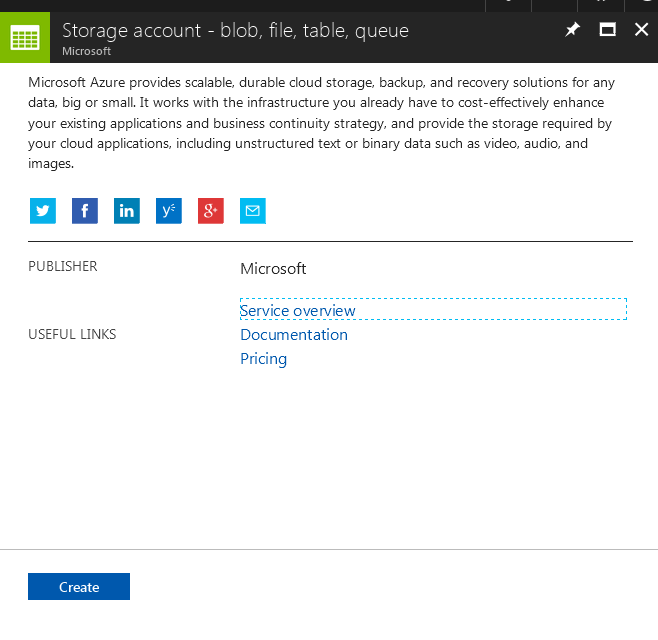
- In the search results, select Microsoft Storage account.
- In the Storage account – blob, file, table, queue page, click Create.
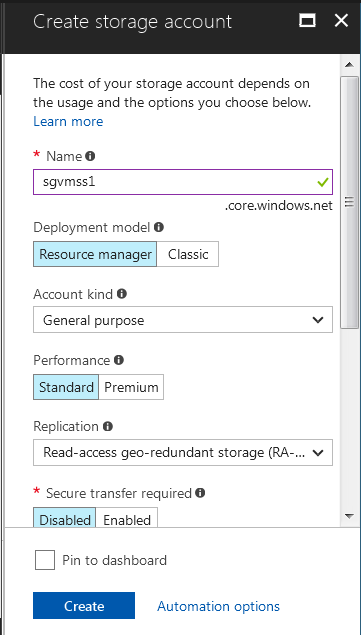
- In the Create storage account page:
- Name: Enter a name for the storage account.
- Deployment model: Ensure the deployment model is set to Resource Manager.
- Account kind: Select the type of storage account that needs to be created. Default: General purpose
- Performance: Select the performance tier as required.
- Replication: Select the replication option for the storage account.
- Secure transfer required: Select Enabled if you want to transfer the data into or out of storage account. Default: Disabled.
- Subscription: Select the subscription in which you want to create the storage account. Note: Ensure that the subscription for the storage account and the resource group is same.
- Resource group: Select the resource group created in Step 1. Create a Resource Group.
- Location: Select the location for the storage account. Note: Ensure that the location for the storage account and the resource group is same.
- Click Create.
Deploying the Barracuda WAF VMSS
Perform the following steps to deploy the Barracuda WAF VMSS instance:
- Log into the Microsoft Azure Portal.
- Click Marketplace at the bottom of the screen.
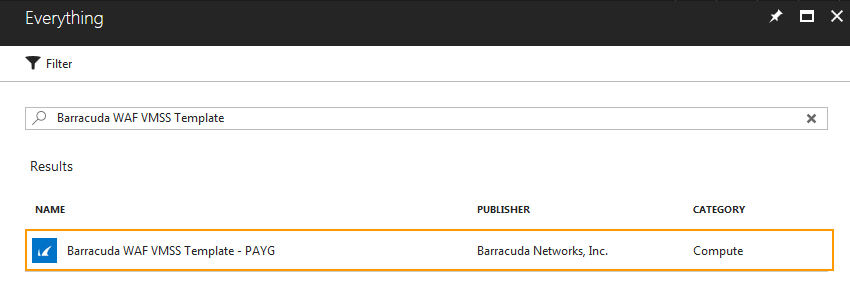
- In the Everything page, type Barracuda WAF VMSS Template in the Search text field.
- In the search results, select Barracuda WAF VMSS Template - PAYG.
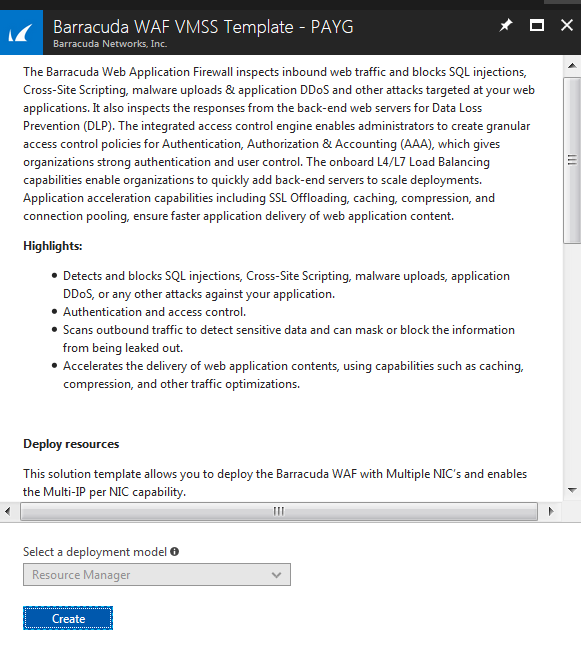
- In the Barracuda WAF VMSS Template - PAYG page:
- Read the product overview.
- Click Create.
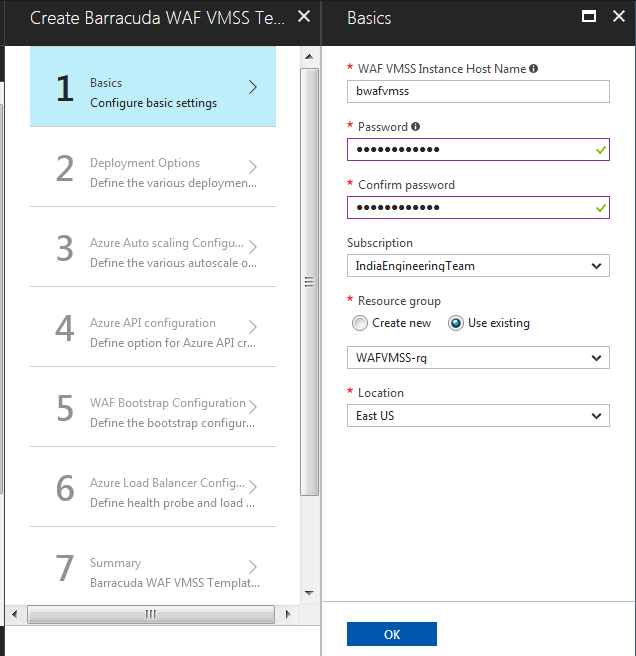
- In the Create Barracuda WAF VMSS Template - PAYG > 1 Basics page:
- Barracuda WAF VMSS Set Name: Enter a name for the Barracuda WAF VMSS.
- Password: Enter a password for authentication. This will be your password to access the Barracuda WAF web interface.
- Confirm Password: Re-enter the password for confirmation.
- Billing Method: Select Pay as You Go (Hourly Billing) form the drop-down list as your billing method.
- Firmware Version: From the drop-down list, select the firmware version on which your instance is deployed.
- Subscription: Select the subscription from the drop-down list.
- Resource group: Create a new resource group or select a resource group that is empty from the existing Resource group list.
- Location: Select a location for the Barracuda WAF VMSS.
- Click OK.
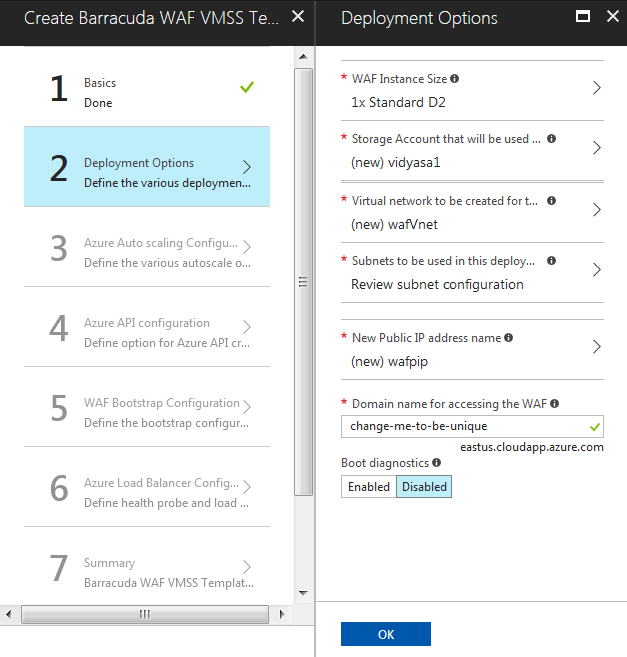
- In the Create Barracuda WAF VMSS Template - PAYG > 2 Deployment Options page:
- Barracuda WAF Instance Size: Select a size for the instance.
Storage Account: Create a new storage account or select a storage account from the existing Storage account list.
- Virtual network: Create a new virtual network, or select a virtual network from the existing Virtual network list in which you want to deploy the Barracuda WAF VMSS.
- Subnets: Review the subnet configuration and modify if required.
- New Public IP address name: Enter a name for the public IP address associated with the Barracuda WAF VMSS.
- Domain name for accessing the Barracuda WAF: Enter the domain for the Barracuda WAF VMSS.
- Boot diagnostics: When Enabled, the boot up debug logs gets saved in the specified storage account.
- Click OK.
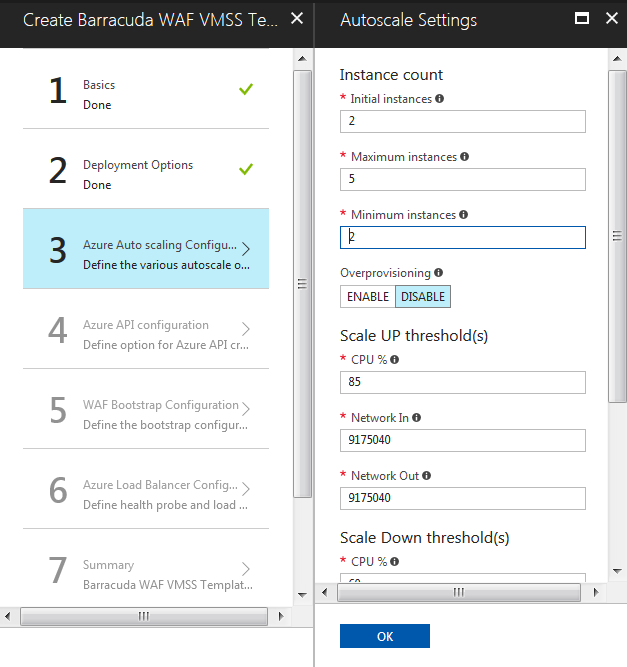
- In the Create Barracuda WAF VMSS Template - PAYG > 3 Azure Auto Scaling Configuration page:
- Instance Count
- Initial Instances: Enter the number of instances to be deployed initially to serve the traffic. Default: 2
- Maximum Instances: Enter the maximum number of instances to be scaled up to handle the traffic when required. Default: 5
Minimum Instances: Enter the minimum number of instances to be scaled down when the traffic less. Default: 2
Overprovisioning: When set to Enable, the VMSS spins up more number of virtual machines than what is required to handle the traffic.
- Scale Up Thresholds
- CPU%: Enter the scale up threshold for CPU utilization. Default: 85%
- Network In: Enter the scale up threshold for NetworkIn throughput. Default: 9175040
- Network Out: Enter the scale up threshold for NetworkOut throughput. Default: 9175040
- Scale Down Thresholds
- CPU%: Enter the scale down threshold for SPU utilization. Default: 60%
- Network In: Enter the scale down threshold for NetworkIn throughput. Default: 5242880
- Network Out: Enter the scale down threshold for NetworkOut throughput. Default: 5242880
- Notification Email ID(s) in CSV Format: Enter the email address to which the auto scaling event notification emails needs to be sent.
- Click OK.
- Instance Count
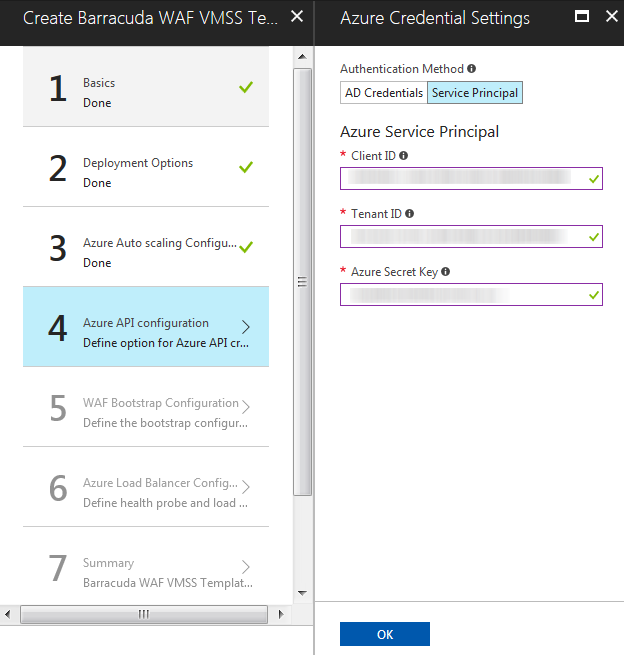
- In the Create Barracuda WAF VMSS Template - PAYG > 4 Azure API Configuration page:
- Authentication Method: Select the authentication method to authenticate to Azure Active Directory (AAD).
- Azure AD Credentials
- Azure User ID: Enter the user name to authenticate to the AAD.
- Azure User Password: Enter the password associated with user.
- Confirm Password: Re-enter the password to confirm.
- Azure Service Principal
- Client ID: Enter the ID of the application in AAD.
- Tenant ID: Enter the ID of the Active Directory tenant.
- Azure Secret Key: Enter the secret key generated.
- Click OK.
- Azure AD Credentials
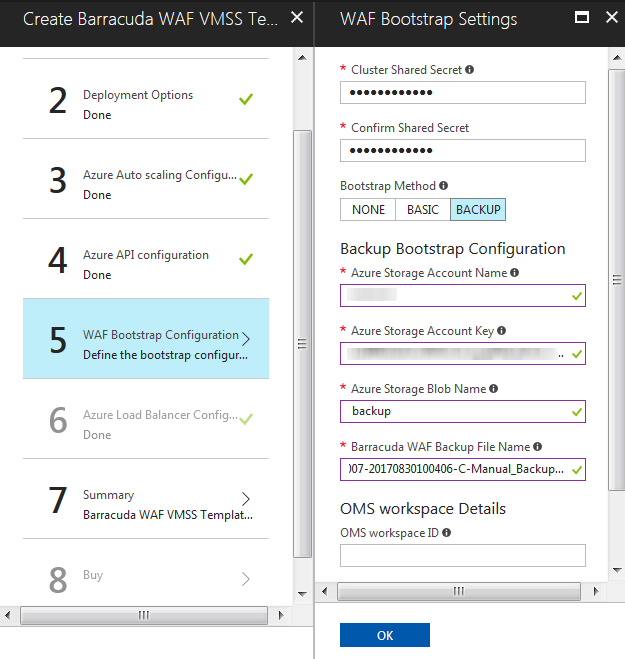
- In the Create Barracuda WAF VMSS Template - PAYG > 5 Barracuda WAF Bootstrap Settings page.
- Cluster Shared Secret: Enter a password to be used by the Barracuda WAF instances in the VMSS group.
- Confirm Shared Secret: Re-type the shared secret password.
- Bootstrap Method: Select the method (NONE, BASIC or BACKUP) for bootstrapping.
- Basic Bootstrap Configuration
- WAF Service Name: Enter a name for the service that needs to be created on the Barracuda WAF instances.
- WAF Service Port: Enter the port number on which the service is listening to.
- Backend Servers (IP:PORT): Enter the IP address of the server followed by the port that needs to be protected by the Barracuda WAF. Use comma (,) as a separator to specify multiple server IP addresses.
- Backup Bootstrap Configuration
- Azure Storage Account Name: Enter the name of the storage account.
- Azure Storage Account Key: Enter the key of the storage account.
- Azure Storage Blob Name: Enter the name of the blob configured in the storage account.
- Type of Backup File: Select the appropriate backup file from the drop-down list
- Barracuda WAF Backup File Name: Enter the name of the backup file that you want to use for bootstrapping the instances.
- OMS Workspace Details
- OMS Workspace ID: Enter the workspace ID of the OMS server (if any).
- OMS Workspace Primary Key: Enter the primary key of the OMS server.
- Click OK.
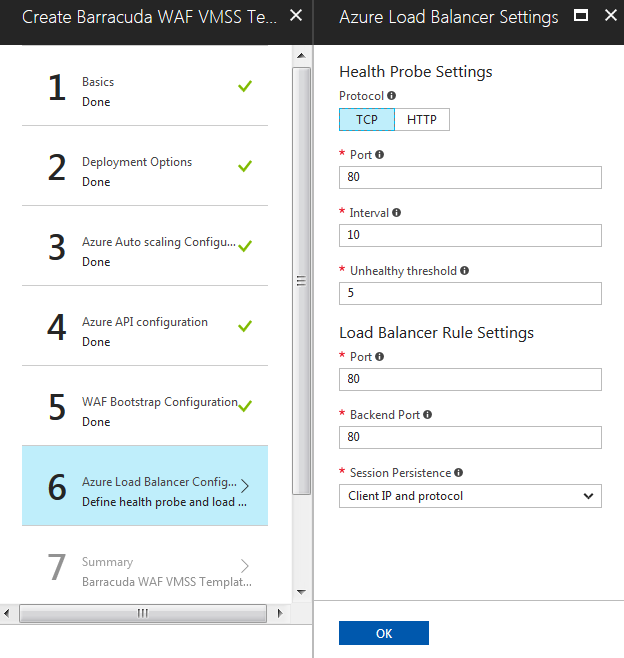
- In the Create Barracuda WAF VMSS Template - PAYG > 6 Azure Load Balancer Configuration page:
- Health Probe Settings
- Protocol: Select TCP or HTTP. It is recommended to use the TCP protocol.
- Port: Enter the port to be used when probing the instance.
- Interval: Enter the interval time to probe the instance.
- Unhealthy threshold: Enter how many attempts can fail before the backend instance is marked as unhealthy.
- Load Balancer Rule Settings
- Port: Enter the port on which the load balancer is listening.
- Backend Port: Enter the port on which the Barracuda WAF is listening.
- Session Persistence: Select the persistence type.
- EULA Acceptance Details
- User Name: Enter the username of the user signing the EULA agreement.
- Email ID: Enter the Email ID of the user signing the EULA agreement.
- Company Name: Enter the user's company name.
- Domain Name: Enter the domain name for the Barracuda WAF VMSS.
- Click OK.
- Health Probe Settings
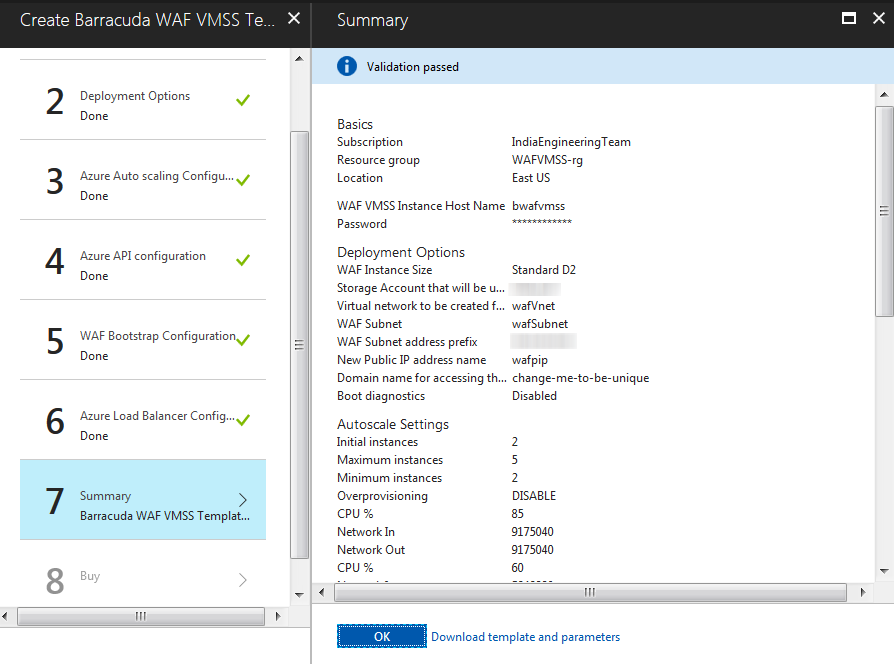
- In the Create Barracuda WAF VMSS Template - PAYG > 7 Summary page, verify the values you entered and click OK.
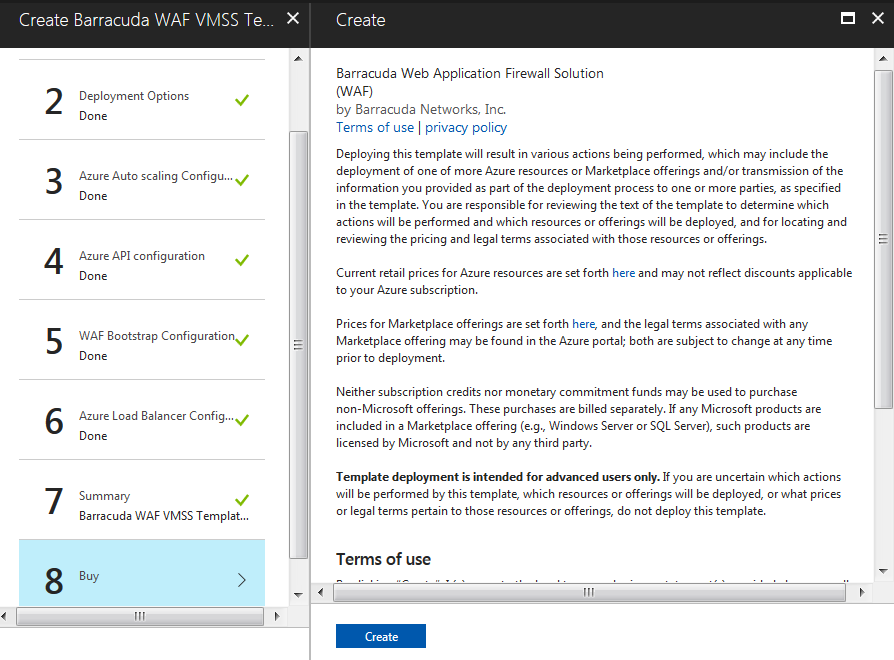
- In the Create Barracuda WAF VMSS Template - PAYG > 8 Buy page, read the Terms of use | privacy policy and click Create.
