Before deploying and provisioning the Barracuda Web Application Firewall in the Classic (old) Microsoft Azure Management portal, create a Microsoft Azure Virtual Network (Classic VNET) by following the steps below:
- Log into your Microsoft Azure Management Portal.
- In the left pane, click NETWORKS, and then click NEW at the bottom of the screen.
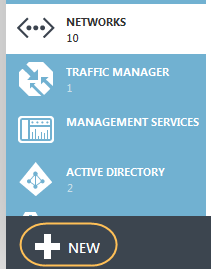
- Click NETWORK SERVICES > VIRTUAL NETWORK > CUSTOM CREATE. The CREATE A VIRTUAL NETWORK window appears.

- On the Virtual Network Details page:
- Enter a unique name in the Name field. For example, AzureVirtualNet
- Select a location from the LOCATION drop-down list. The virtual network can only be used for Azure instances in this geographic region. E.g., South Central US
- Click Next
 .
.
- Optional) On the DNS Servers and VPN Connectivity page, select or enter your DNS SERVERS.
- Click Next

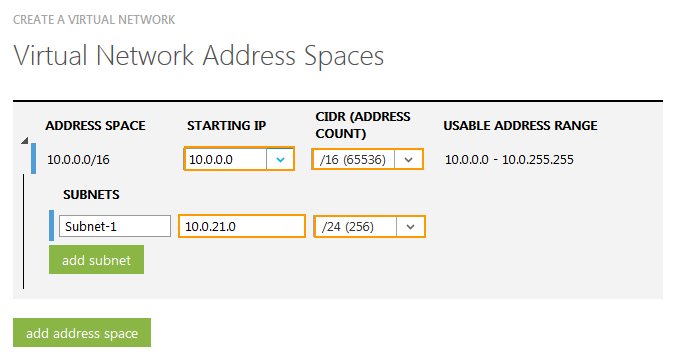
- On the Virtual Network Address Spaces page, configure the ADDRESS SPACE:
- STARTING IP: Enter the first IP address of the address space you want to use.
- CIDR: Select the subnet mask for the virtual network. The maximum number of instances for a virtual network is listed in parentheses.
- Add a SUBNET:
- STARTING IP: Enter the first IP address of the subnet.
- CIDR: Select the subnet mask for the subnet.
- Click Finish
 .
.
The created virtual network gets displayed in the VIRTUAL NETWORKS lists.
After creating the virtual network, perform the following steps to deploy and provision the Barracuda Web Application Firewall in the Classic Microsoft Azure Management portal:
- Log into the Microsoft Azure Management Portal.
- On the VIRTUAL MACHINES page, click NEW at the bottom of the screen.
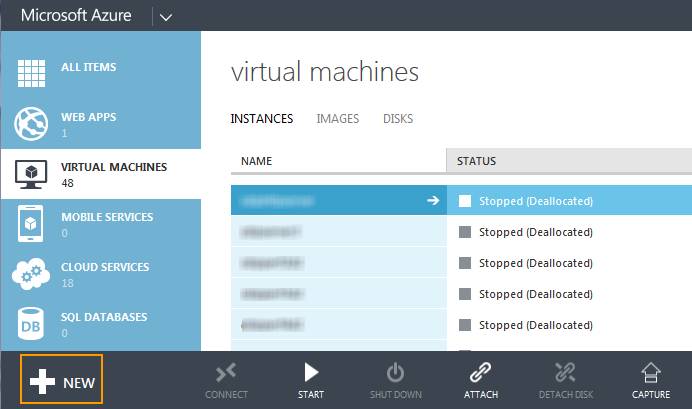
- In the NEW window, navigate to COMPUTE > VIRTUAL MACHINE > FROM GALLERY.

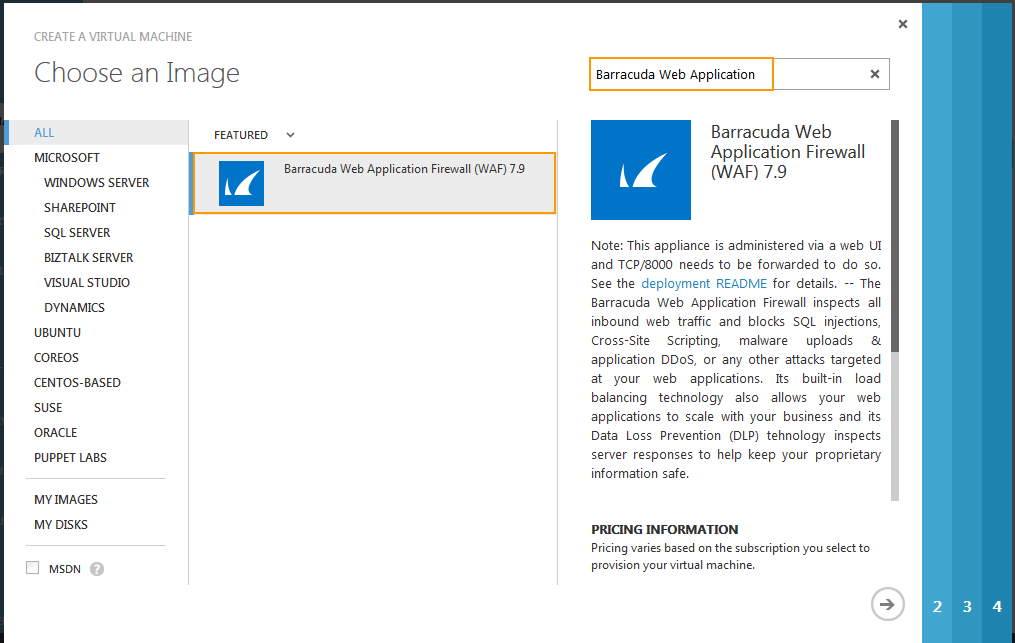
On the Choose an Image page, search for Barracuda Web Application Firewall for Azure image. Select the Barracuda Web Application Firewall for Azure image and click Next (->) to continue.
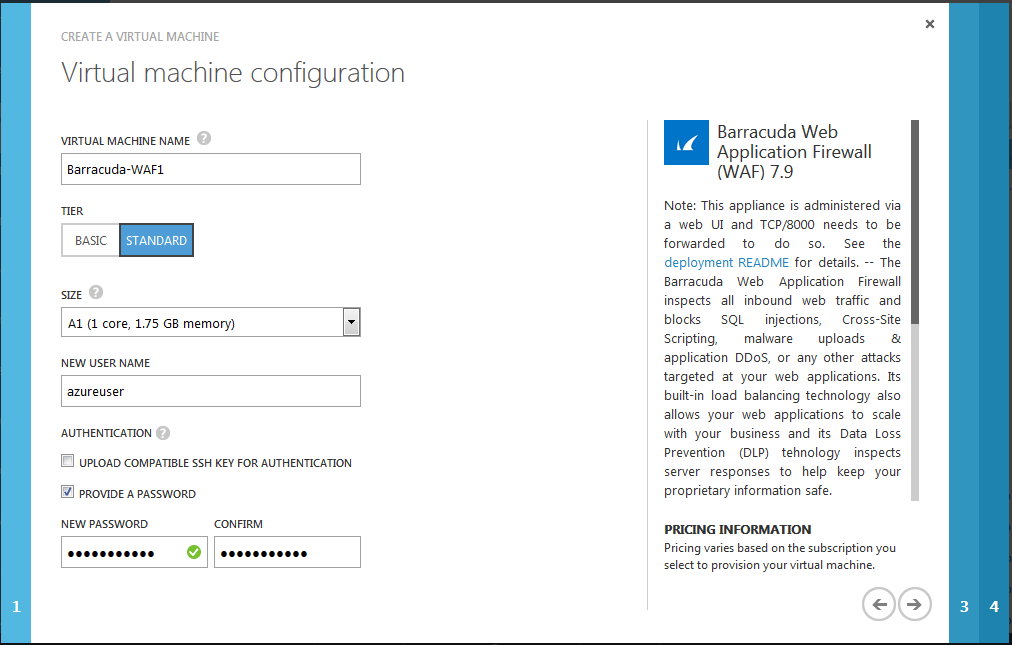
- On the Virtual machine configuration page:
- Enter a name in the VIRTUAL MACHINE NAME field.
- Select the TIER (BASIC or STANDARD).
- Select a size for the virtual machine from the SIZE list based on the Barracuda Web Application Firewall license.
- In the NEW USER NAME field, enter a username. This entry is not used by the Barracuda Web Application Firewall.
- Clear the UPLOAD COMPATIBLE SSH KEY FOR AUTHENTICATION check box.
- Select the PROVIDE A PASSWORD check box and enter a password in NEW PASSWORD. Re-enter the password in CONFIRM and click Next (->). Note that this will be your password to access the Barracuda Web Application Firewall web interface.
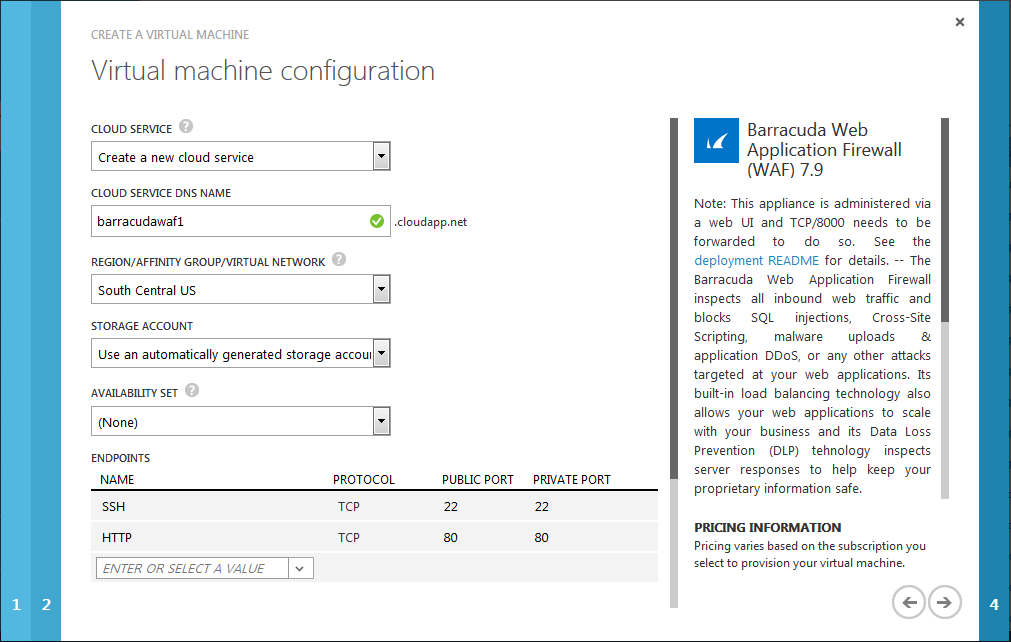
- On the second page of Virtual machine configuration:
- Select Create a new cloud service from the CLOUD SERVICE list.
- Enter a name in the CLOUD SERVICE DNS NAME field.
- Select a region from the REGION/AFFINITY GROUP/VIRTUAL NETWORK list.
- Select a subnet from the VIRTUAL NETWORK SUBNETS list.
- Select None for AVAILABILITY SET.
- Configure the ENDPOINTS to access the web interface of the Barracuda Web Application Firewall. By default, the Barracuda Web Application Firewall web interface listens on port 8000 for HTTP and port 8443 for HTTPS. Make sure these ports (8000 and 8443) are configured as ENDPOINTS on the Barracuda Web Application Firewall. Specify values for the following fields to configure the endpoints.
- NAME: a name of your choice.
- PROTOCOL: TCP
- PUBLIC PORT: 8000
- PRIVATE PORT: 8000
- Follow the same steps to open other ports.
- Click Next (->) to continue.
- Read the legal terms and product description in the next page, and click the check mark (√) to complete the deployment.
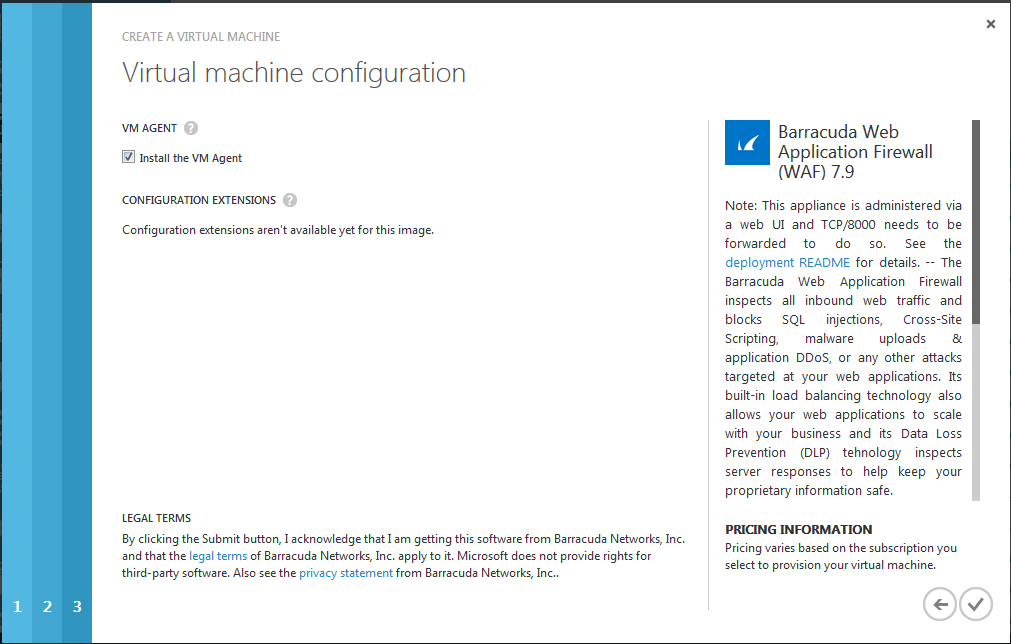
After clicking on (√), Microsoft Azure begins provisioning the Barracuda Web Application Firewall. You can check the status of the provisioned Barracuda Web Application Firewall from the Microsoft Azure Management Portal under VIRTUAL MACHINES. You will see Starting (Provisioning) in the beginning on the Microsoft Azure Management Portal. Allow a few minutes before taking any further actions in the Portal. During this time, the Microsoft Azure Linux Agent and Barracuda Web Application Firewall image boot up.
Make sure you do not restart the Barracuda Web Application Firewall while it is provisioning.
Next Step
Continue with the Barracuda Web Application Firewall Quick Start Guide - Microsoft Azure for licensing and initial configuration of your virtual machine.
