

Follow these steps to configure Barracuda WAF-as-a-Service to protect your web applications. For an overview of the traffic flow you will have created through this process, refer to Understanding Traffic Flow with Barracuda WAF-as-a-Service.
A. Configure Barracuda WAF-as-a-Service
To configure your application:
Navigate to https://waas.barracudanetworks.com/ and log in with your Barracuda account credentials.
If you do not already have a Barracuda account, click Free 30-Day Trial to sign up for a trial of WAF-as-a-Service.Select Applications in the left panel, and click Add new.
Websites:
Enter a name for the application you want to protect.
Select an app group to which you want the application to be associated with.
Enter all possible DNS domains your users will use to access this service, including different forms, like
www.example.comandexample.com. Click Continue .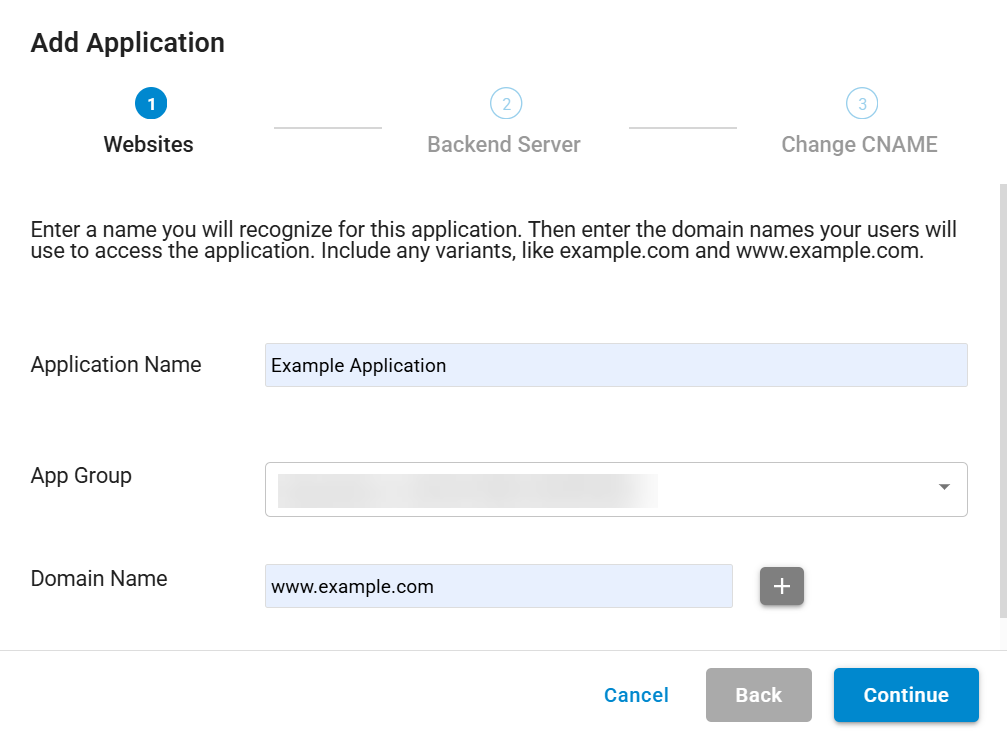
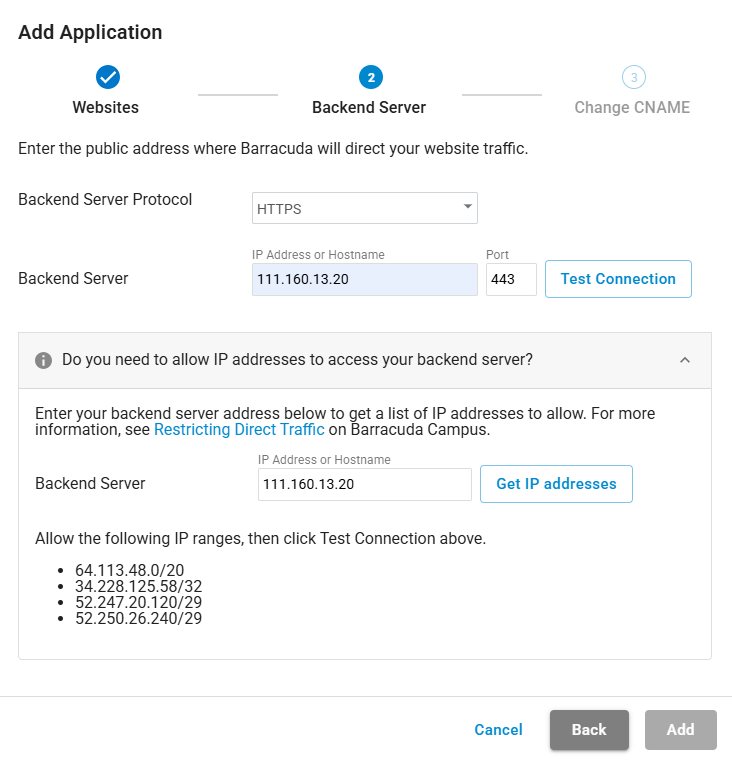
Backend Server:
Backend Server Protocol - Specify the protocol for the backend server – HTTP or HTTPS.
Backend Server - Specify the public IP address or Hostname and port that resolves to the public IP address. This is typically the current IP Address or hostname associated with the DNS domains you entered in step 1.
Click Test Connection to ensure that Barracuda WAF-as-a-Service can connect to the backend server. When you have successfully tested the connection, click Continue .
If you cannot reach the backend server: You have the option to continue with the setup without fixing the connection at that time. Read the message, then click Continue anyway , then click Add . You must still fix the connection issue before your application can work. Refer to Backend IP Address Errors for troubleshooting information.
Allowing the IP address to access your backend server : If you protect your backend server with a firewall, expand the lower section of this window, as shown below. Specify the IP address for your backend server to make it accessible.
To view a list of Barracuda WAF-as-a-Service IP addresses to add to your firewall allow list:Enter the IP address or hostname for your backend server, then click Get IP Addresses .
A message appears with IP addresses you need to allow.Allow the IP addresses on your backend server.
Click Test Connection .
Change CNAME: Copy the CNAME domain provided so you can update your DNS records through your hosting provider. The CNAME is structured as
app######.prod.cudawaas.com. After copying the information, click Close.
You must configure CNAMEs for all of the domains you entered in Step 1 for your application configuration to be marked as configured.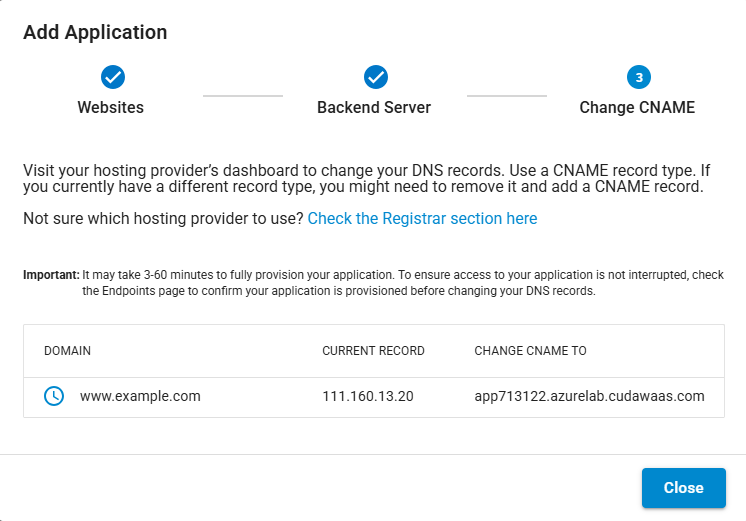
B. Add CNAME Records
Go to your domain provider’s DNS management portal to add the CNAME record you created in the previous step. Adding the CNAME record will redirect all of your web application traffic to Barracuda WAF-as-a-Service. If you already have a CNAME record for your domain, edit the existing record. If you already have an A record for your domain, delete the A record first, then create the CNAME record.
Reach out to your domain provider directly with any questions.
After you complete the standard steps above, you will have HTTP redirect service on port 80 and HTTPS service with automatic certificate on port 443. Note that certificates can only be generated successfully after you have updated the DNS to point to all available domains and the endpoint is marked as configured.
Note that your application starts in monitoring mode. For more information, refer to Understanding Monitor and Block Modes.
C. Restrict Direct Traffic
Barracuda WAF-as-a-Service automatically assigns regions for your application. If you want to change a region, follow the instructions in Restricting Direct Traffic. Note that when you change a region, you must allow a new list of IPs in your firewall.
D. Subscribe to Receive Notifications
It is important that you be informed of incidents or scheduled maintenance that might affect your deployment of Barracuda WAF-as-a-Service. You can sign up to receive notifications automatically.
To sign up for notifications:
Navigate to the Barracuda Status Page – https://barracuda.statuspage.io/#
Click Subscribe to Updates.
Add your information for your preferred contact method, then click Subscribe via...