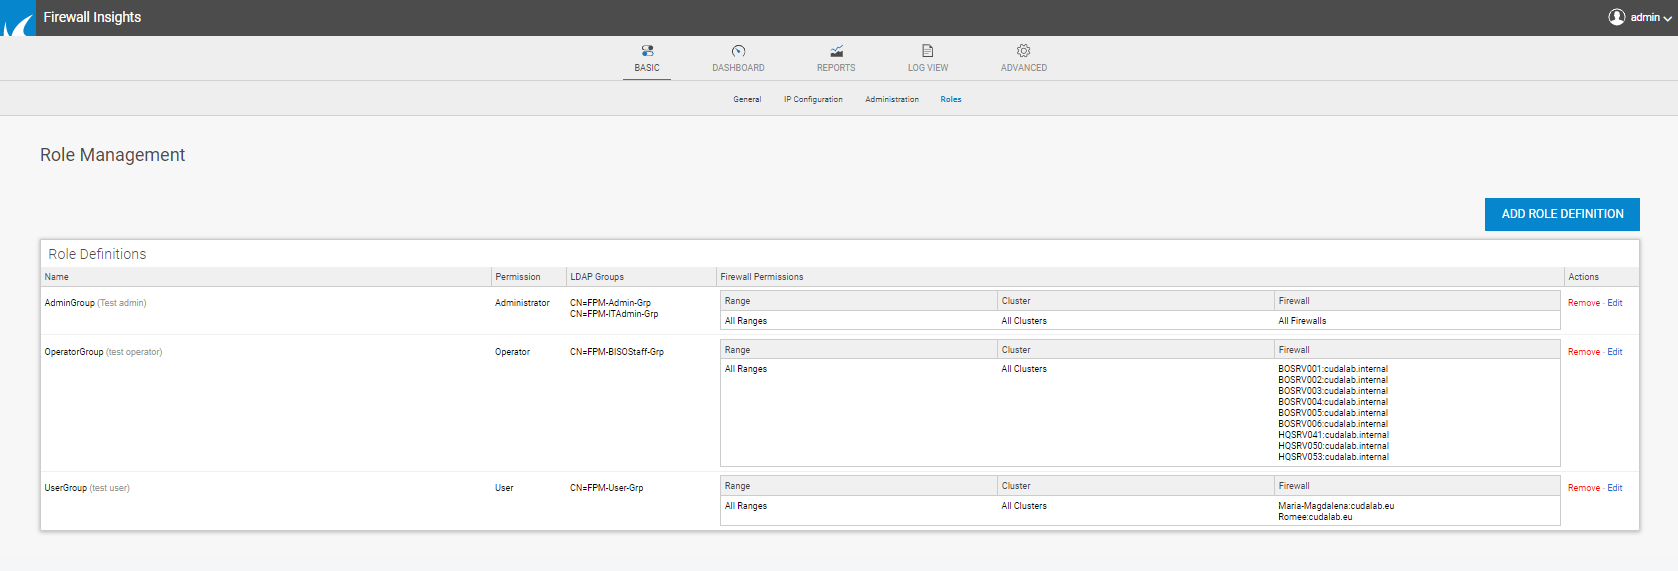
The BASIC > Roles tab allows administrators to configure role-based access to selected ranges, clusters, and firewalls for different user groups. For role-based administration to work, LDAP login must be activated, and the settings configured. If an LDAP certificate is provided, LDAPS is used. A role consists of a freely selectable name, a description, an authorization level, LDAP groups, and permitted firewalls. Any number of roles can be created for each authorization level (they can differ in the LDAP groups or the permitted firewalls).
Role Permissions
The authorization level (permission) decides which menu items or pages the role should have read (R) and / or write (W) access to on Firewall Insights. Role permissions are defined as follows:
| Permission | Basic | Dashboard | Reports | Log | Advanced | |||||||||||
|---|---|---|---|---|---|---|---|---|---|---|---|---|---|---|---|---|
| General | IP Config | Administration | SDWAN Summary | SDWAN Tunnels | Security & Web | Network Traffic | Reports | Custom | Backup | EU | Firmware | External Servers | Troubleshooting | Support | ||
| Administrator | RW | RW | RW | RW | RW | RW | RW | RW | RW | RW** | RW | RW | RW | RW | RW | RW |
| Operator | RW | RW | RW | RW | RW | RW | RW | RW** | ||||||||
| User | R | R | R | R | R | RX* | RX* | RW** | ||||||||
Configure Role-Based Access
Before You Begin
Activate and configure LDAP.
- Go to Basic > Administration.
- Configure the LDAP Settings. For more information, see Administration.
Step 1. Create a Role
Any number of roles can be created for each authorization level. To create a role:
- Go to BASIC > Roles.
- In the Role Management section, click ADD ROLE DEFINITION.
- Enter a Name for the role.
- Add an optional Description.
- Select the Permission you wish to assign to the role. You can select Administrator, Operator, or User.
- Add the LDAP Groups that should receive the specified permission. E.g.:
cn = AdminGroup, ou = groups, dc = example, dc = com, orcn = AdminGroup. Use one line per entry.
Step 2. Add Firewall Permissions
Select the firewall units the group members assigned to the role should have access to.
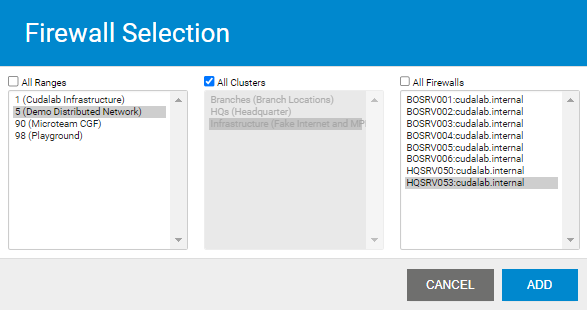
- Click Add Selection. The Firewall Selection window opens.
- Chose the firewall units the the role should have access to.
You can filter and select the units by range and cluster, or restrict just to desired firewalls. Only these permitted firewalls can then be selected for graphs and reports.
- Click ADD.
- Click Save Changes.
The role now appears in the Role Management list where you can edit or delete it.

Users can now access Firewall Insights and manage firewalls according to the role permissions assigned to their LDAP group. When logging in, the LDAP server checks whether the username and password are OK. If so, the LDAP groups are read out and a check is made to see whether the user's group is available in a role. If yes, login is allowed; if no, no login is possible.
