

Note: Only one System State backup set may exist on a computer.
To create a System State backup, perform the following steps.
Navigate to the Computer page. See Navigating to the Computer Page for instructions.
The Computer page is displayed.
Click the Backup tab.
The Backup Selections page is displayed.
Note: The System State backup type is available only for agents of version 5.5.4 or above that have a supported operating system (Windows Server) and the Windows Server Backup feature enabled.
In the Backup Type pane, click System State.
The Select page is displayed.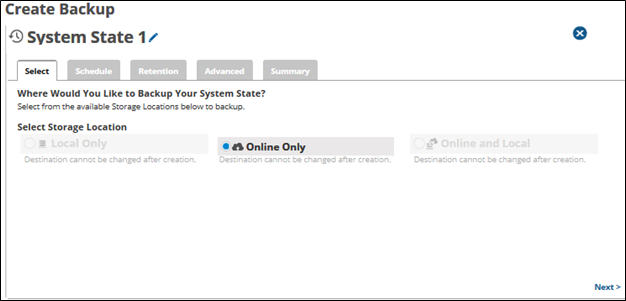
Click the Backup Name to provide a new name for the backup set or accept the default. See Changing Backup Set Names.
At the Select Storage Location section, click one of the following radio button options.
Note: This procedure applies to all options. See Backup Options for more information.Local Only (Local Vault must be enabled, and a local subscription is required. Data is not backed up to the cloud.)
Online Only (An enabled Local Vault disables this option.)
Online and Local (Local Vault must be enabled.)
Click Next.
The Schedule page is displayed.
Accept or edit the default schedule. See Adding a New Daily or Weekly Schedule for more information.
Notes:Multiple daily/weekly schedules are permitted (if they do not overlap).
The Allow to Finish check box is always selected and grayed-out.
The default is every week on Sunday at 11:00 p.m. The backup is allowed to finish before starting the next schedule occurrence.
After setting the schedule, click Next.
The Retention page is displayed.
Select the number of versions you wish to archive.
Note: The default retention is kept 4 weeks and no fewer than 4 versions.Optionally, select the Enable Advanced Archiving check box. For Advanced Archiving information, see Archiving Rules.
The Advanced Archiving fields are displayed.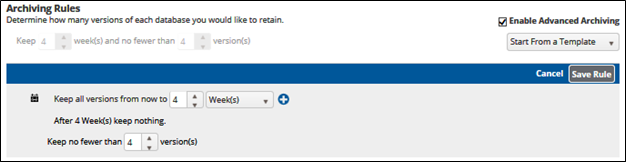
Make your selections, click Save Rule, and then click Next.
The Advanced page is displayed.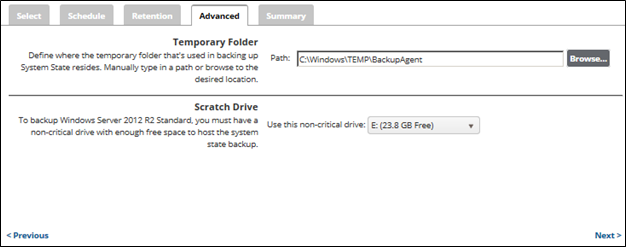
Requirement: You must specify a temporary folder and a scratch drive located on a disk with enough space.
At the Temporary Folder field, accept the default, type a new path, type a new path, or click the Browse button to locate the temporary folder that is used in backing up. See Browsing to a Folder.
Note: To back up Windows Server 2012 R2 Standard and Windows Server 2008 and above, you must have a non-critical drive with enough free space to host the system state backup.At the Scratch Drive section, click the down-arrow to display non-critical drives, select a non-critical drive with enough free space to host the system state backup, and then click Next.
The Summary page is displayed.
At the Summary page, verify your backup selections, and then click Create Backup Set.
The Backup Selections page is displayed with current backup status.