

You must configure LDAP or Microsoft Entra ID for group expansion and user attributes in the Barracuda Cloud Archiving Service.
Use AD authentication to store and administer Barracuda Cloud Archiving Service user accounts via your organization's LDAP or Microsoft Entra ID.
When you first set up the Barracuda Cloud Archiving Service, a warning notice displays across the top of the web interface notifying you that you must configure AD through Barracuda Cloud Control and enable groups. Before you continue, you are required to either set up AD and wait for a sync to complete, or select to proceed without AD. Barracuda Networks strongly recommends setting up local AD.
Create a Barracuda Cloud Control Directory
Log into https://login.barracudanetworks.com/ as the account administrator, and go to Home > Admin > Directories.
Click the Add Directory button.

Select one of the following sections to add a new LDAP or Microsoft Entra ID.
Add a New LDAP Active Directory
Select LDAP Active Directory.
On the INFO tab, specify a new Directory Name.
Activate the Authentication option to have users authenticate using their LDAP credentials. If you disable this option, users authenticate with Barracuda Cloud Control.
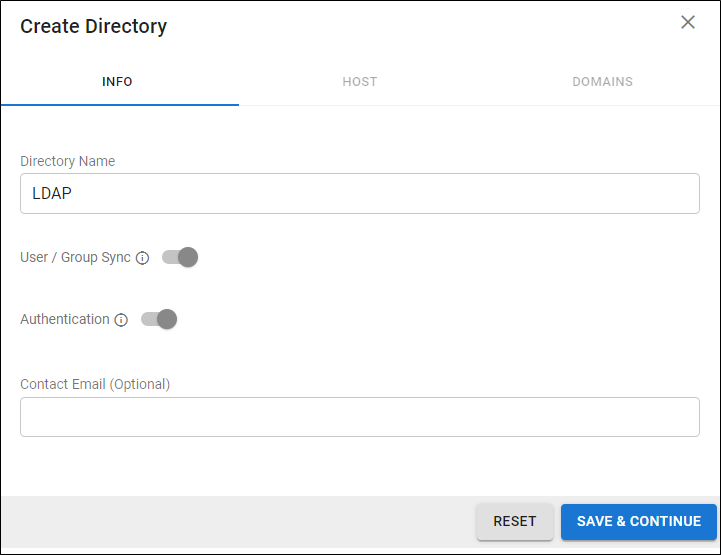
Click SAVE AND CONTINUE.
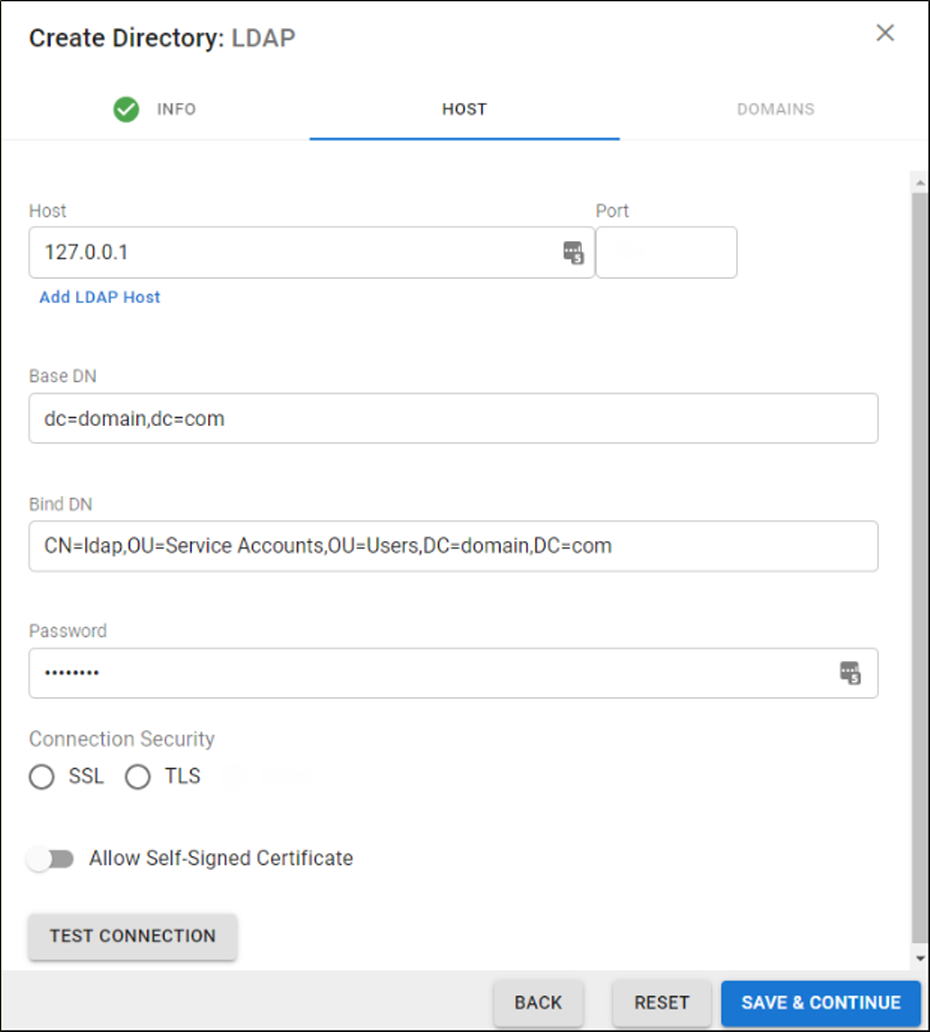
On the HOST tab, specify the following for the LDAP host:
LDAP Host IP address
Base Domain Name (DN) – Any user or group that exists with the search base that will sync to Barracuda Networks. For example,
DC=domain,DC=com.Bind DN – Enter the bind domain name for a service account with read permissions to the active directory.
Password – Password associated with the service account.
Connection Security – Select SSL or TLS. For more information, see New Requirements for LDAP Authentication.
(Optional) To add additional servers, click Add LDAP Host.
If your LDAP server uses a self-signed certificate, toggle on the Allow Self-Signed Certificate setting.
Click TEST CONNECTION to check connectivity to the host. If the connection fails, verify your settings are correct and that you have allowed the Barracuda Networks IP in your firewall. Contact Barracuda Networks Technical Support for additional troubleshooting.
If the connection succeeds, it displays as Connected. Click SAVE AND CONTINUE.
On the DOMAINS tab, add the domains associated with your users.
For each domain that you add, click Verify and following the instructions to verify the domain.
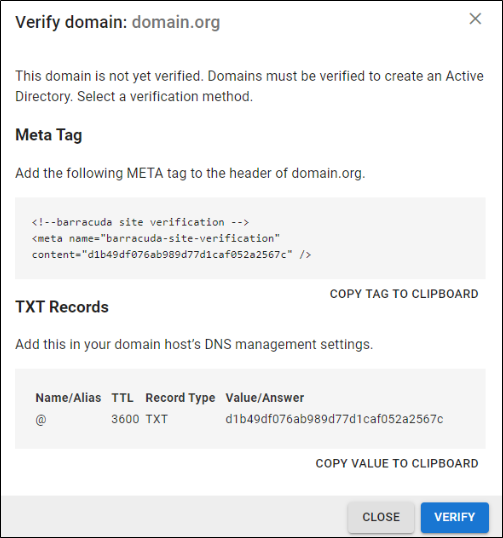
After each domain is verified, you can sync your users and groups to the Barracuda Cloud Control.
Add a New Microsoft Entra ID
Select Microsoft Entra ID.
On the INFO tab, specify a new Directory Name. For example, "Office 365".
Click CONNECT TO MICROSOFT to sign into Microsoft and authorize Barracuda Cloud Control to connect to your Microsoft Entra ID.
Log in with your Microsoft 365 administrator credentials.
Accept the credentials for the application request.
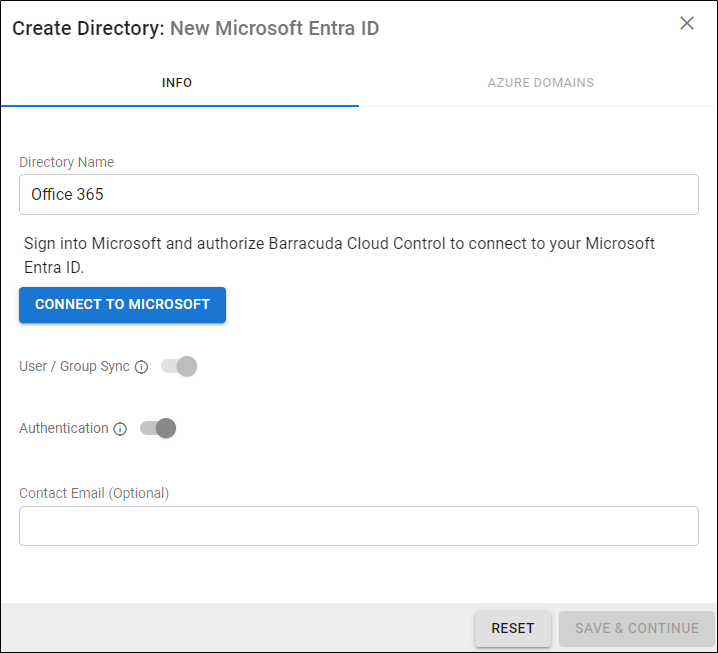
Activate the Authentication option to have users authenticate using their Microsoft Entra ID credentials. If you disable this option, users authenticate with Barracuda Cloud Control.
After you are redirected back to the Barracuda Cloud Control, click Save.
For end-user authentication, refer to How to Set Up Active Directory Groups for End-User Authentication.
Continue with Step 3 - Launch the Initial Setup Wizard.